
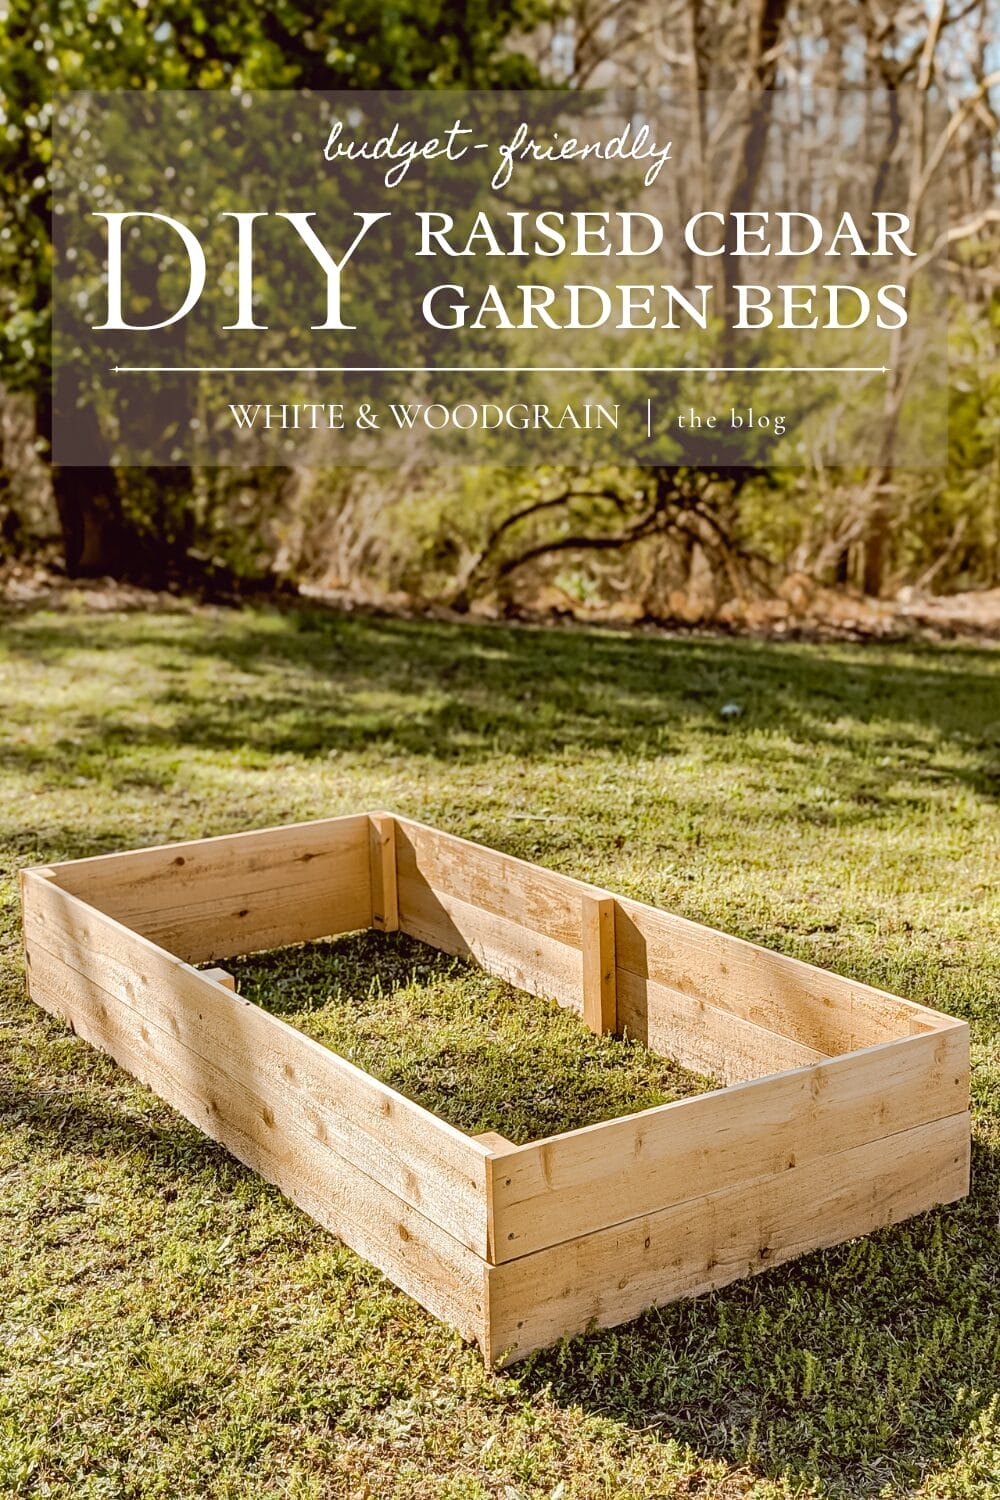
How We Built Our DIY Cedar Raised Garden Beds for Under $30
This post may contain affiliate links. For more information, you can read my full disclaimer here.
If you’ve been dreaming of making your own DIY cedar raised garden beds for your garden space, but thought they would be too expensive to build… I’m so glad you found my post!
I thought raised cedar beds would be out of our budget too! But after a little research and planning, I found a very budget-friendly way to get these DIY planter boxes done for a fraction of the cost.
And in today’s post, I’m gonna show you how we did it!
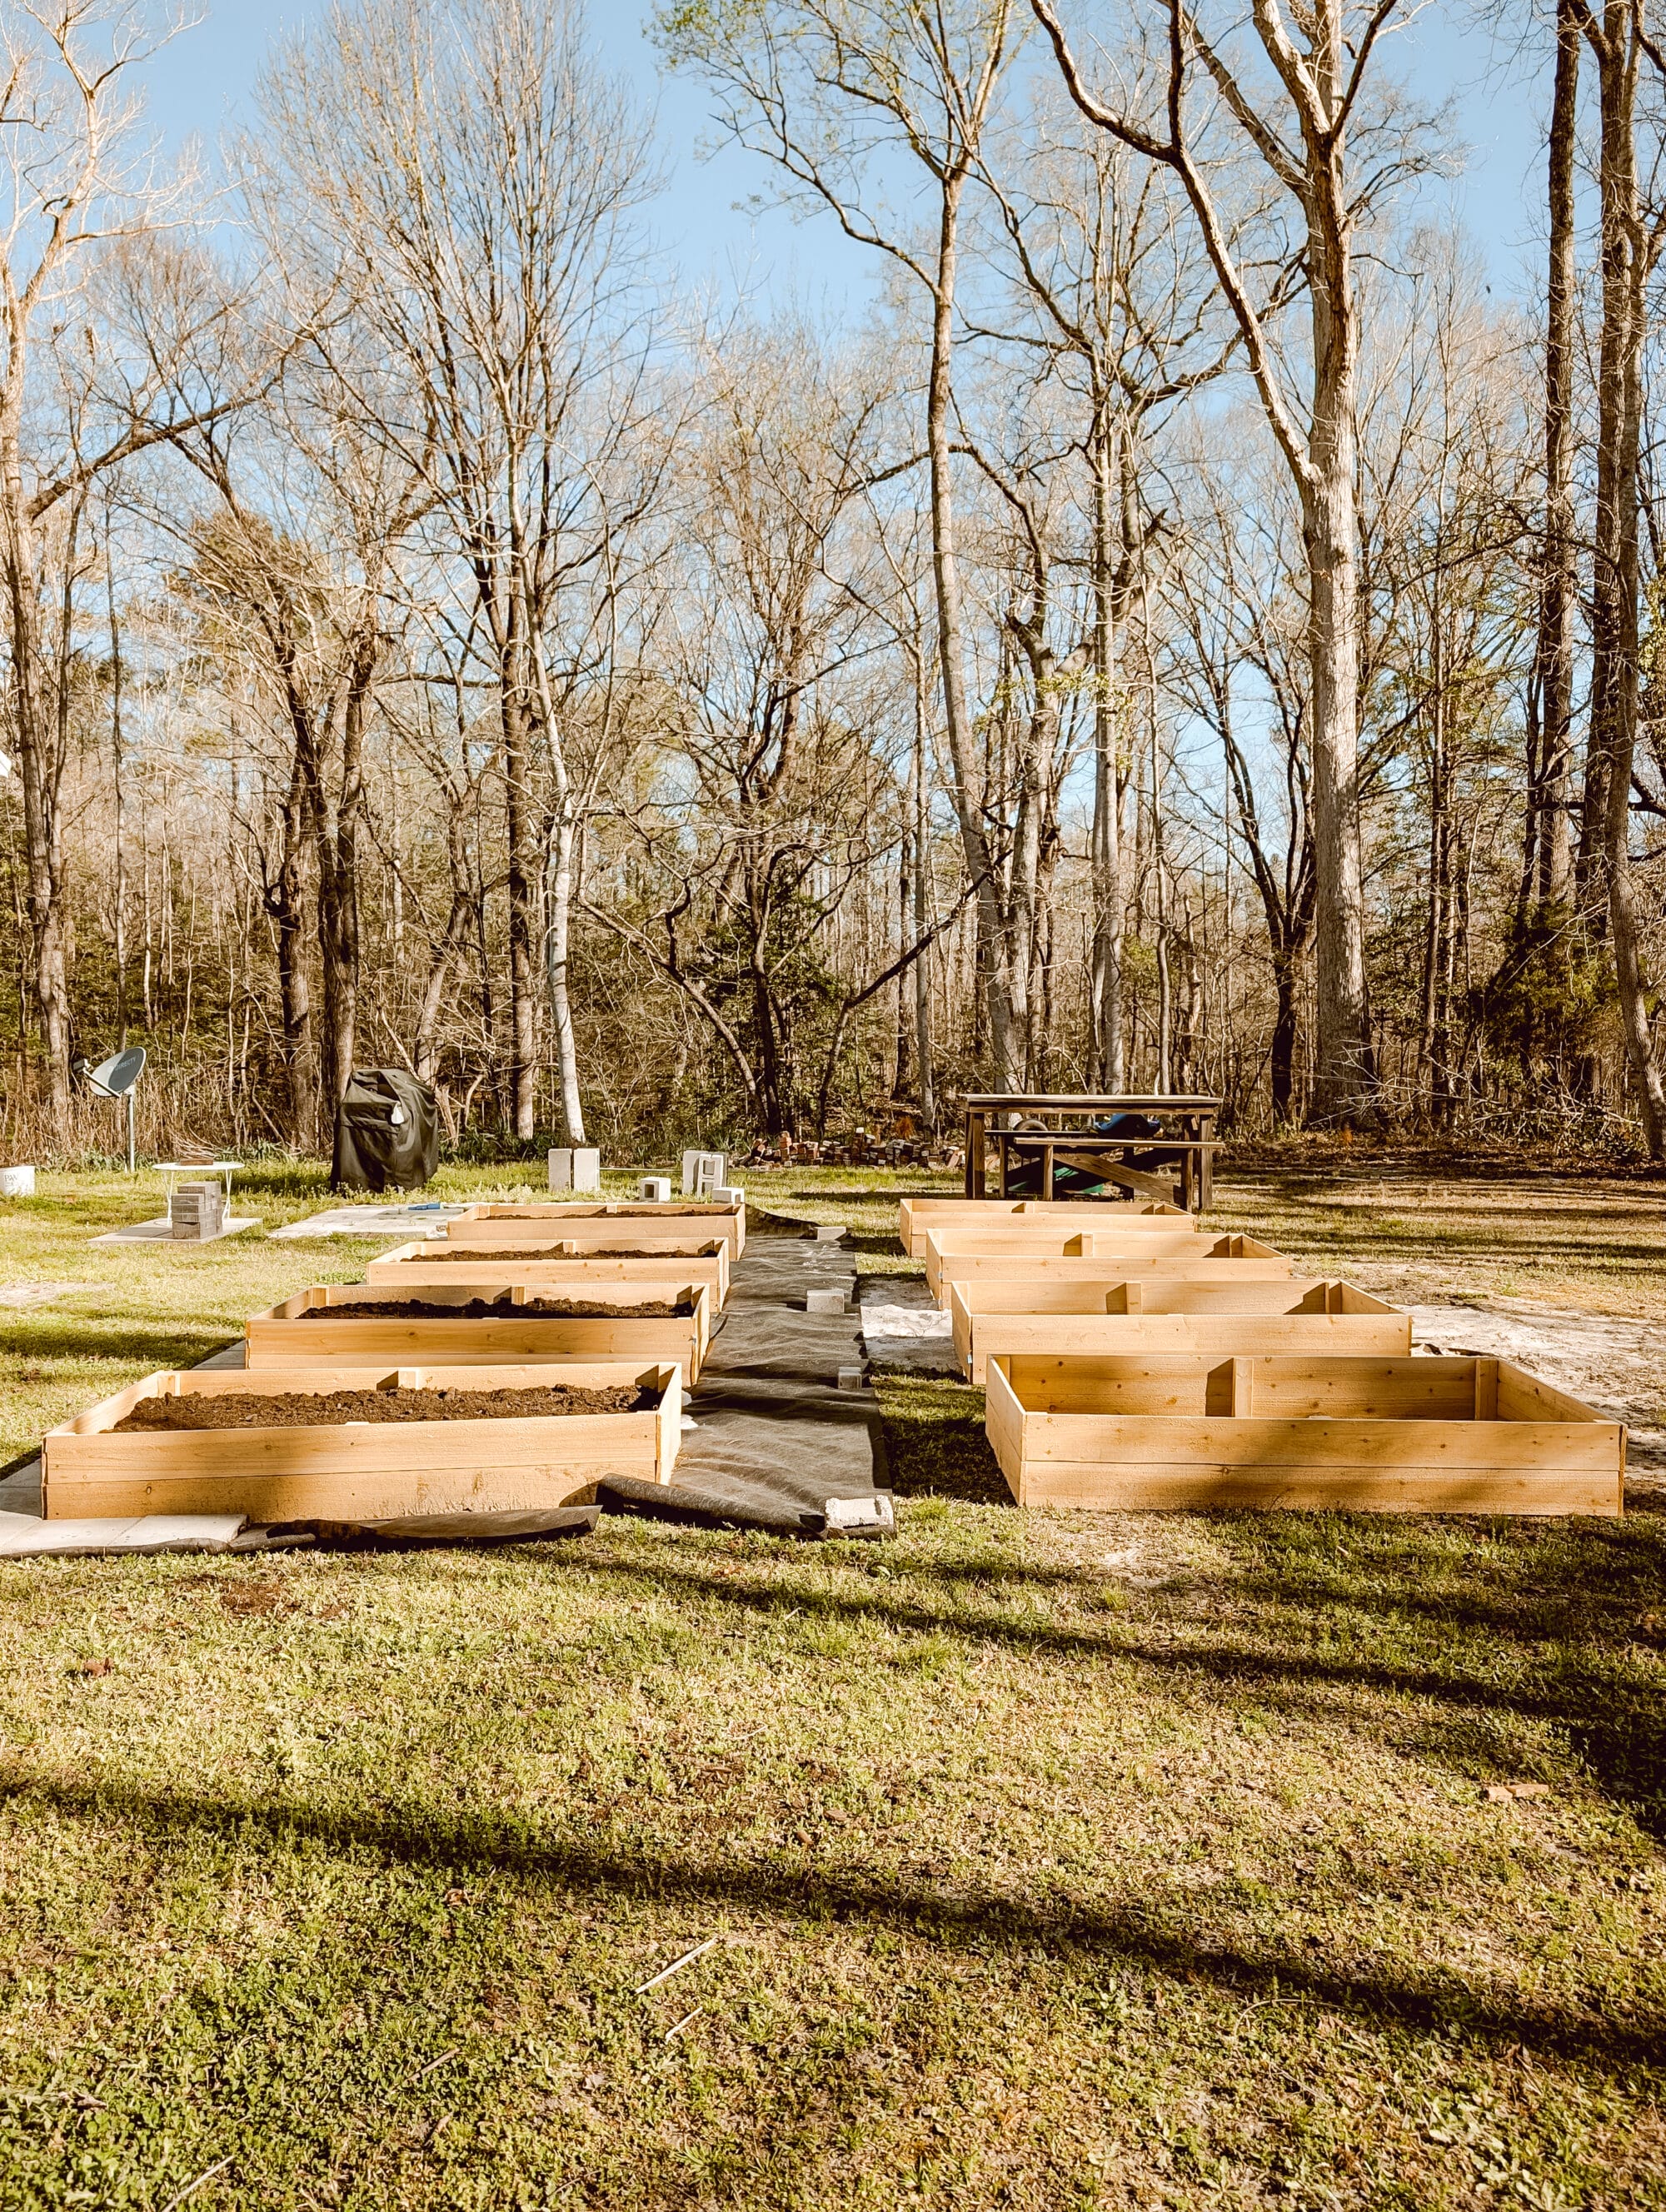
We, and by we I mean my husband Jake, built 8 raised garden beds out of cedar wood for right around $220. When you do the math, that comes out to about $27.50 / bed. So just under $30 each!
Obviously lumber prices can vary widely. But even taking that into consideration, under $30 for a raised cedar garden bed is unheard of! This is by far the most budget friendly way I’ve ever seen to build raised garden beds out of cedar wood.
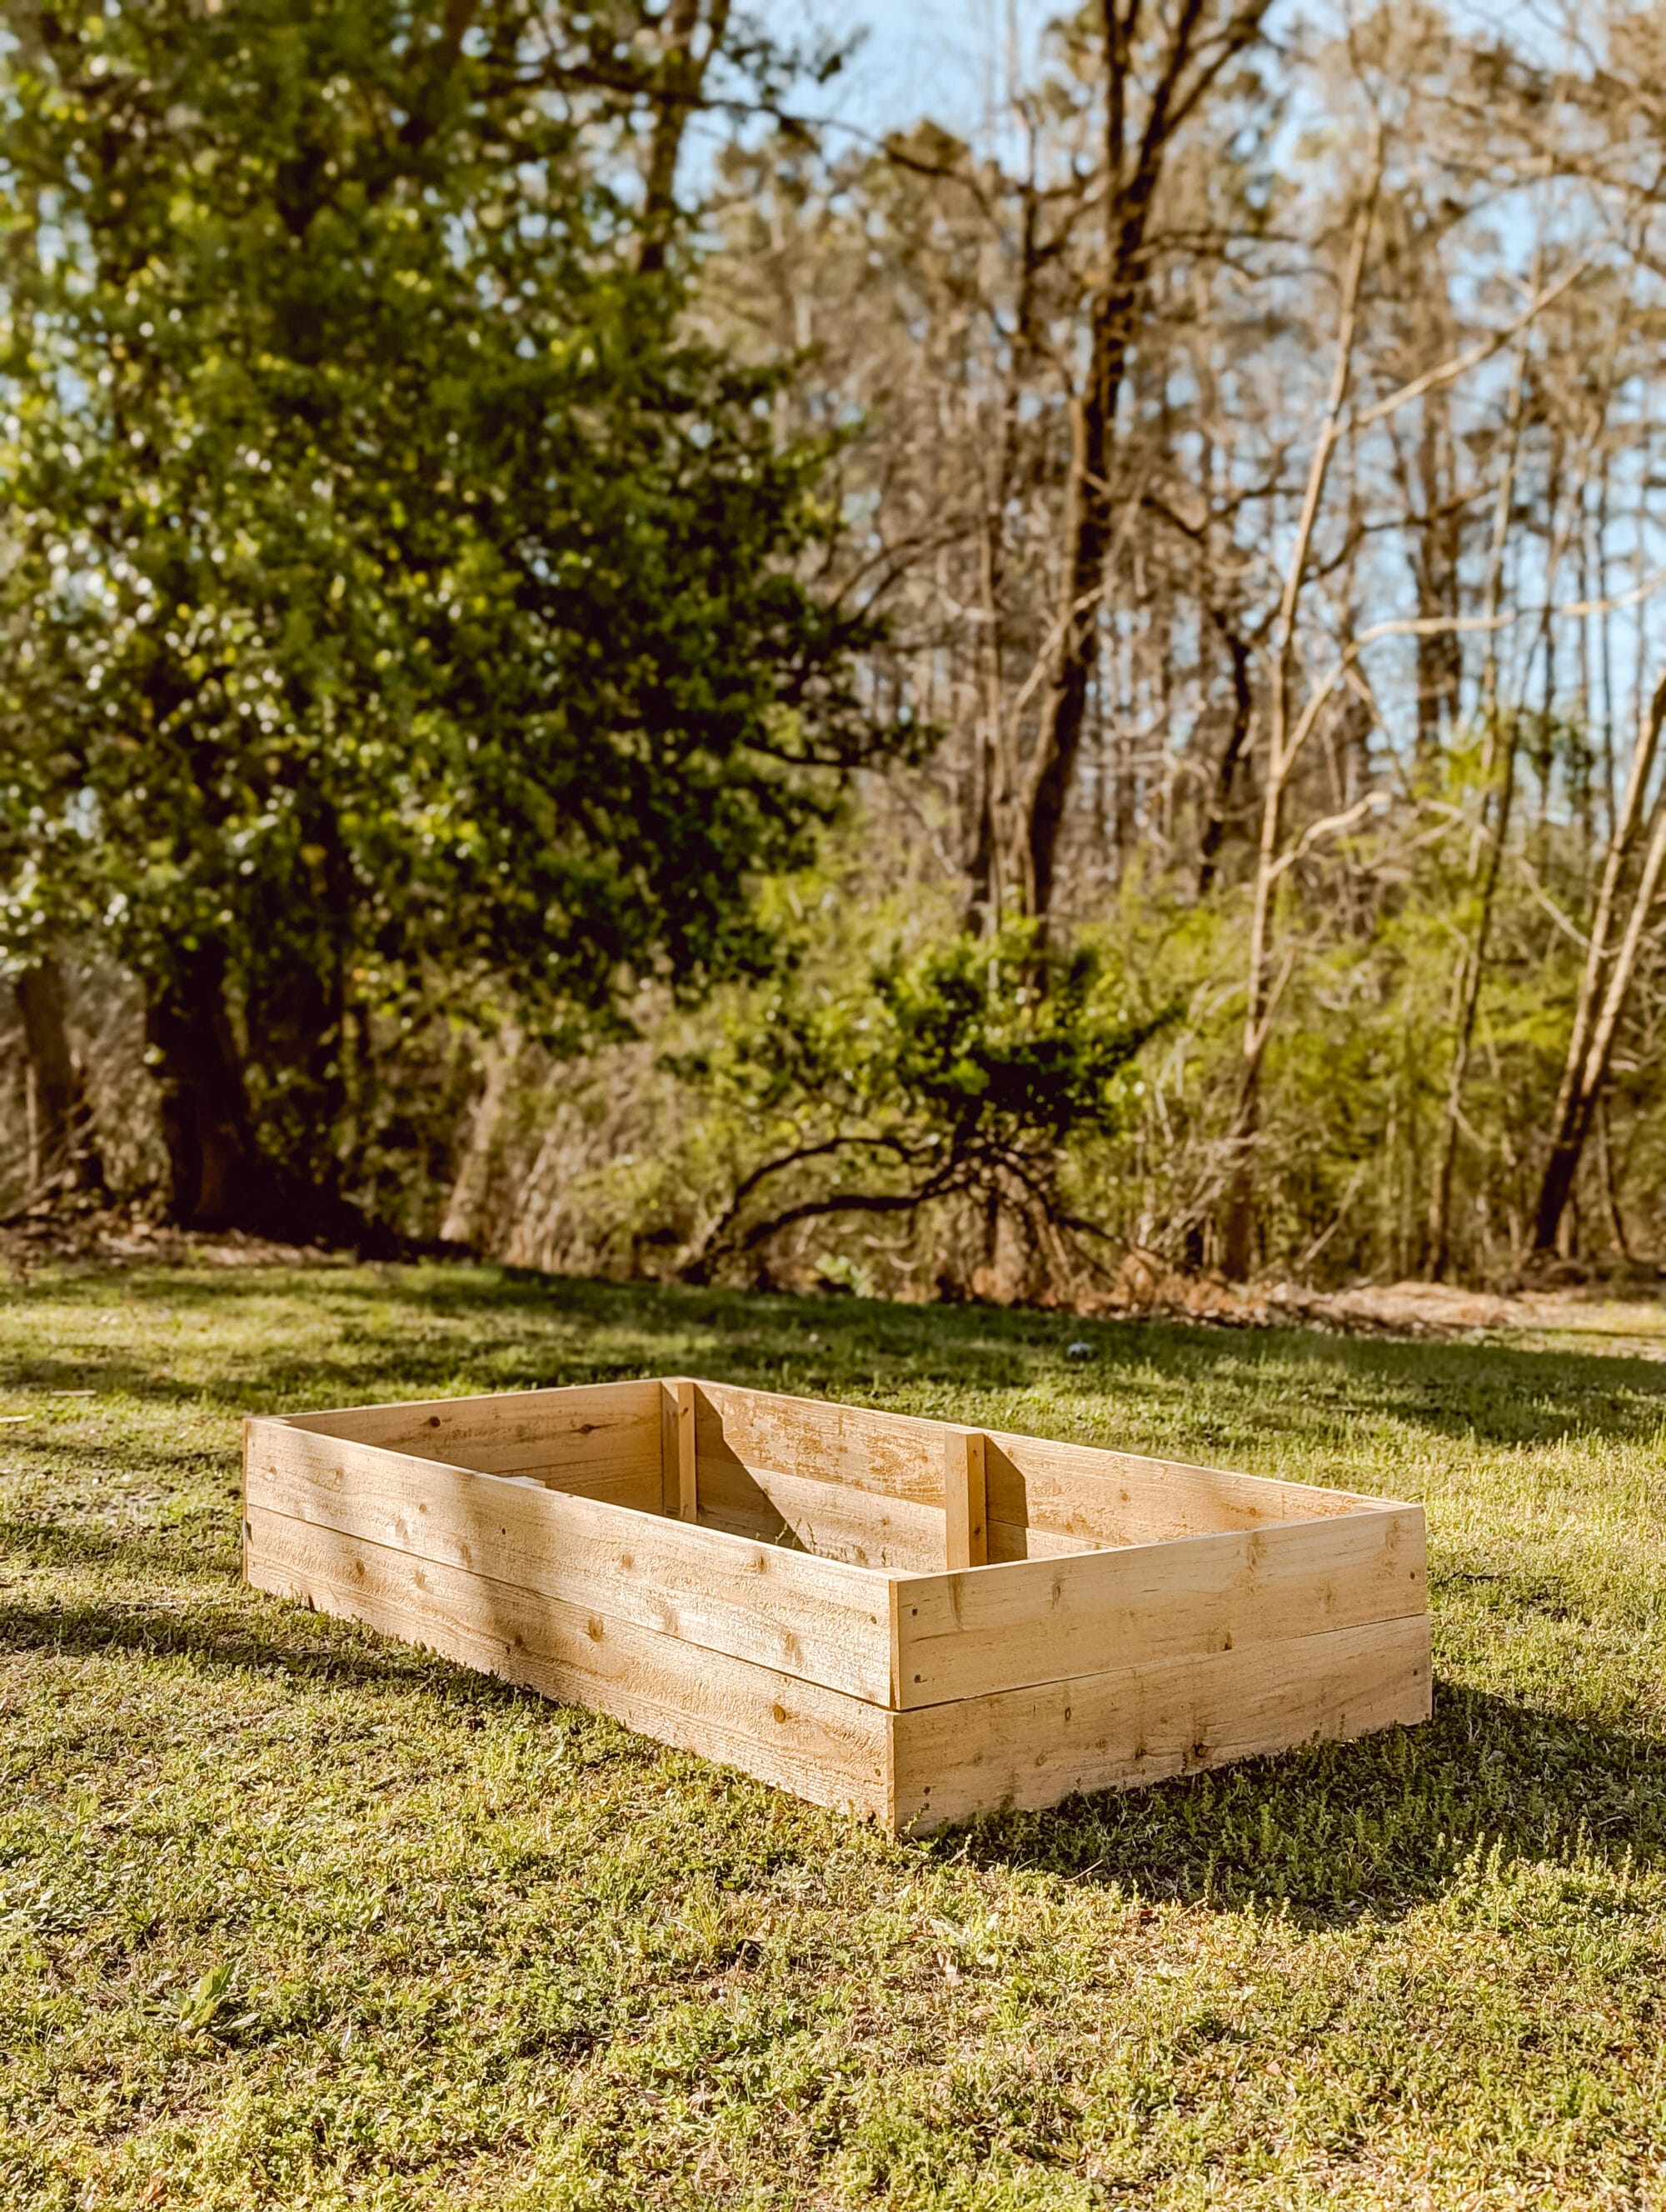
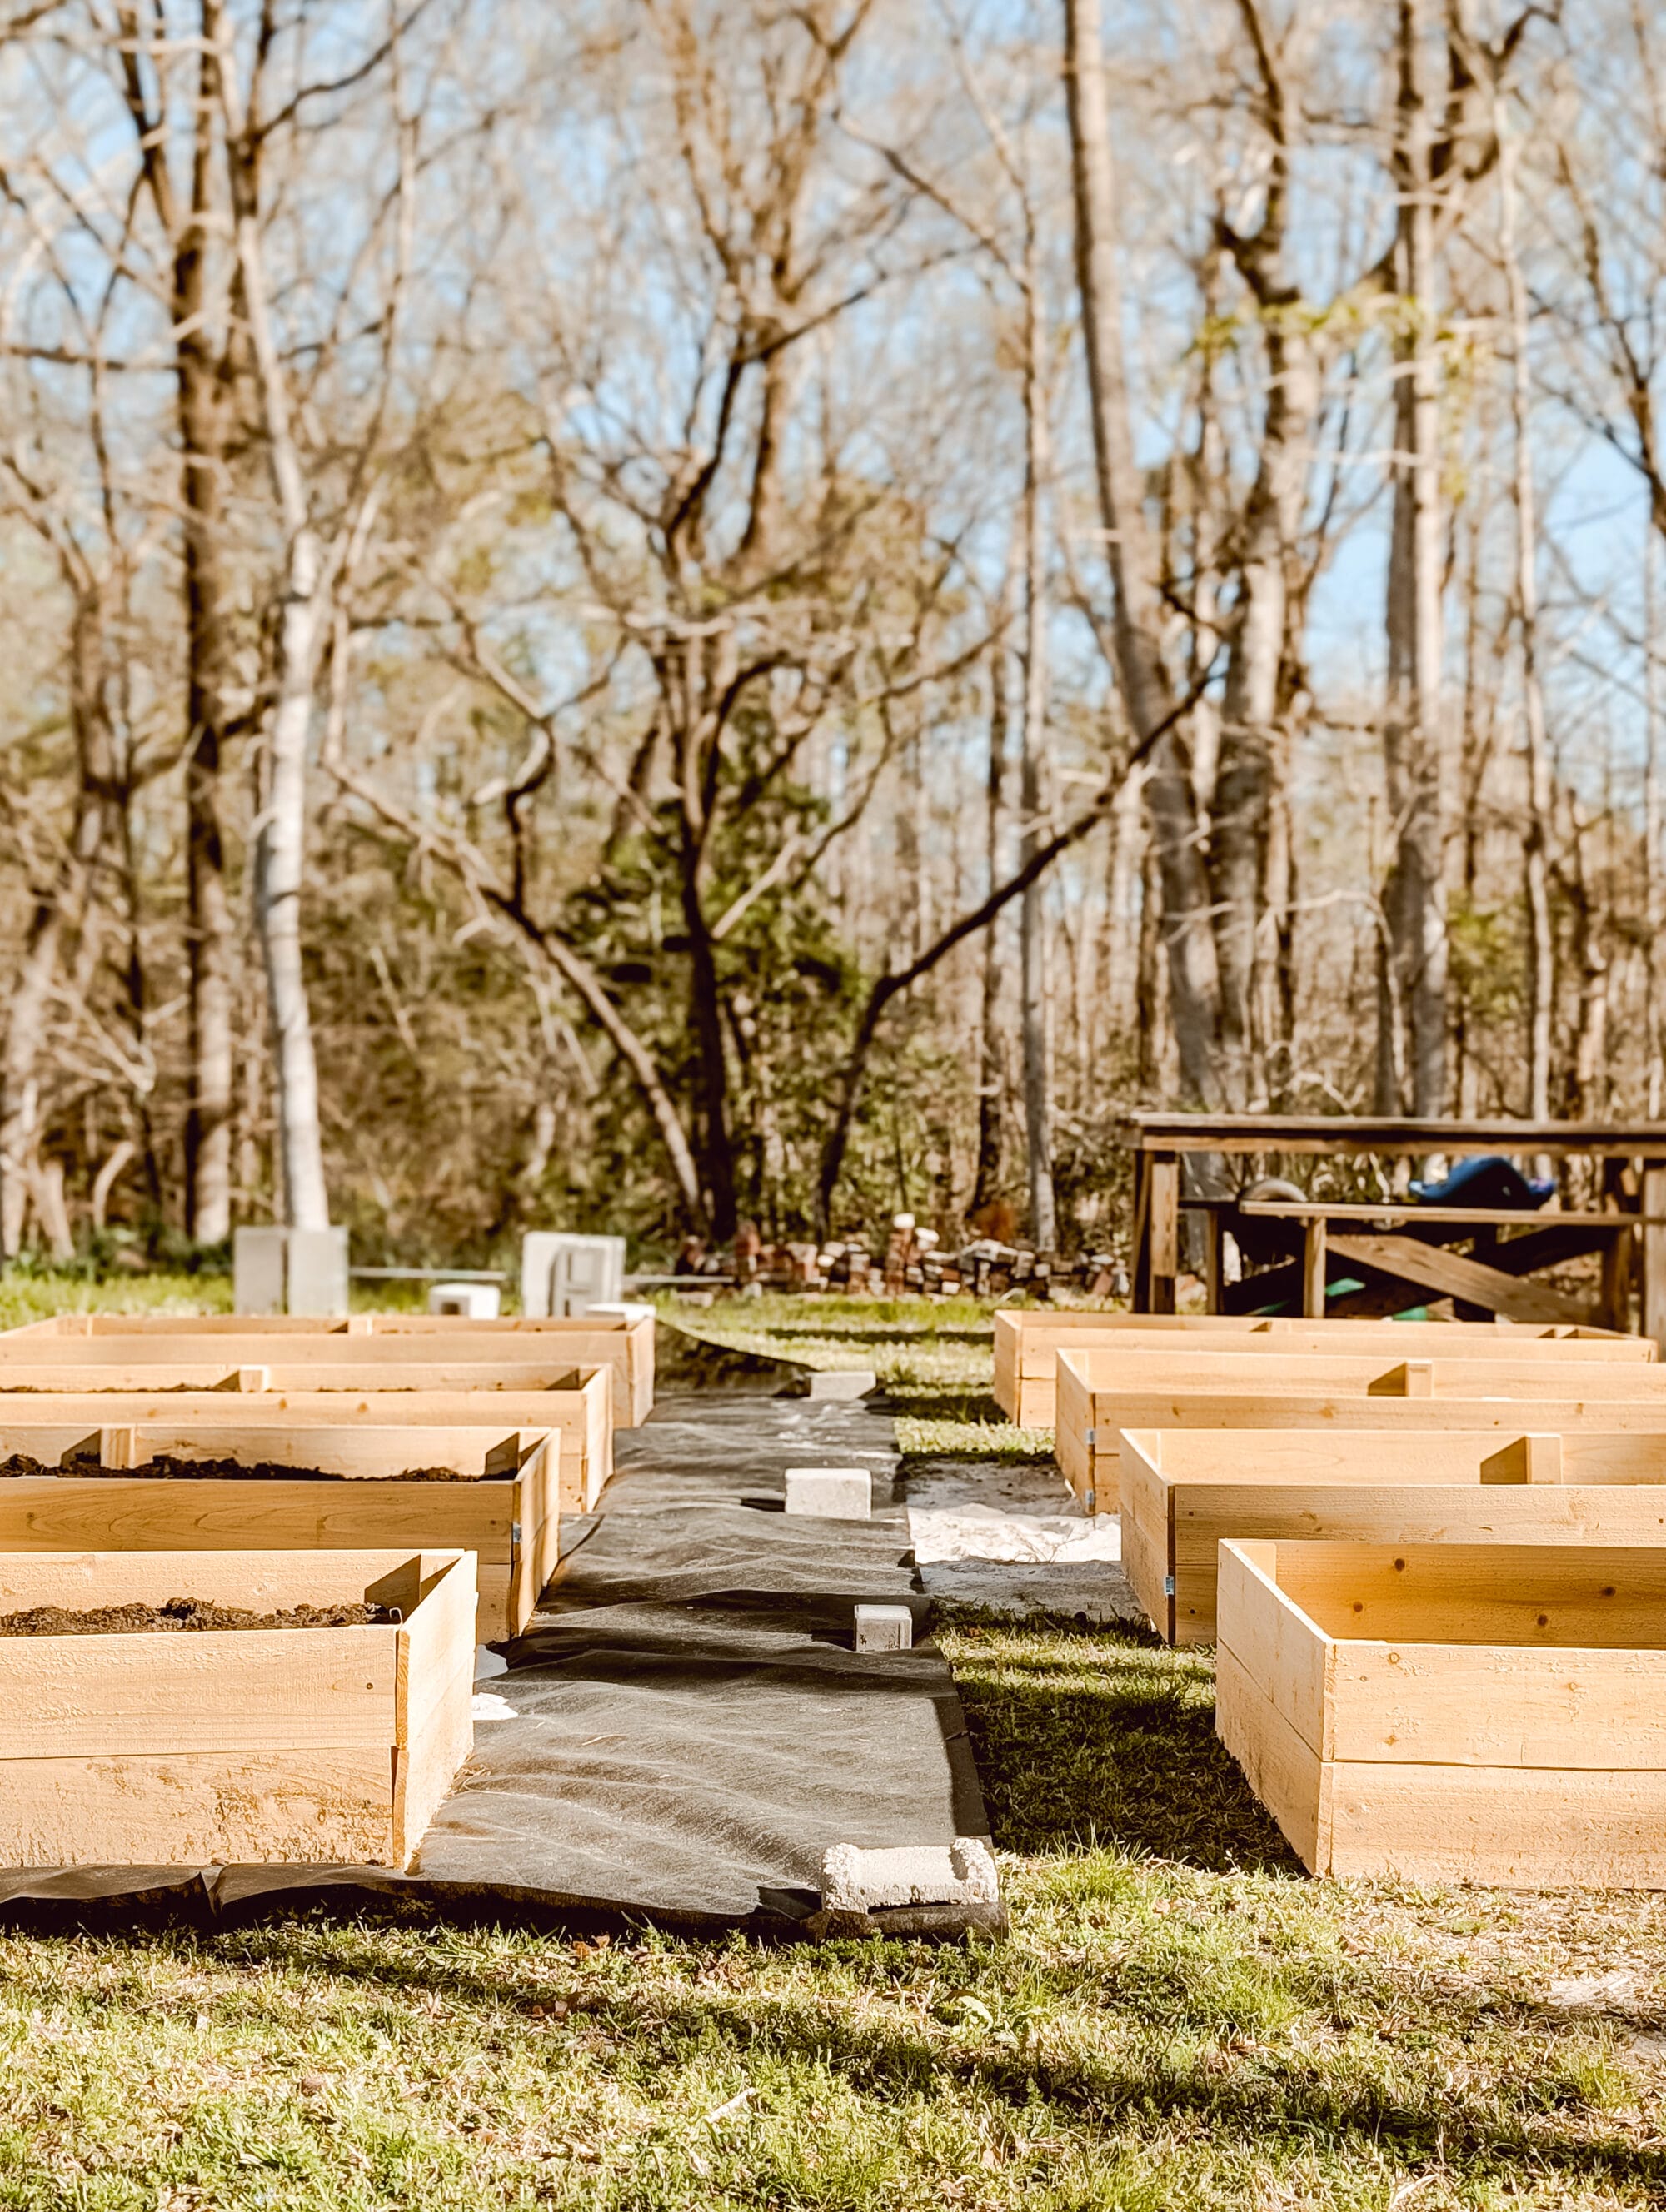
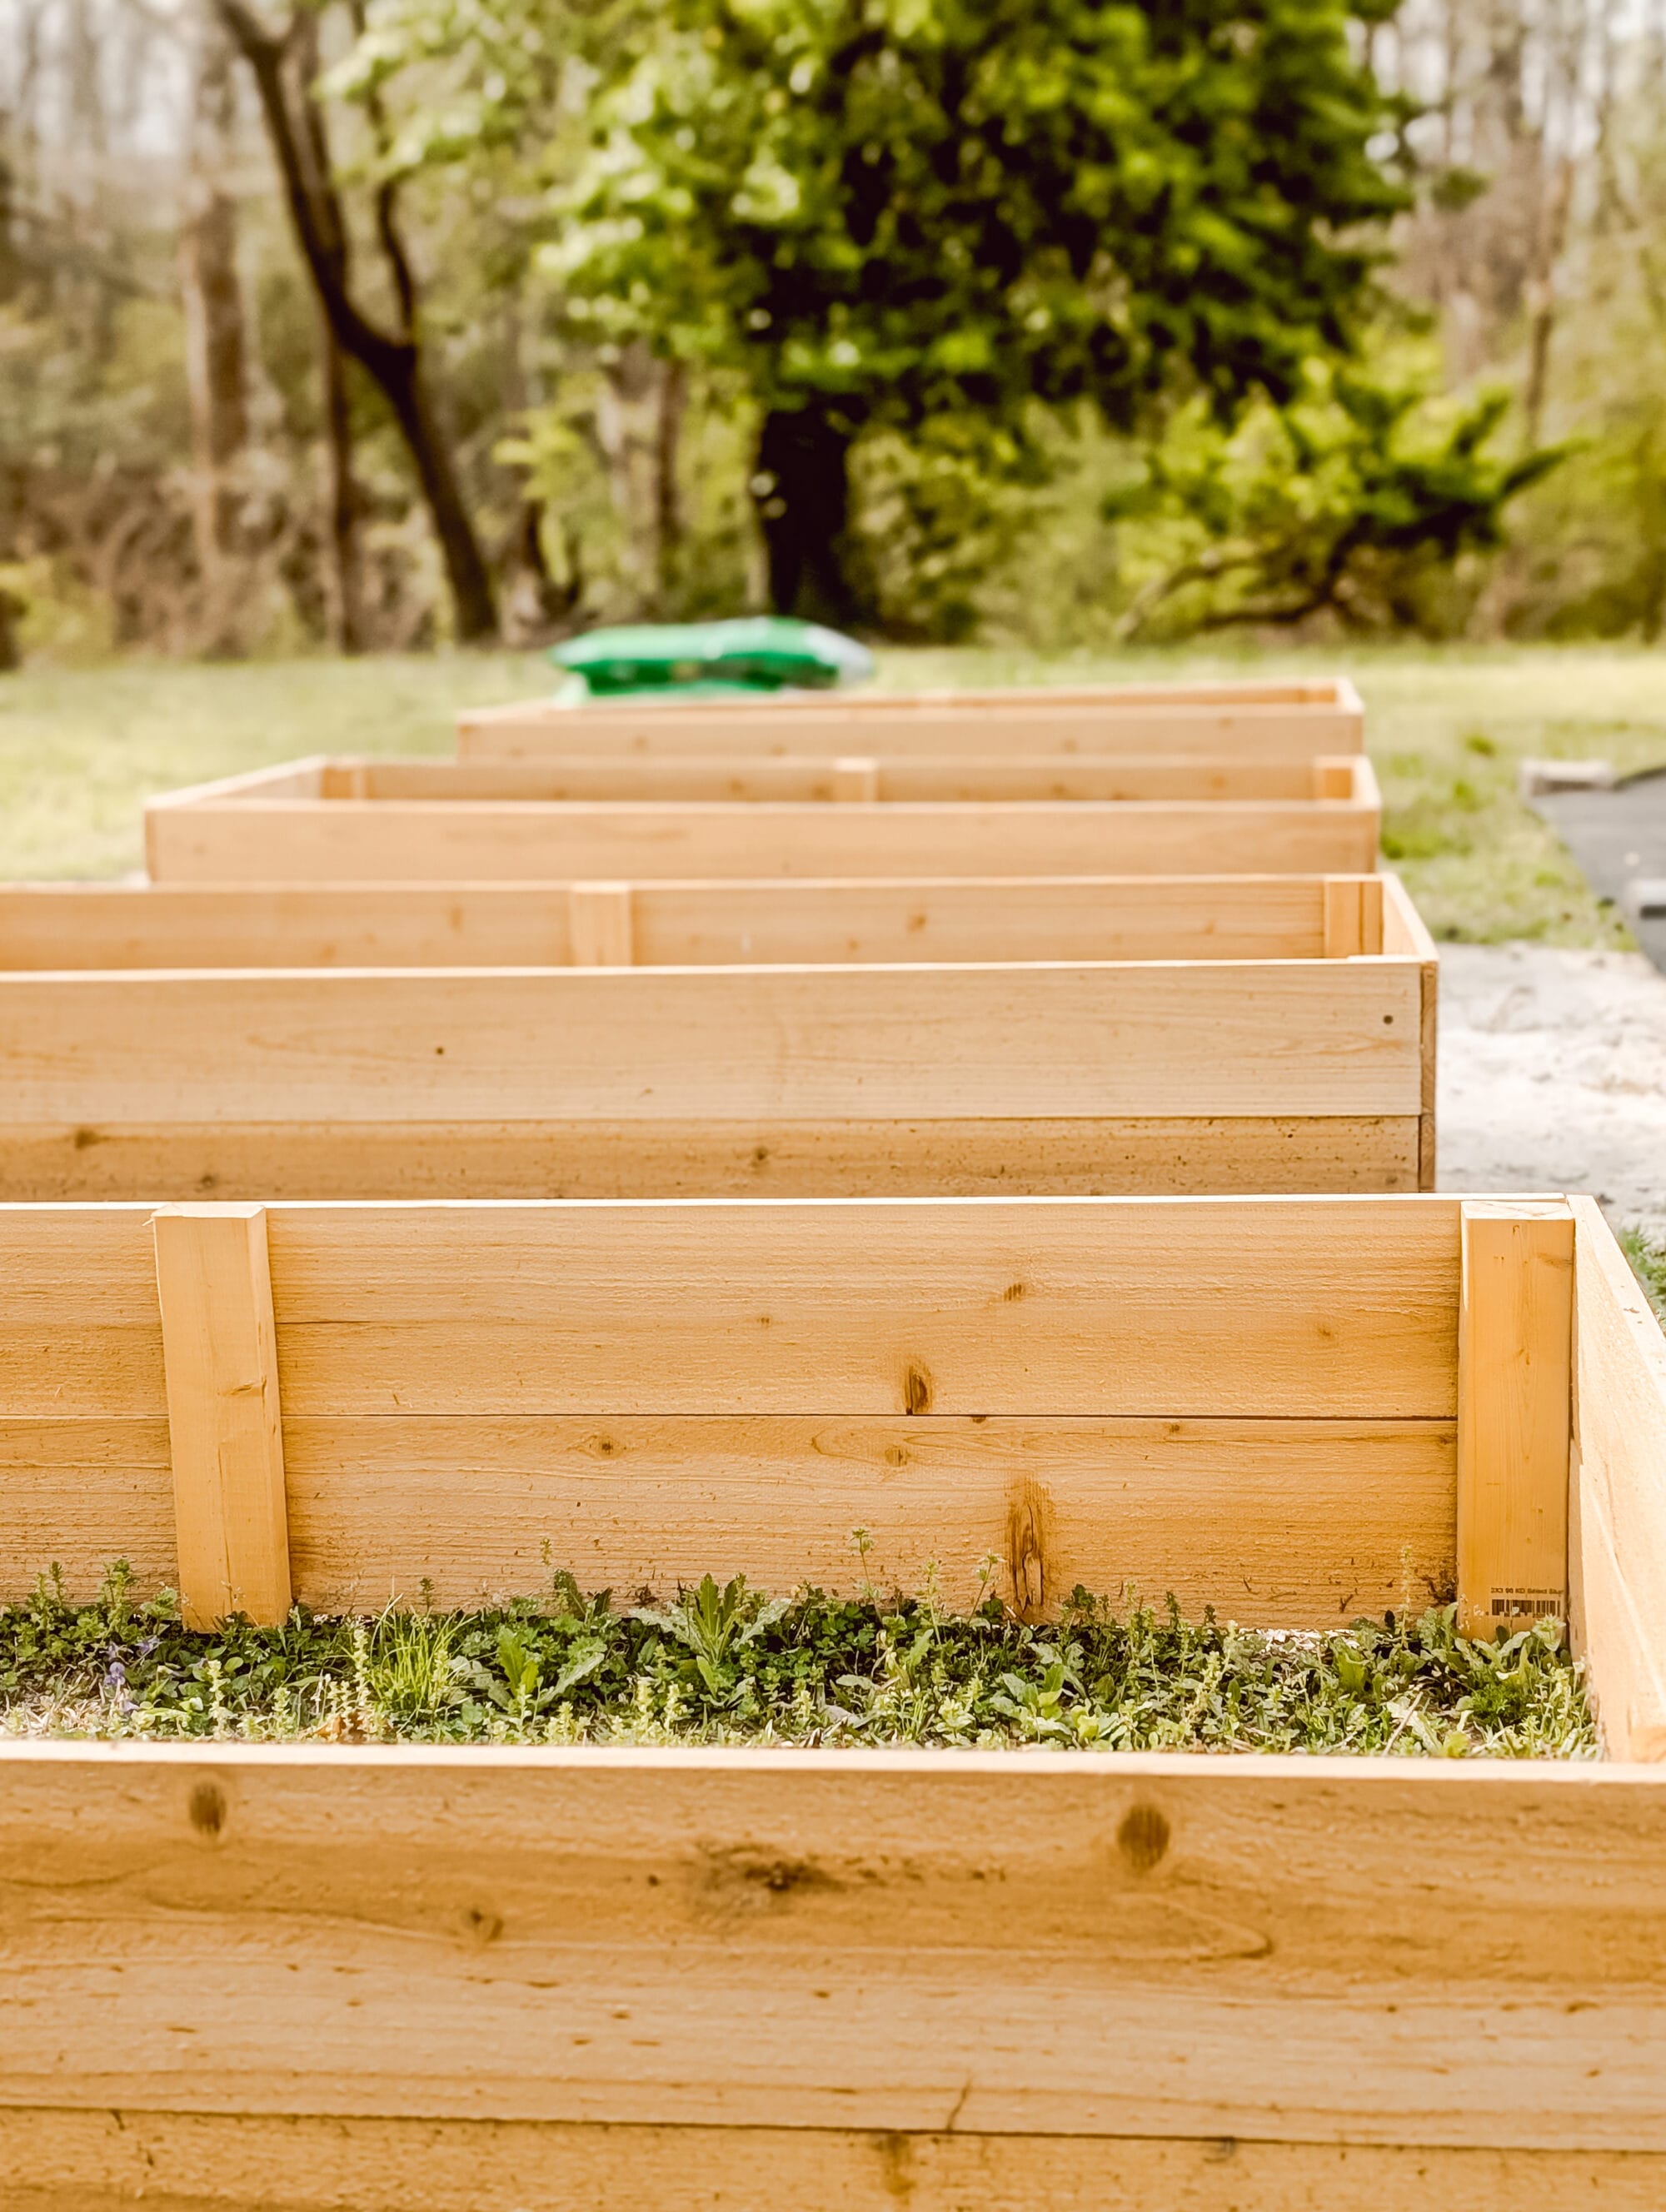
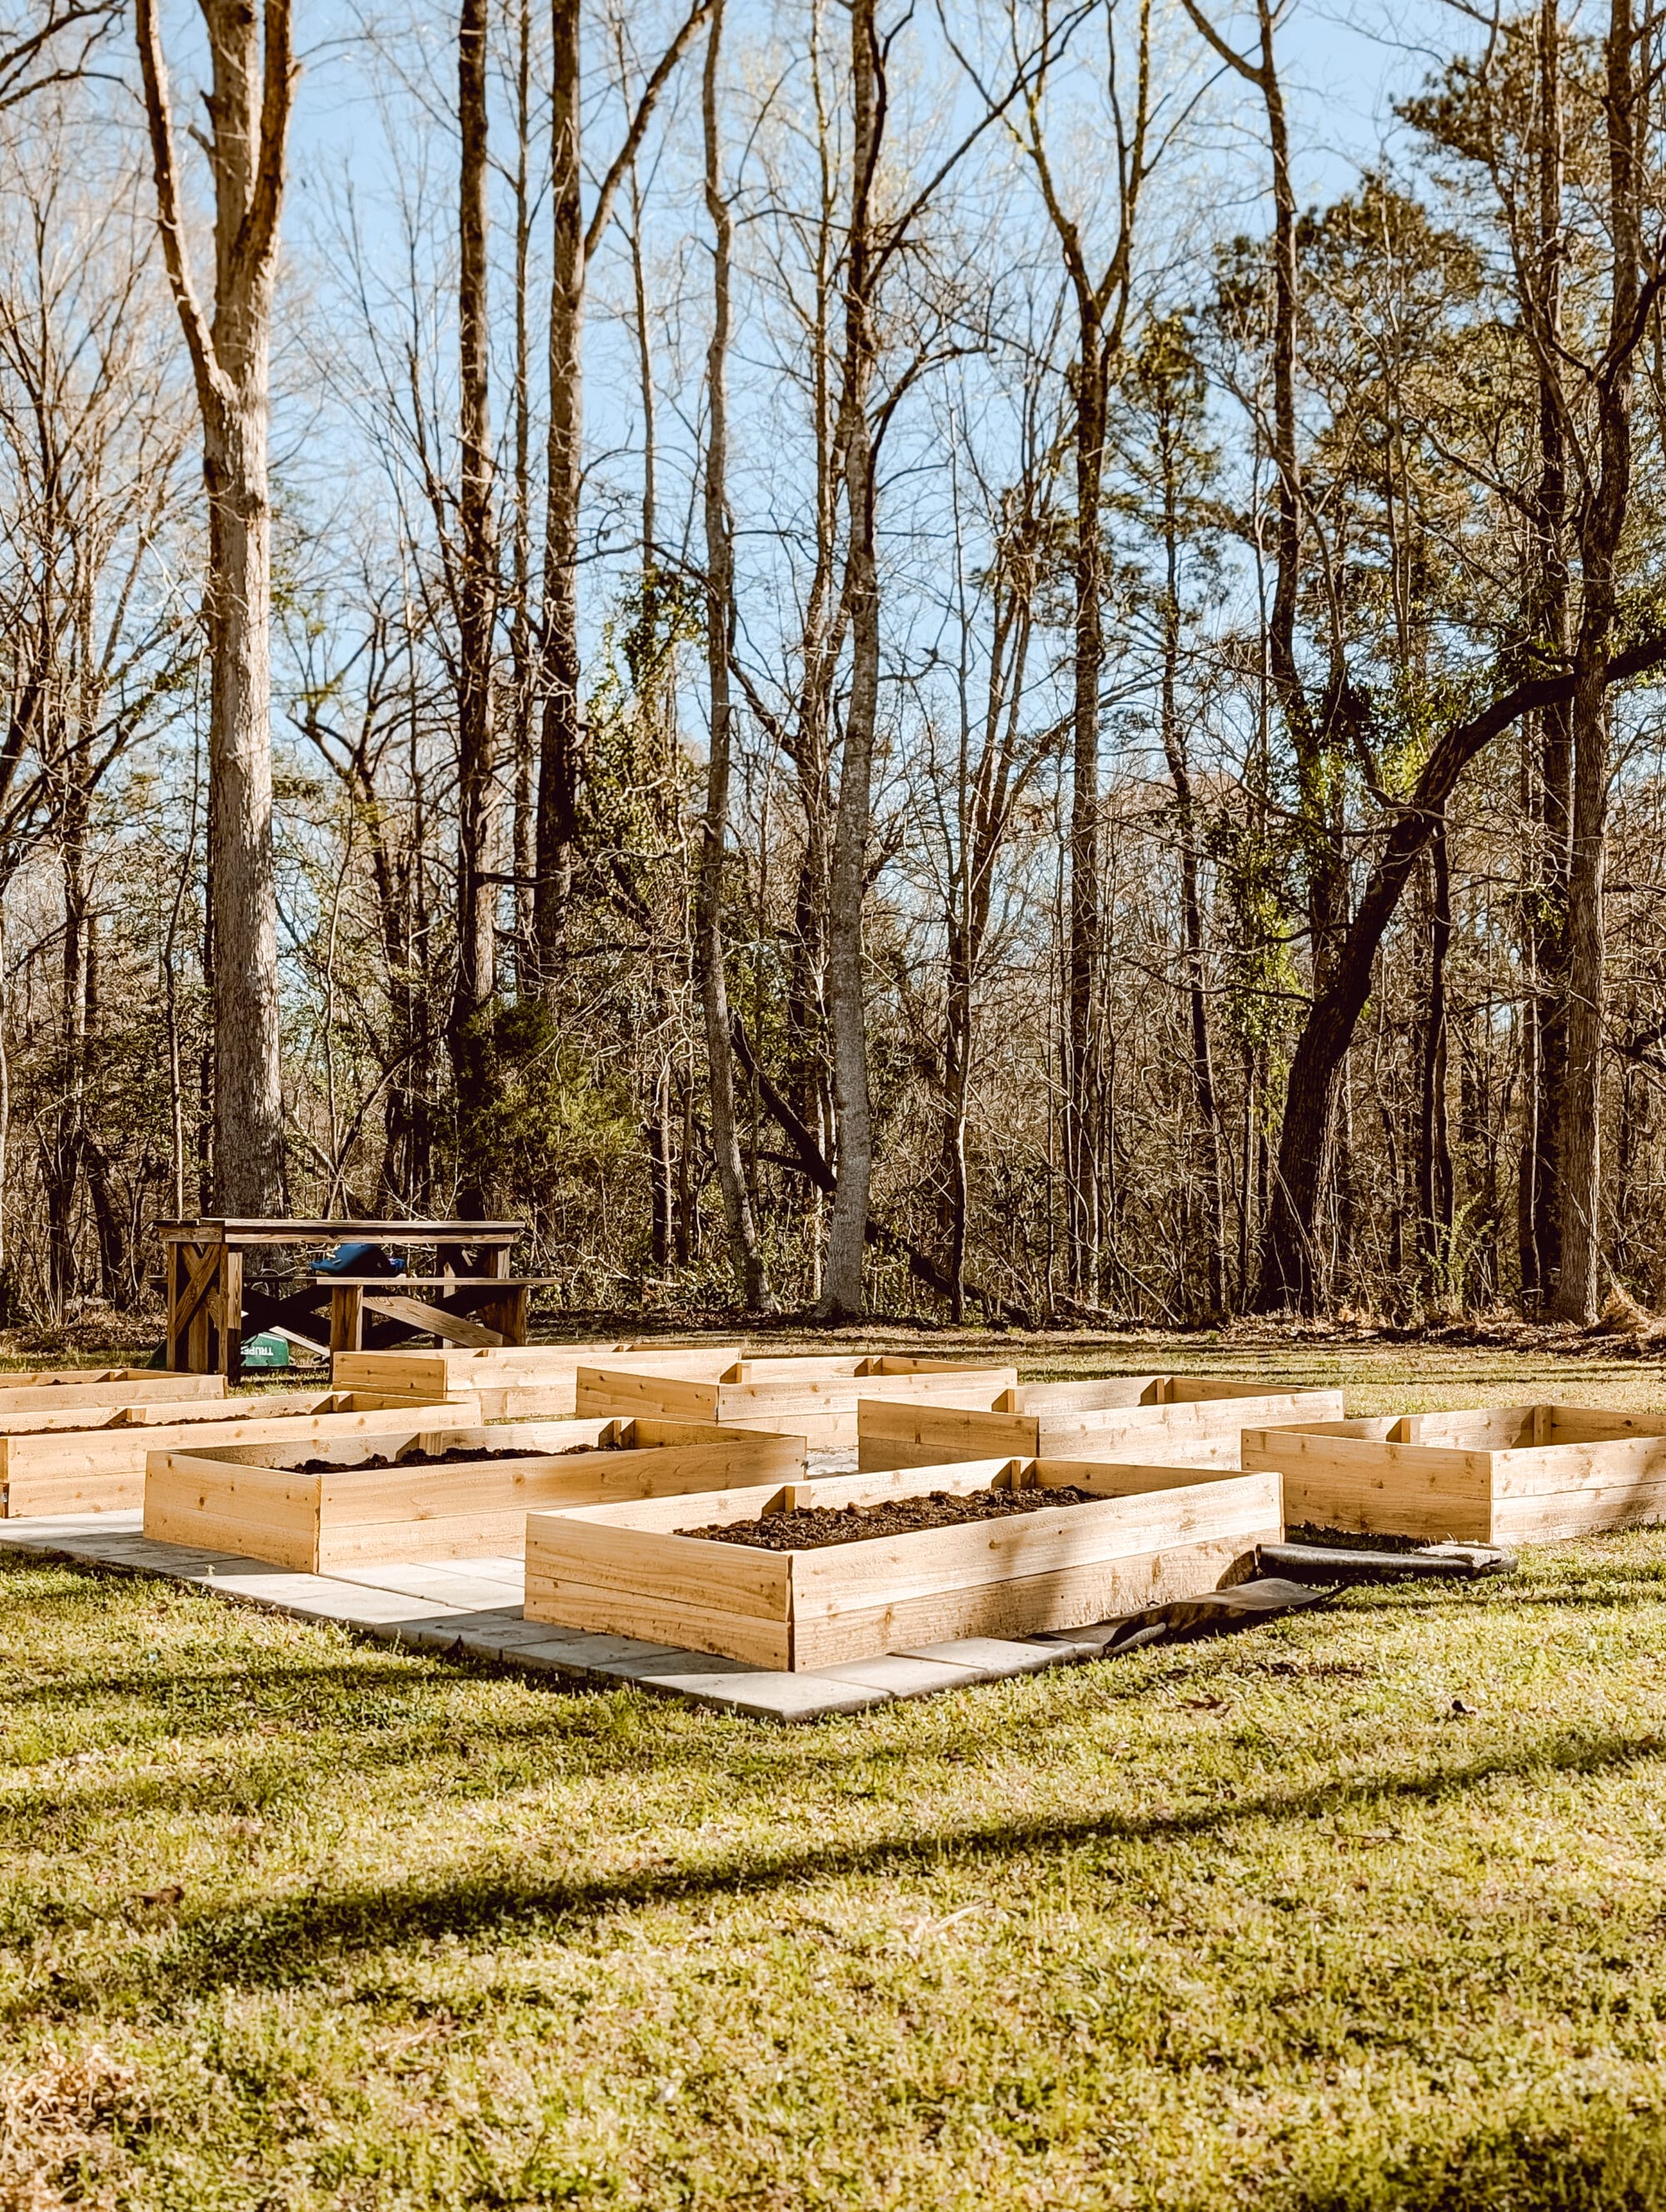
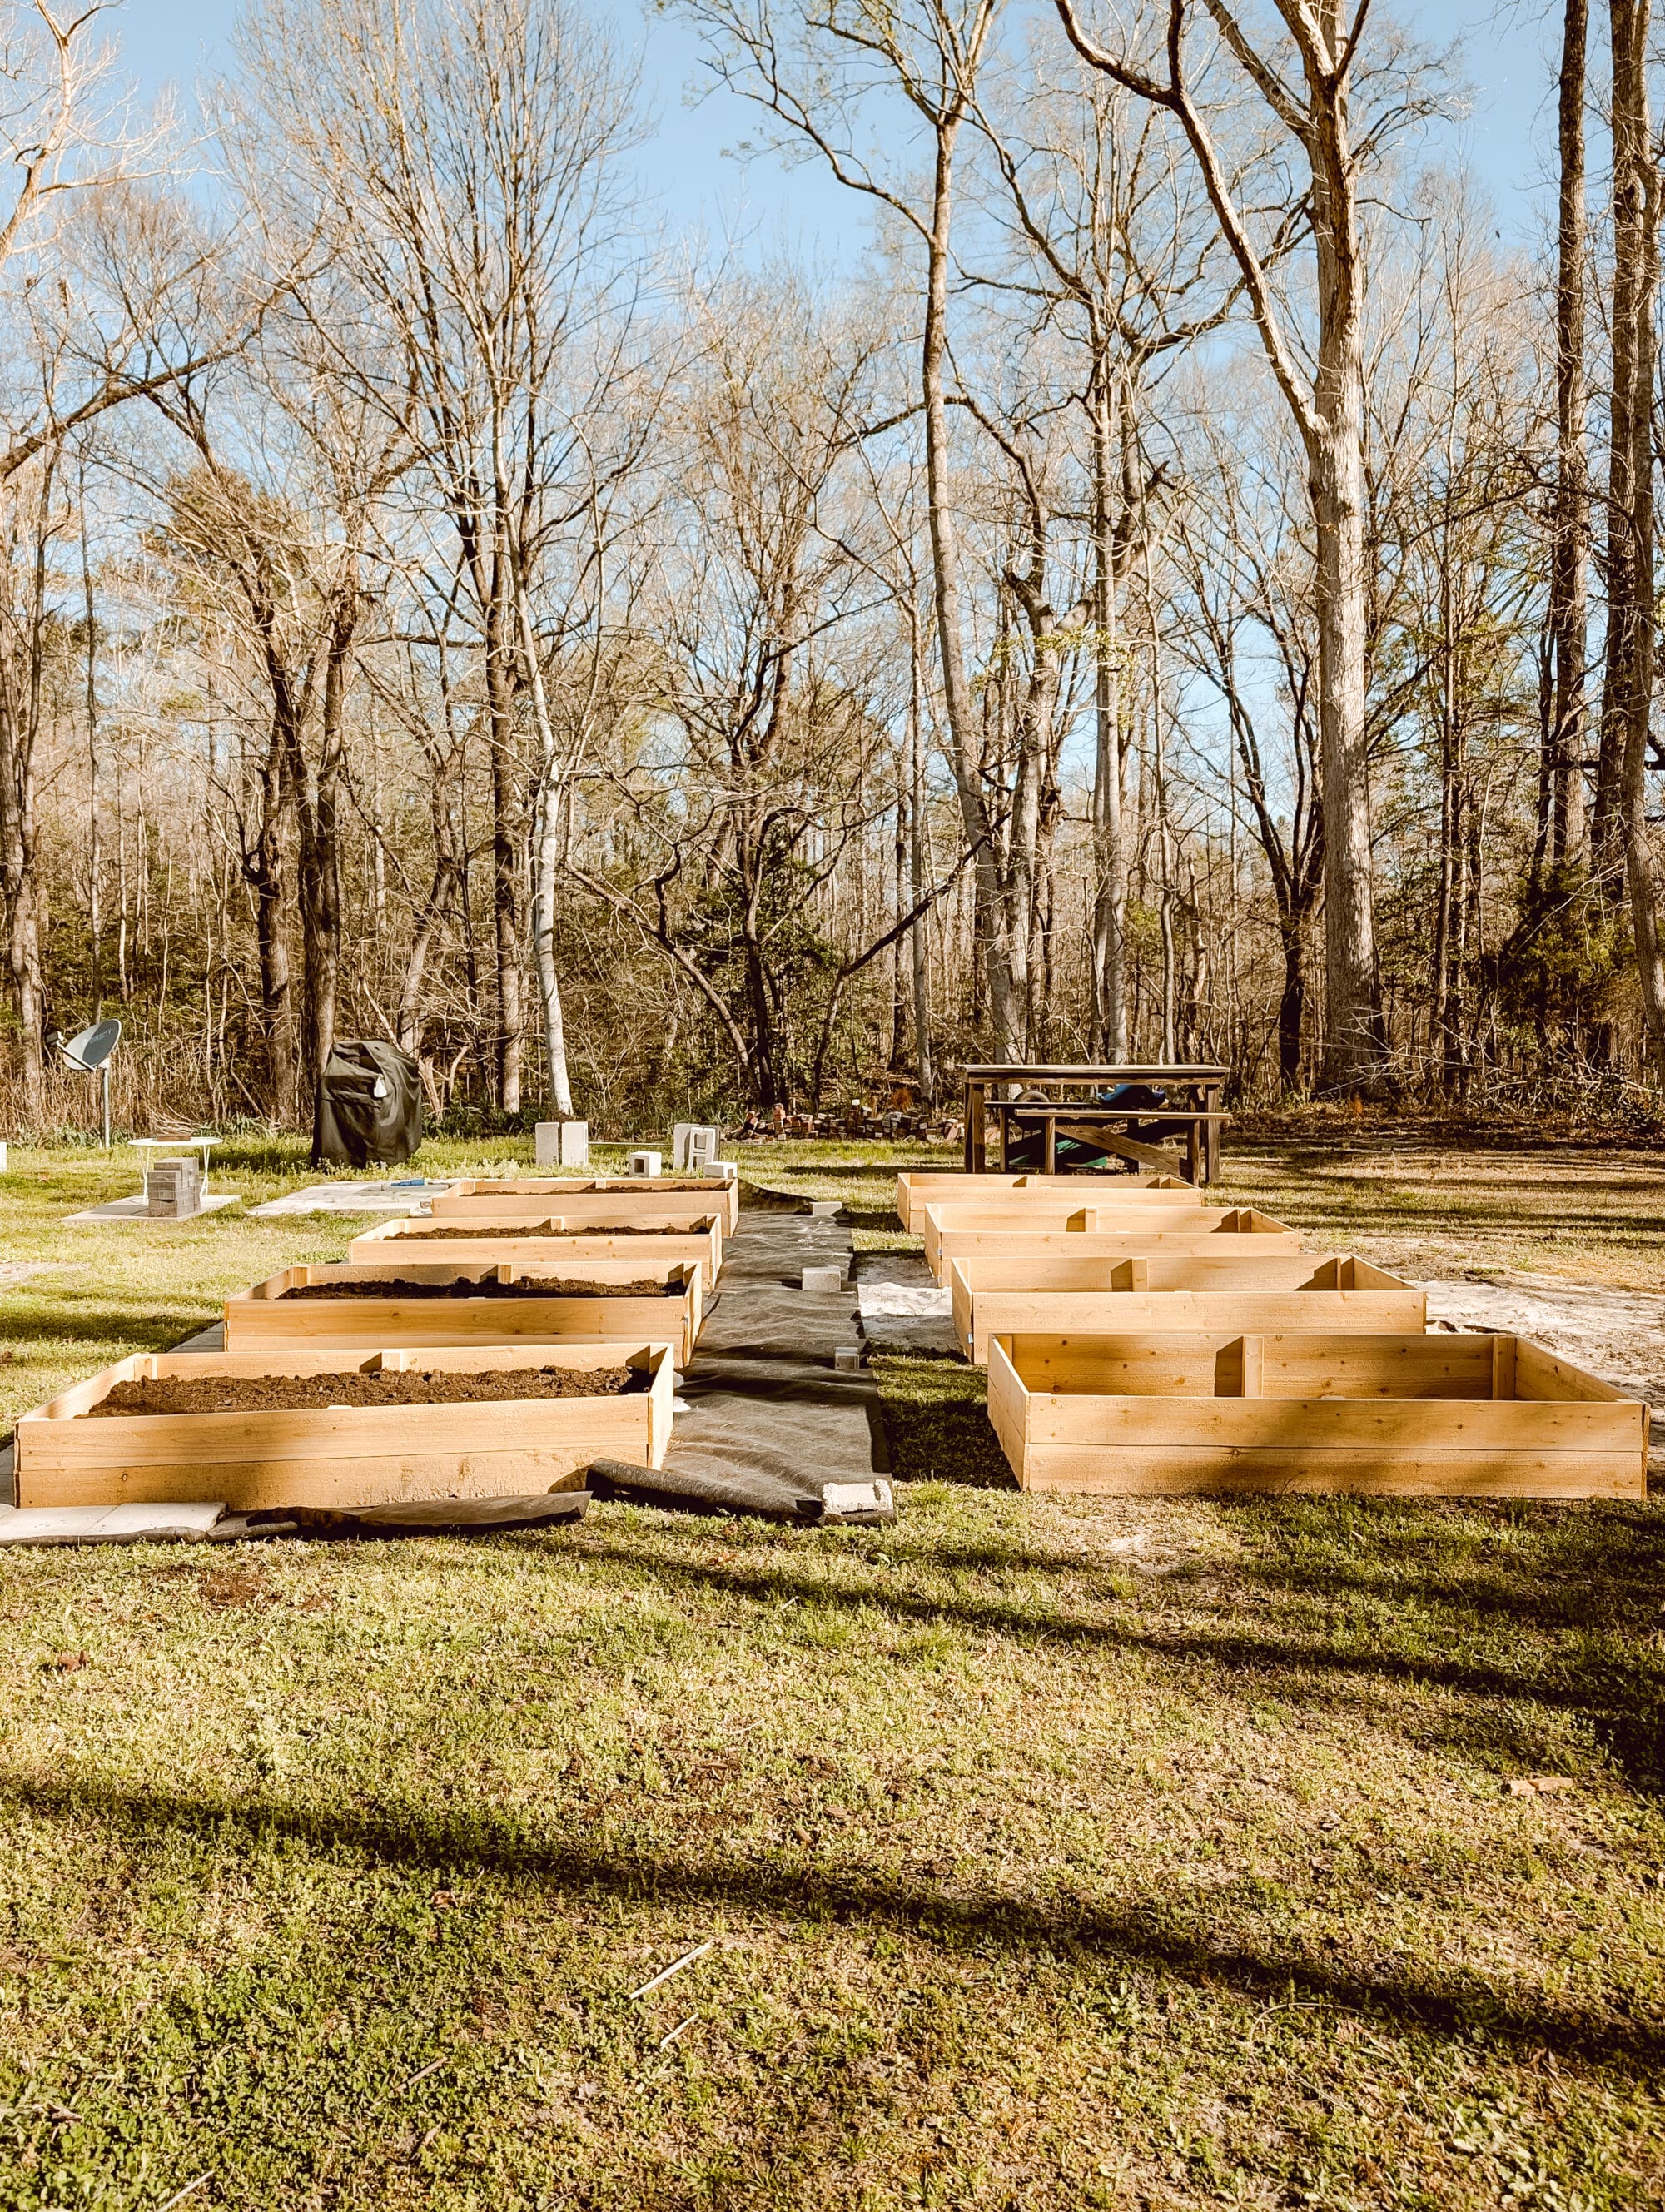
I wish I could show you our pretty raised beds full of vegetables and herbs… but I didn’t want to wait that long to share this garden project with you!
Here’s a peek at how they turned out…
This space might not look like much now, but these raised beds are the start of a beautiful little potager / kitchen garden.
I have it on my calendar to share an update in a few weeks so you can see how our little kitchen garden is coming along. And how all the cedar planter beds look after they’re filled with soil and plants!
Raised Beds for Under $30? How?!
I promise you, the math maths!
We were able to build super affordable DIY cedar raised garden beds for our garden out of cedar fence pickets.
Cedar fence pickets measure roughly 5.5 inches wide by 6 foot long. They are typically priced around $4 / picket. (Though you can sometimes find them on sale for closer to $3 / a piece.)
It takes 6 fence pickets to build a 3 foot by 6 foot raised bed. (Plus a few other supplies which we’ll get into in a moment.)
So 6 times $4, you’re looking at $24 worth of fence pickets for 1 raised planter.
Whereas common cedar boards measure 4 inches wide by 8 foot long, and they run about $10 a board.
Working with the size difference of these boards, it’s not quite like comparing apples to apples… but if you just used 6 of these boards you’re looking at $60. Which is more than doubled the cost from using fence pickets!
Using cedar fence pickets to build raised garden beds is a great way to save money on this project.
Now, it’s worth pointing out that because they’re fence pickets, the boards are a little thinner. So they may not last quite as long as raised beds built with the common cedar boards, or even the more expensive cedar 2 x 4’s.
But in my humble opinion, you just can’t beat the affordability factor of the fence pickets!
So if budget is a concern for you like it was for me, building raised beds with cedar fence pickets is the obvious choice and a great option for your garden.
Benefits of Growing in Raised Beds
Before we get into the DIY, I wanted to share why we decided to build raised beds in the first place! Rather than just growing right in the ground.
There are so many benefits to growing your garden in raised beds, so I’ll just share a few reasons that mattered most to us.
Better Drainage
Drainage is a concern for us as heavy summer rains often waterlog our yard, especially the area I had in mind for our garden!
I didn’t want to have to worry about the plants roots staying wet when we get heavy rains, and raised garden beds seem like a great solution for this problem.
Better Soil
Because you’re filling the beds yourself, you have more control over the nutrients and the quality of the soil when you choose to garden in raised beds.
You can add in lots of organic matter like leaves and grass clippings, compost, etc. to give your plants the best growing environment possible!
Less Weeding
From what I’ve heard and read, there is less weeding involved with raised bed gardening.
I can’t speak to this personally because we are just getting started with our raised bed gardening journey.
But if you saw the current state of our flower beds around our farmhouse… you’d understand why this is a concern! That’s a project for another day though.
Overall Aesthetics
My grandparents always grew a huge garden out in our fields.
They had rows and rows of corn, tomatoes, cucumbers, field peas, green beans, butter beans, squash, watermelon, cantaloupe, peanuts… you name it they grew it!

Their garden was so big they needed a tractor to till up the soil and plow the rows.
We’re gardening on a much smaller scale, and much closer to the house where I want things to look pretty. Think more of a potager style kitchen garden.
Ford looks like he’s picturing it all in his mind with his eyes closed!
I want our garden space to be functional, but also beautiful. And I absolutely LOVE the look of raised beds with pretty walkways and a little picnic table seating area nearby.
That’s the vision and the end goal we’re working towards. One step at a time!
Why Cedar is Ideal for Planter Boxes & Raised Beds
Cedar is a very popular choice for raised garden beds because it’s resistant to rot and decay, thanks to the naturally present oils and acids that deter fungi and insects that cause decay.
It lasts a lot longer than other wood like pine.
The only downside of cedar is that it can be pretty pricey!
And you may think, well why not just use treated lumber? Wouldn’t that would last longer?
But you don’t want to do that! The chemicals they use to treat lumber can get into the soil, and that’s not good for your plants or for you.
That’s why we went with the cedar fence pickets for our raised garden beds.
Cedar fence pickets are not treated like regular fence pickets are. They have all the same benefits of using cedar wood. And they’re budget-friendly!
How to Build DIY Cedar Raised Garden Beds
Now that we’re talked about the the budget, the benefits of raised beds, and why cedar is the ideal wood to use for garden beds… let’s get to building!

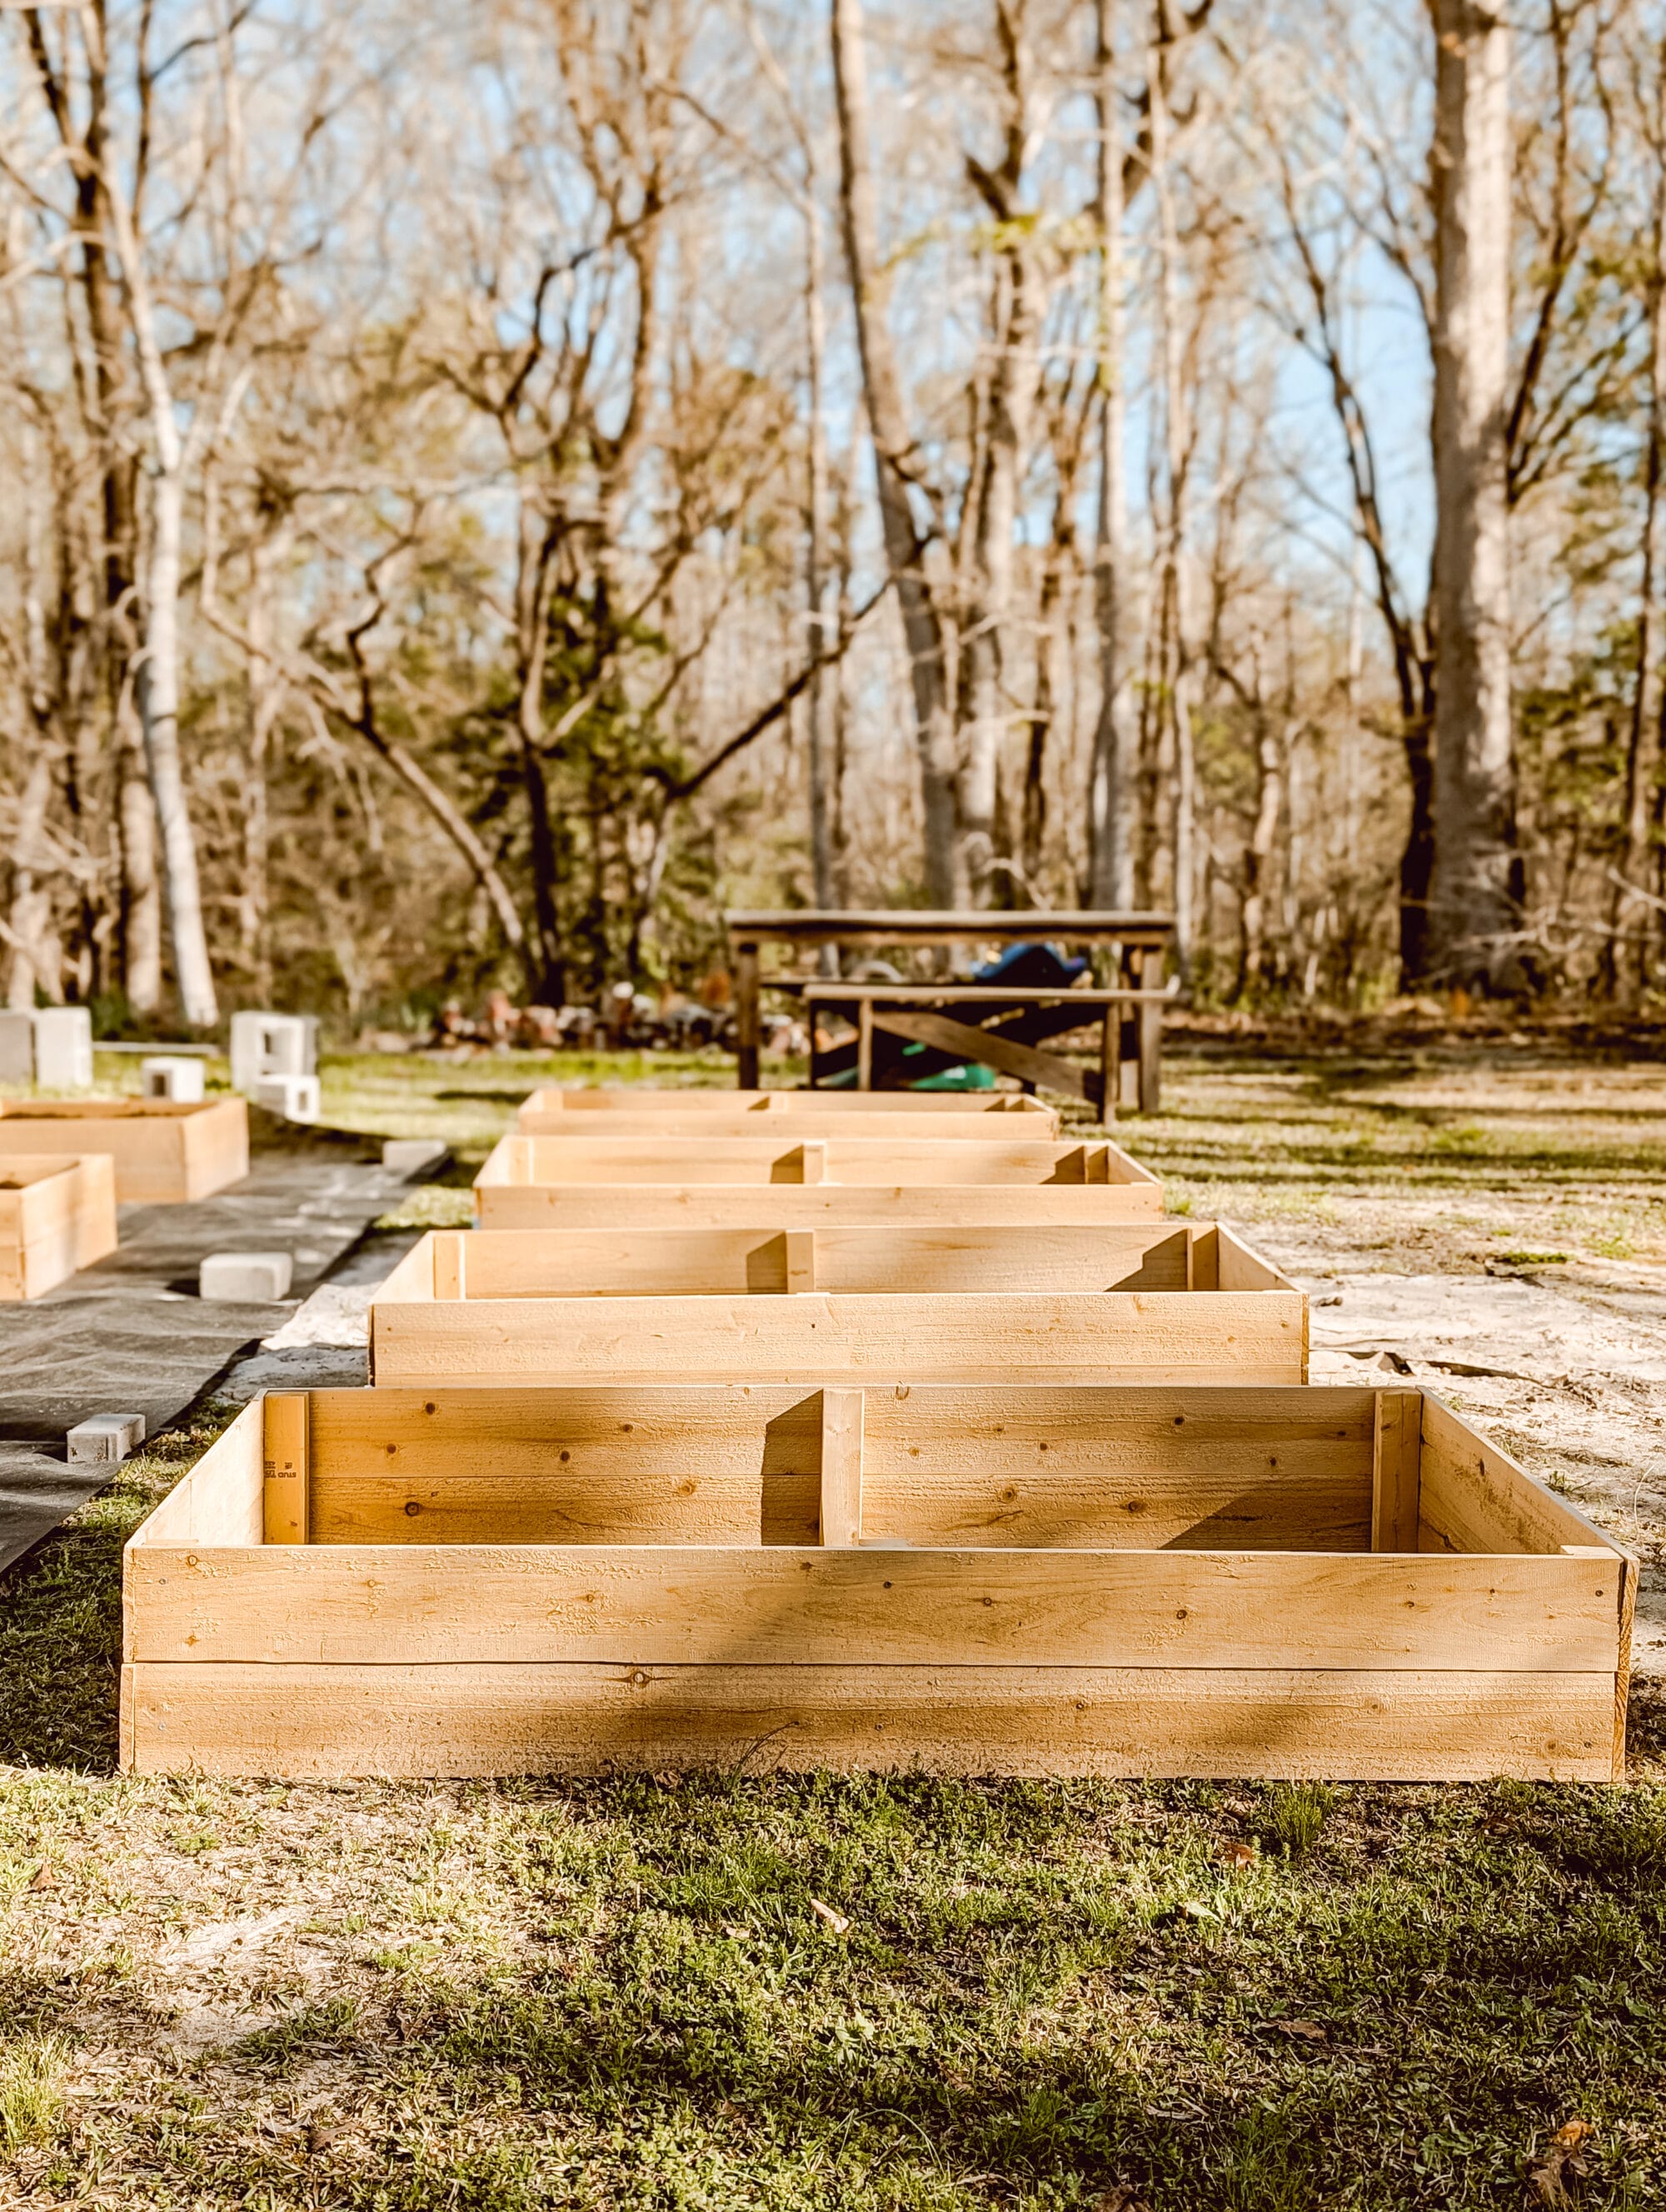
We built 8 raised garden beds for our garden. But for the “how to” part of this post, I’m going to write it out as though you are only building 1 garden bed. I think that will just make things simpler to explain.
Tools and Supplies you’ll need for your Raised Garden Bed:
- 6 cedar fence pickets
- a 2 x 4 x 8 board (I used a common untreated stud for this to save money, but you could also go with a cedar 2 x 4.)
- 2 inch long exterior wood screws
- A drill
- A circular saw
Again, the quantities listed above are for 1 raised cedar garden bed!
If you’re making 2 beds, multiply all the supplies above by 2. If you’re making 6 beds, multiply all the supplies above by 6.
Step by Step Instructions for Building your Raised Garden Bed
Now let’s get to the fun part – building your raised bed!
Step 1: Cut off the dog ears on each of the cedar fence posts
Because we’re working with fence pickets, the top ends of the boards will come “dog-eared”.
You’ll want to cut about an inch off the top of your fence pickets to remove the “dog-ear” before assembling.
Step 2: cut 2 of the fence pickets in half
Cut 2 of your 6 fence pickets in half. They are 6 foot long to start with, so you will be left with 4 boards that are now 3 feet long.
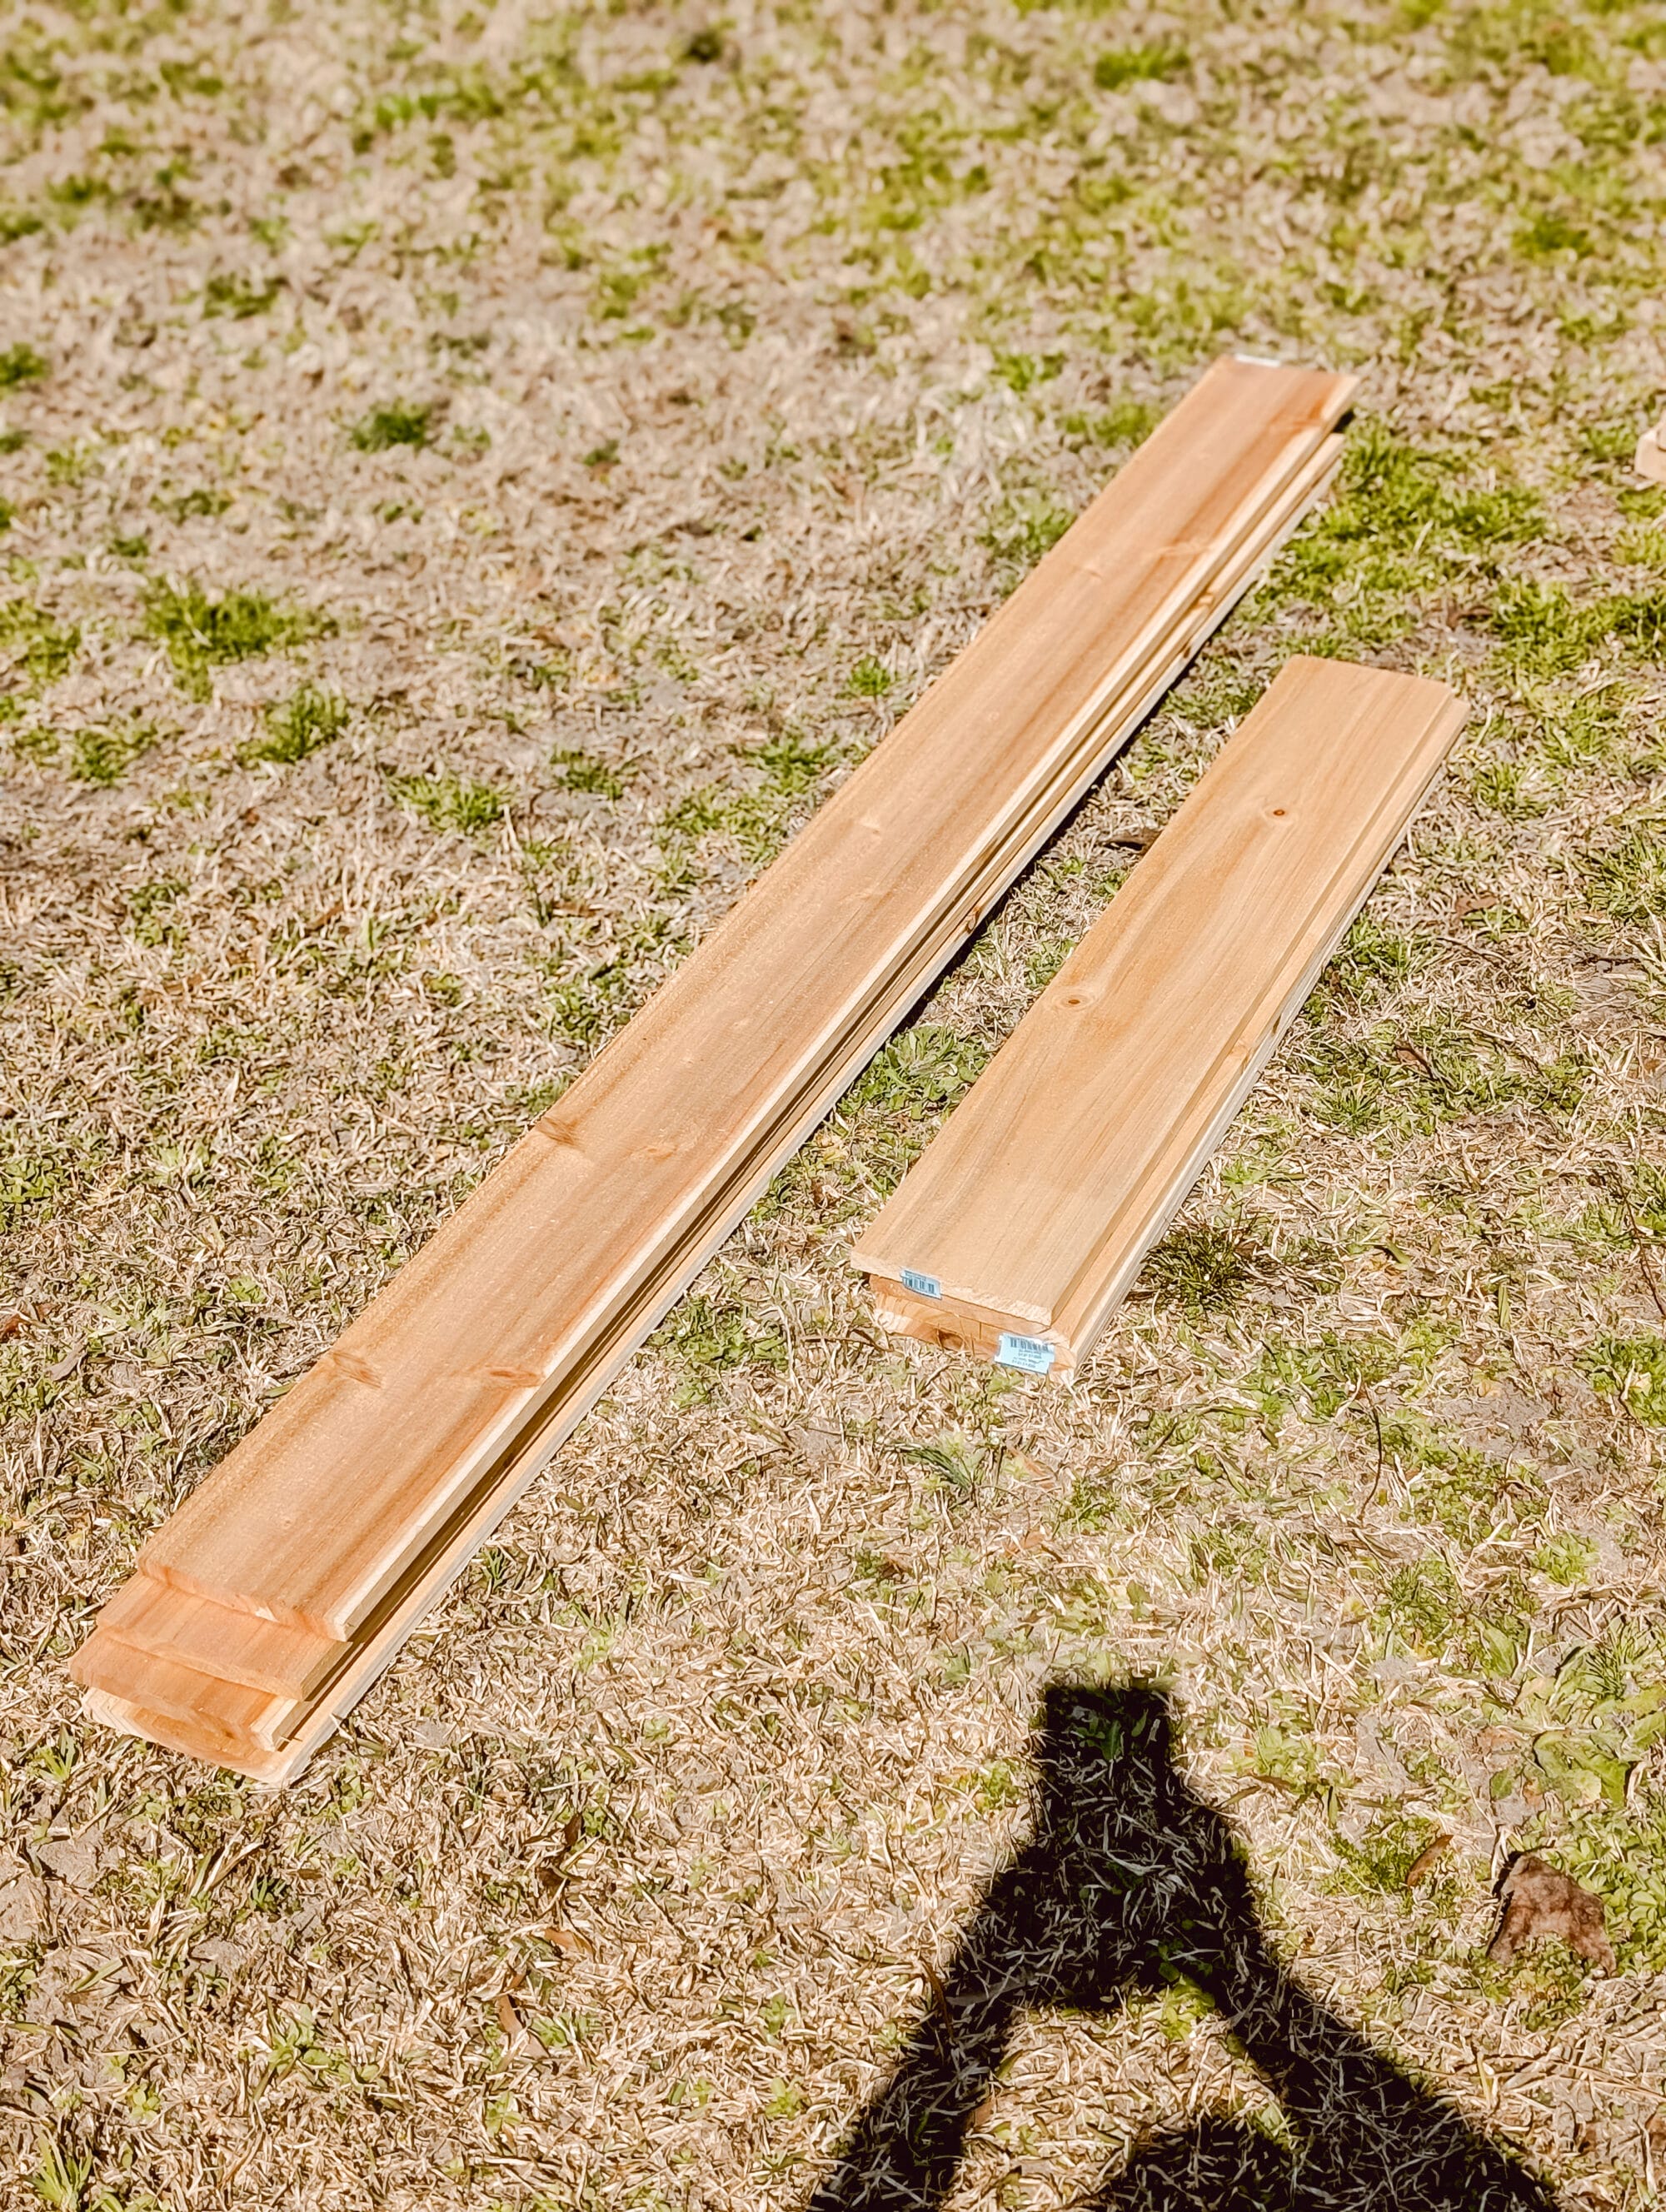
These shorter boards will make up the shorter sides of your raised beds.
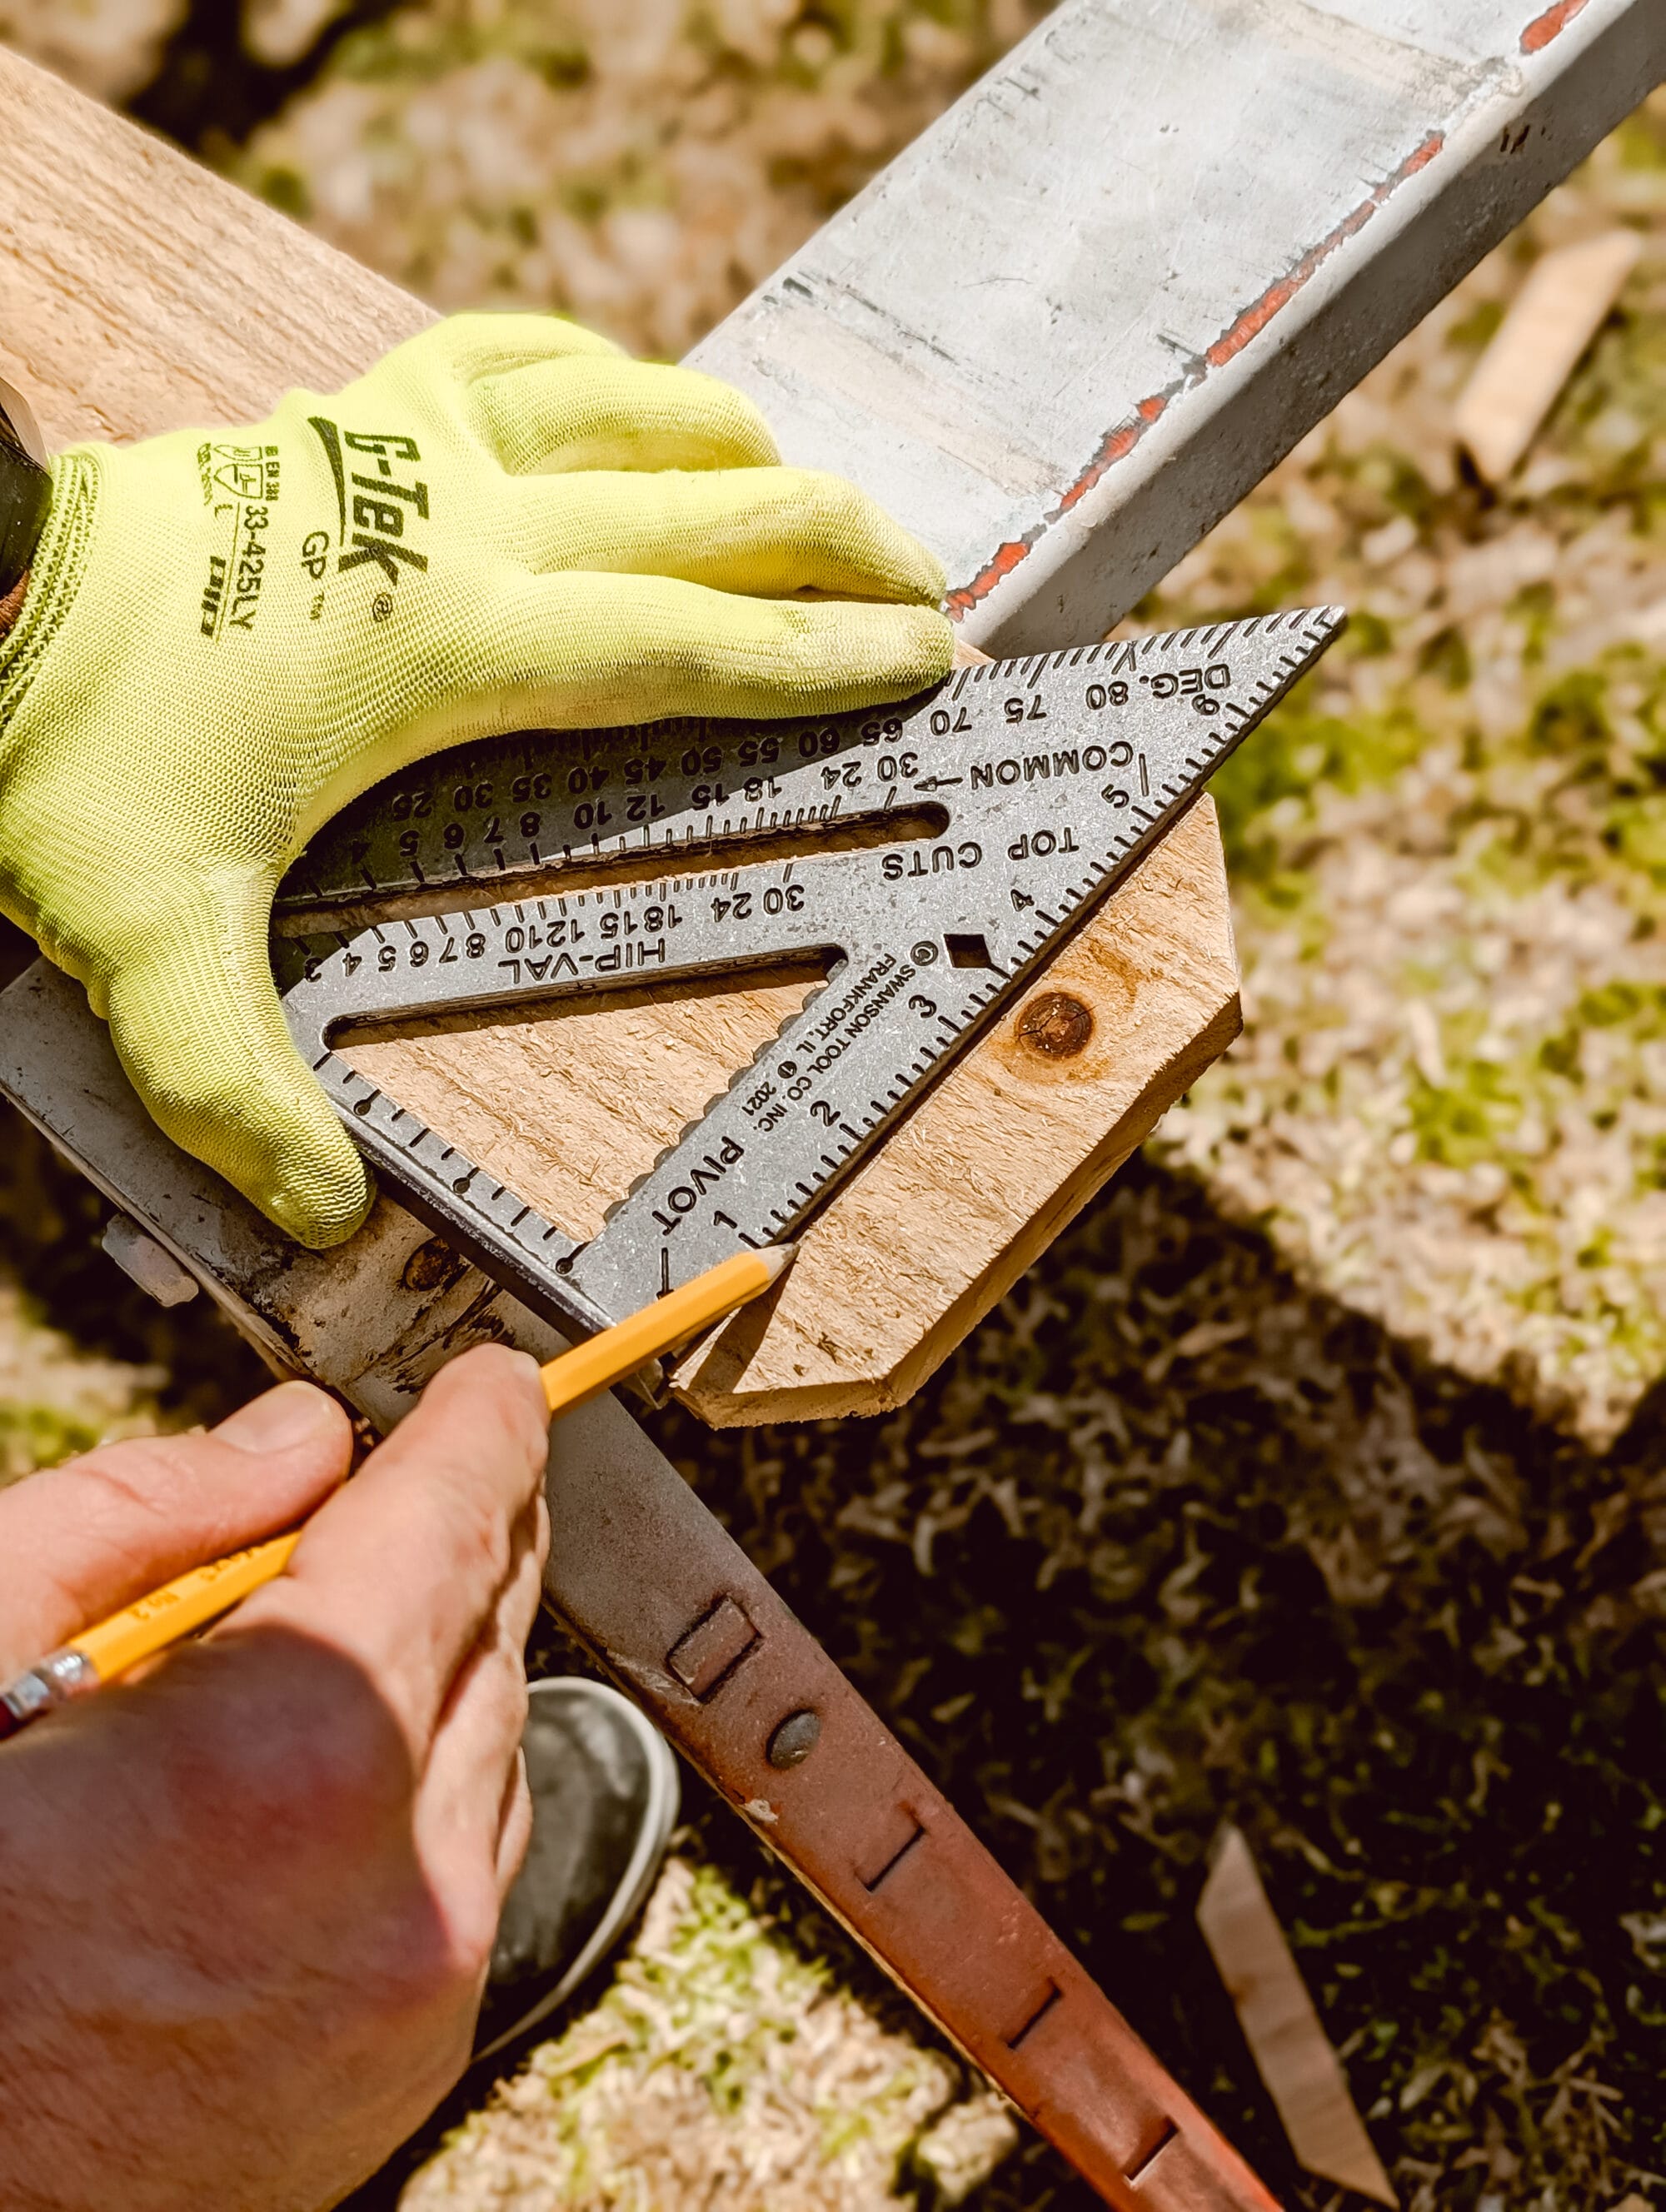
Step 3: cut your 2×4’s into 6 pieces – all 11 inches long
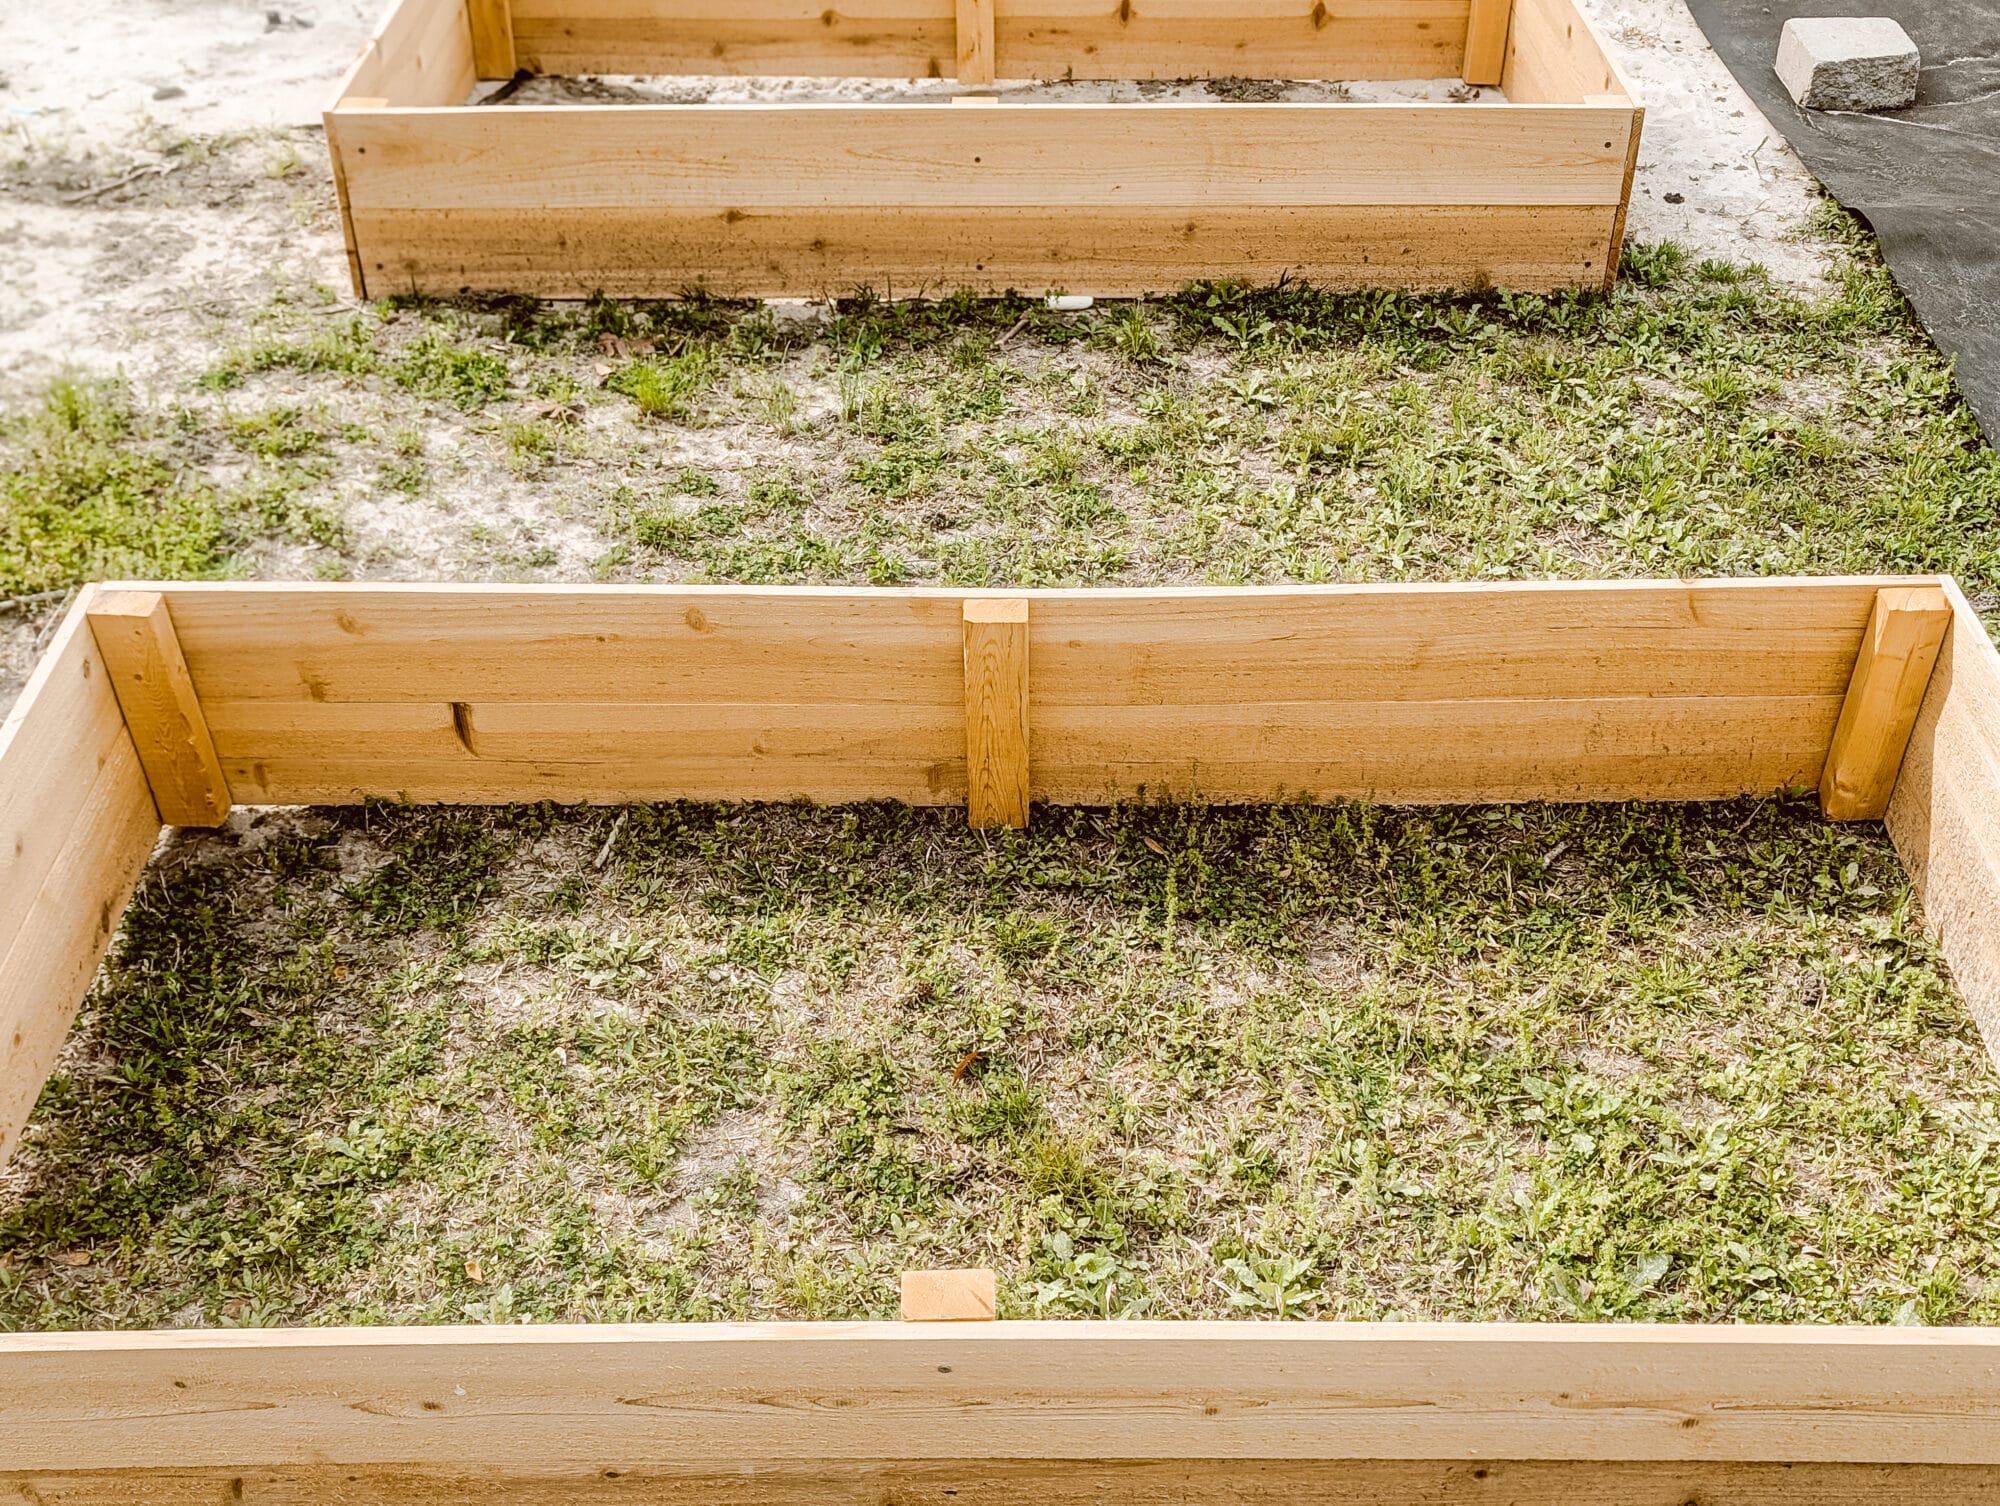
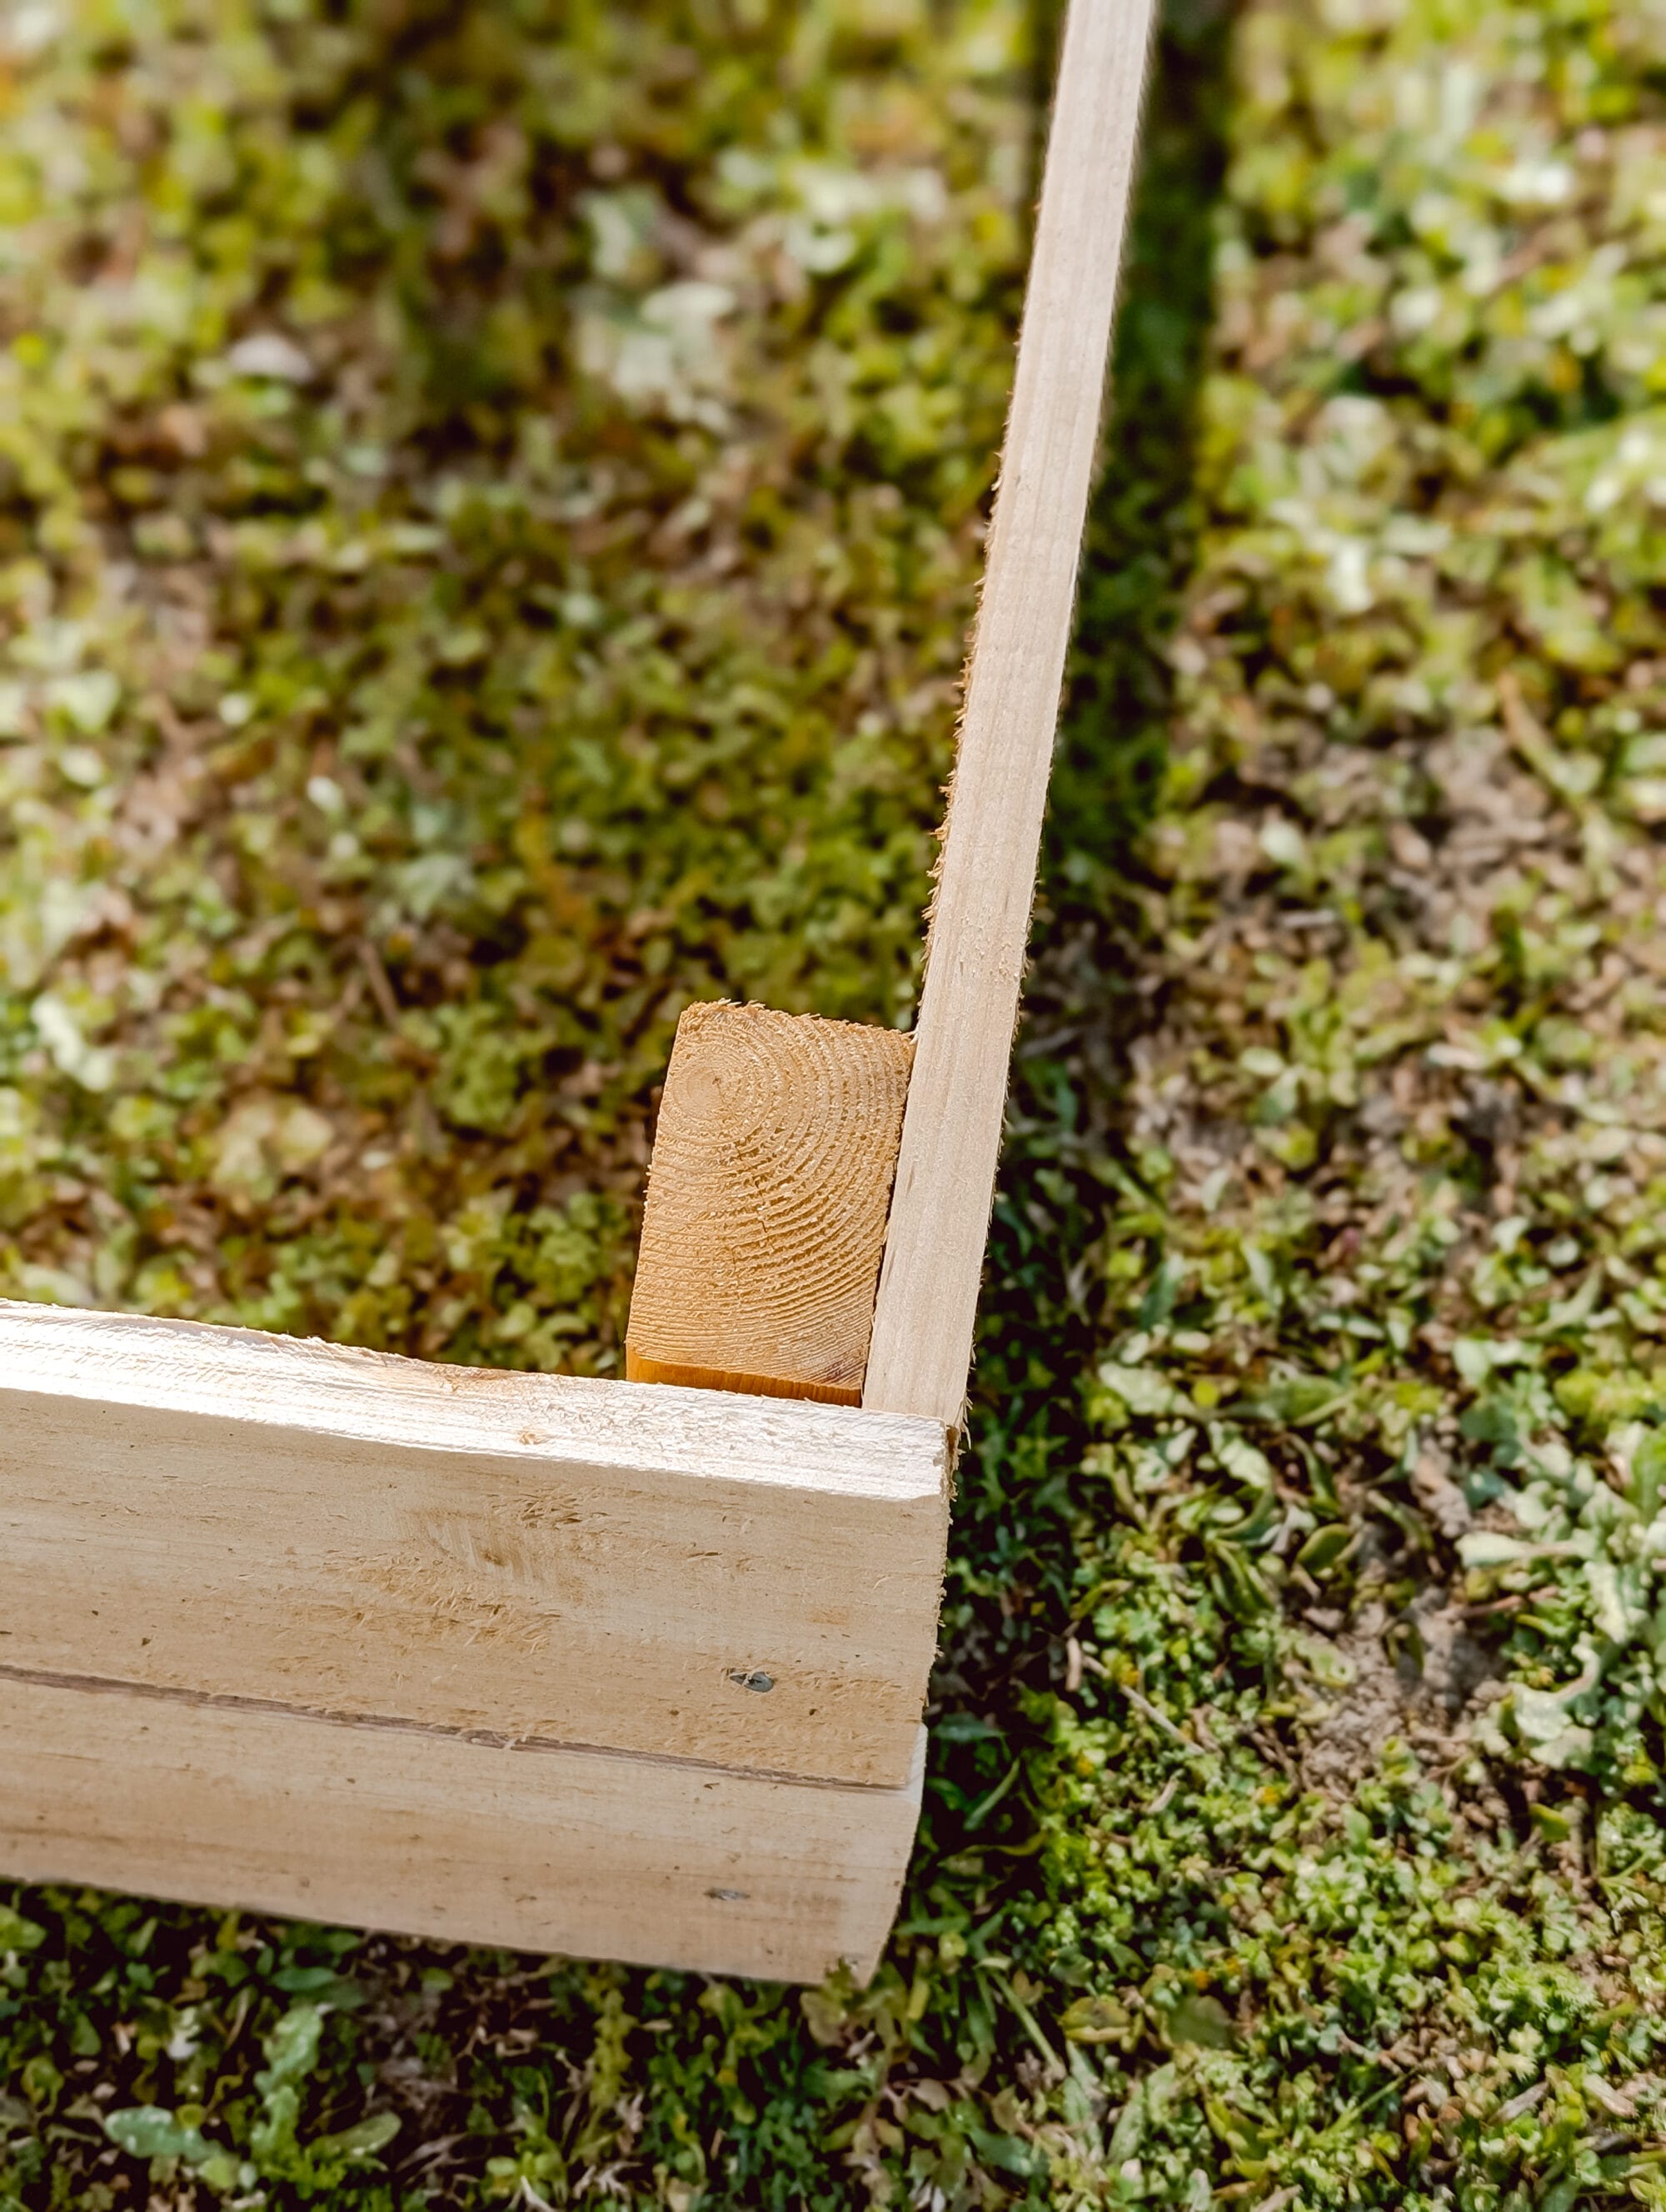
Now let’s move on to the supports! The fence posts are 5.5 inches wide. They will stack 2 high to create an 11 inch deep garden bed. So your supports need to be 11 inches long.
Cut the 2 x 4 into 11 inch long sections. You’ll need 6 of these 11 inch support pieces for your garden bed.
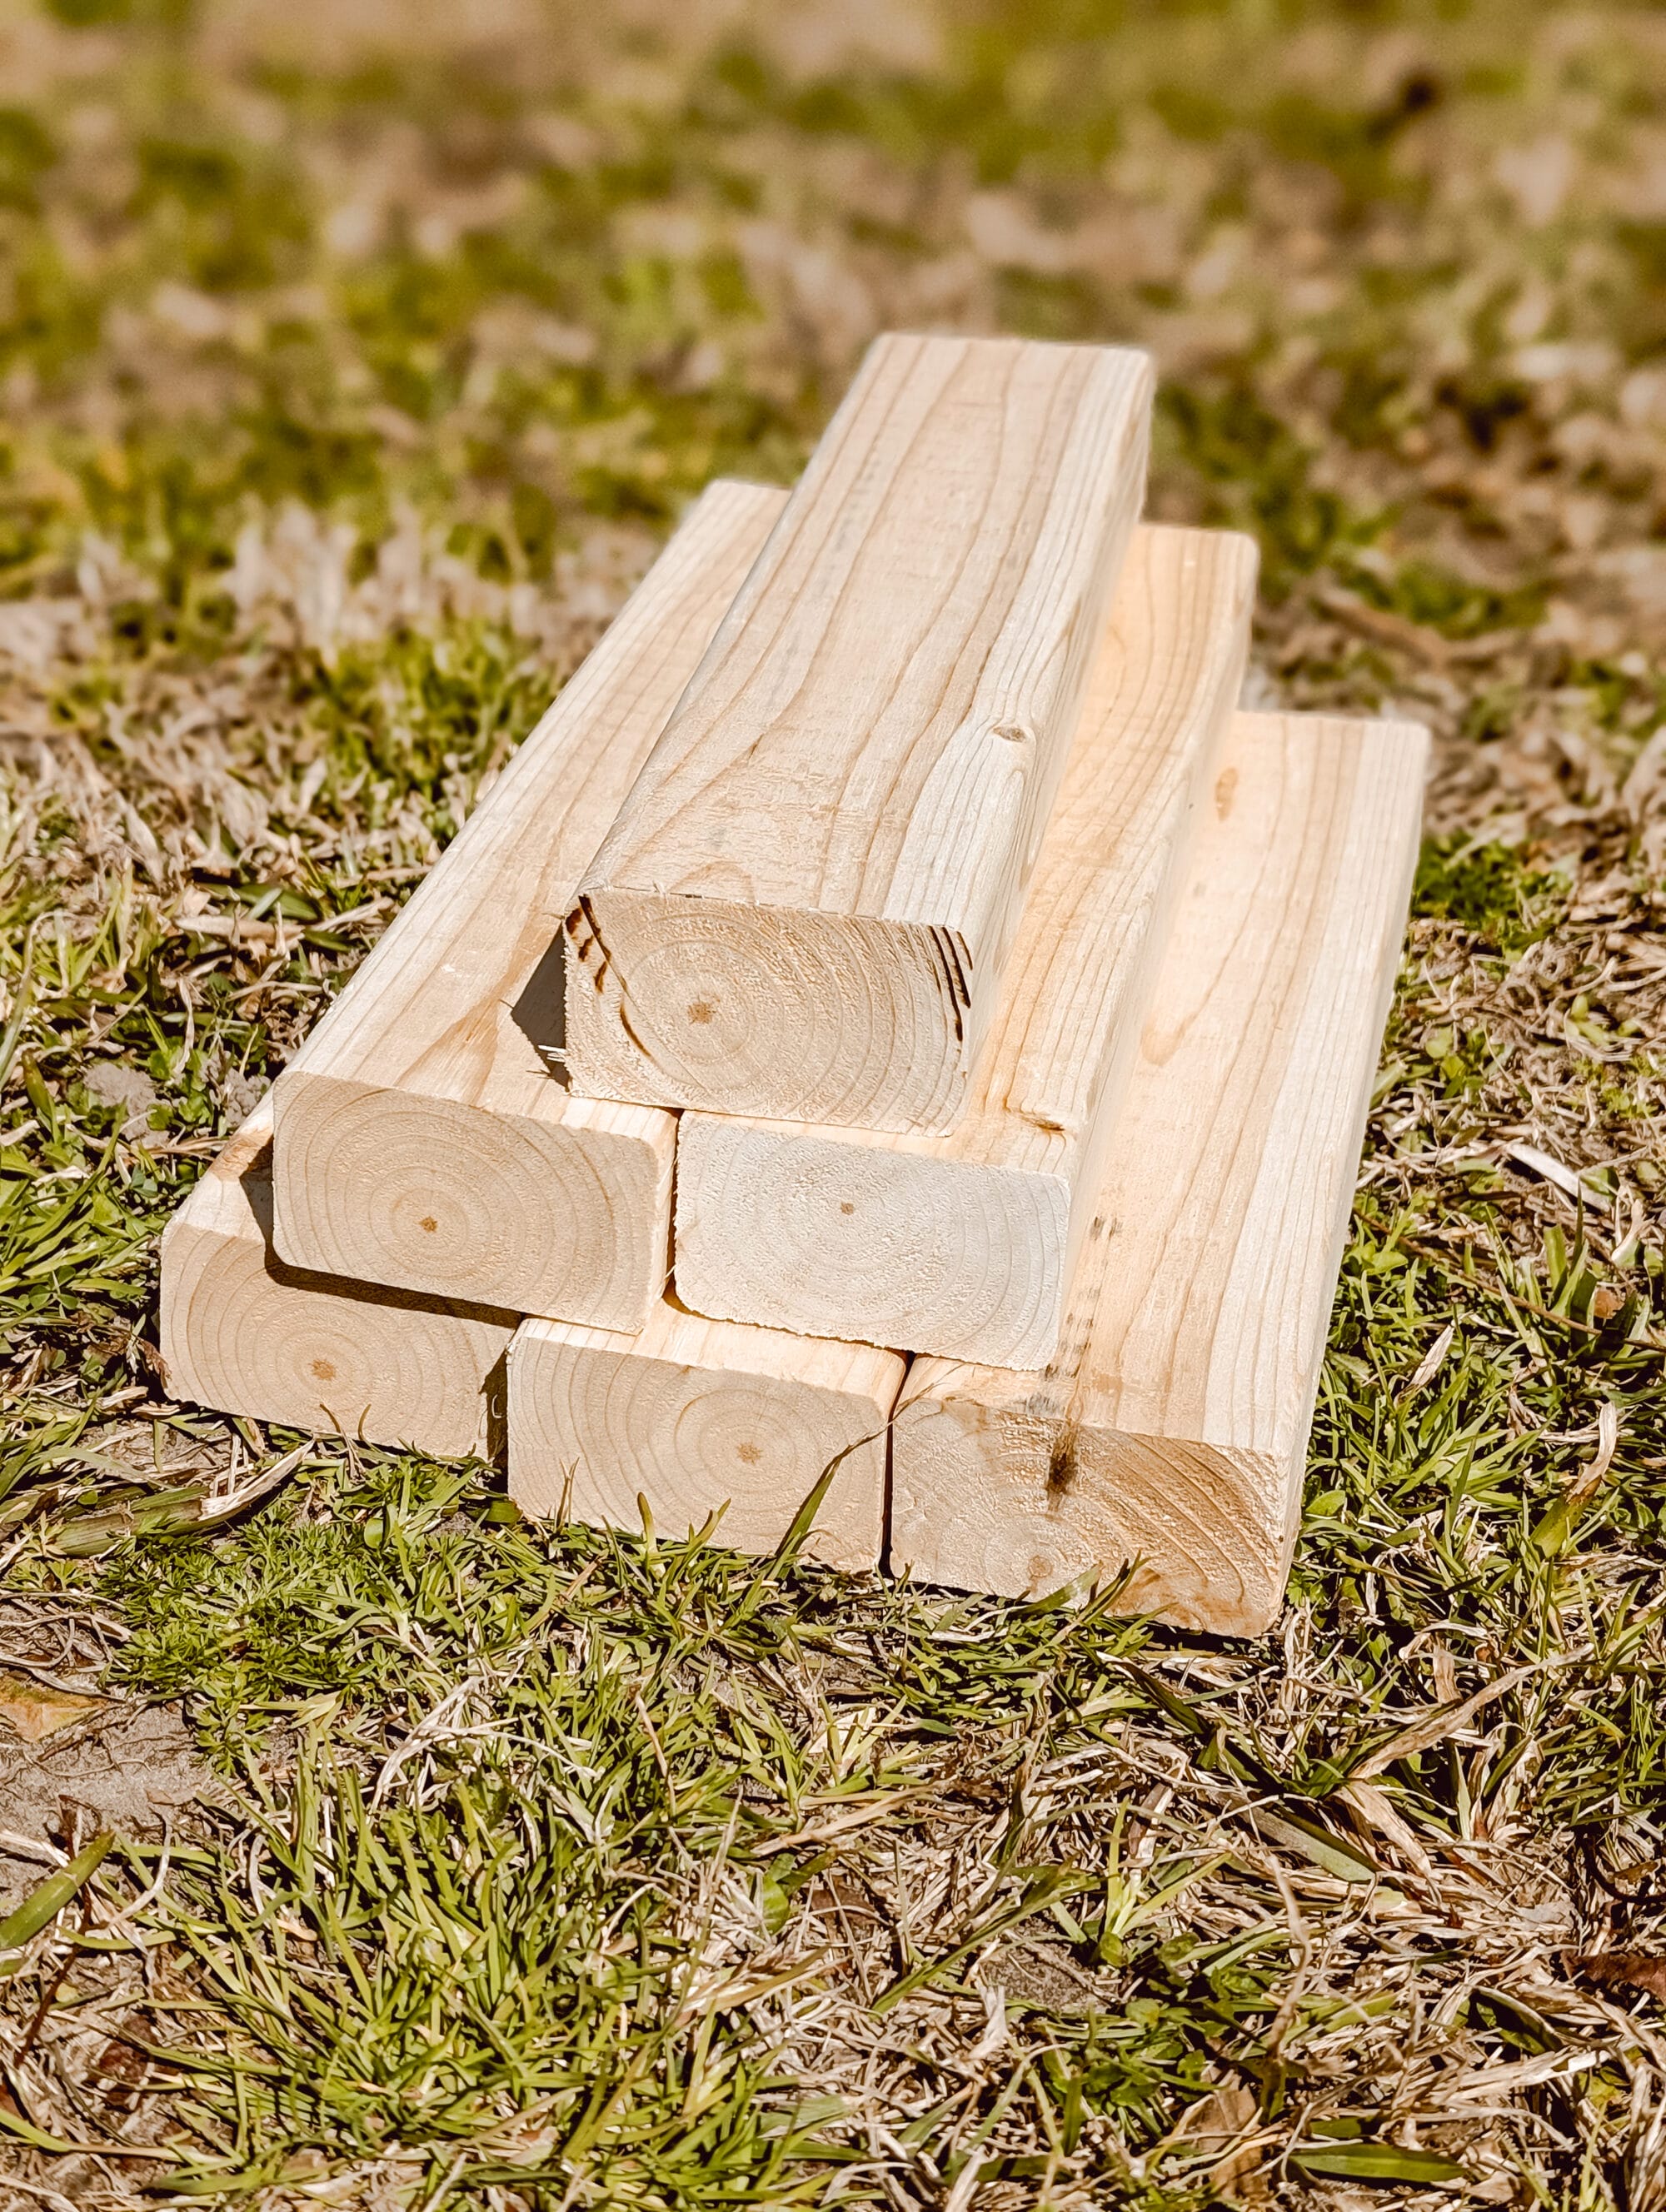
These 11 inch pieces will become the supports that hold your raised beds together. 1 will go in each corner of the bed, and one will go in the middle of each long wall / long side of the garden bed.
Step 4: Assemble the long Side of your Garden Bed
Now it’s time to assemble. First you’ll put the long side of your garden bed together.
Lay two of the 6 foot long fence pickets flat on the ground, with one positioned above the other. These two boards will create one long side of your raised bed.
To join the two fence pickets together and form the wall, you’ll want to attach 3 of the support boards you cut in step 3 to the fence pickets.

The support boards should be evenly spaced with one in the center and the other two at each end of the fence pickets.
Use a drill to and the 2 inch wood screws to secure the fence pickets to the support boards.
This side is now done.
Step 5: Repeat Step 4 to assemble the other long side of the bed
Repeat step 4 to create the other long side of your garden bed. You’ll use the 2 remaining 6-foot long fence pickets and the 3 remaining support boards.
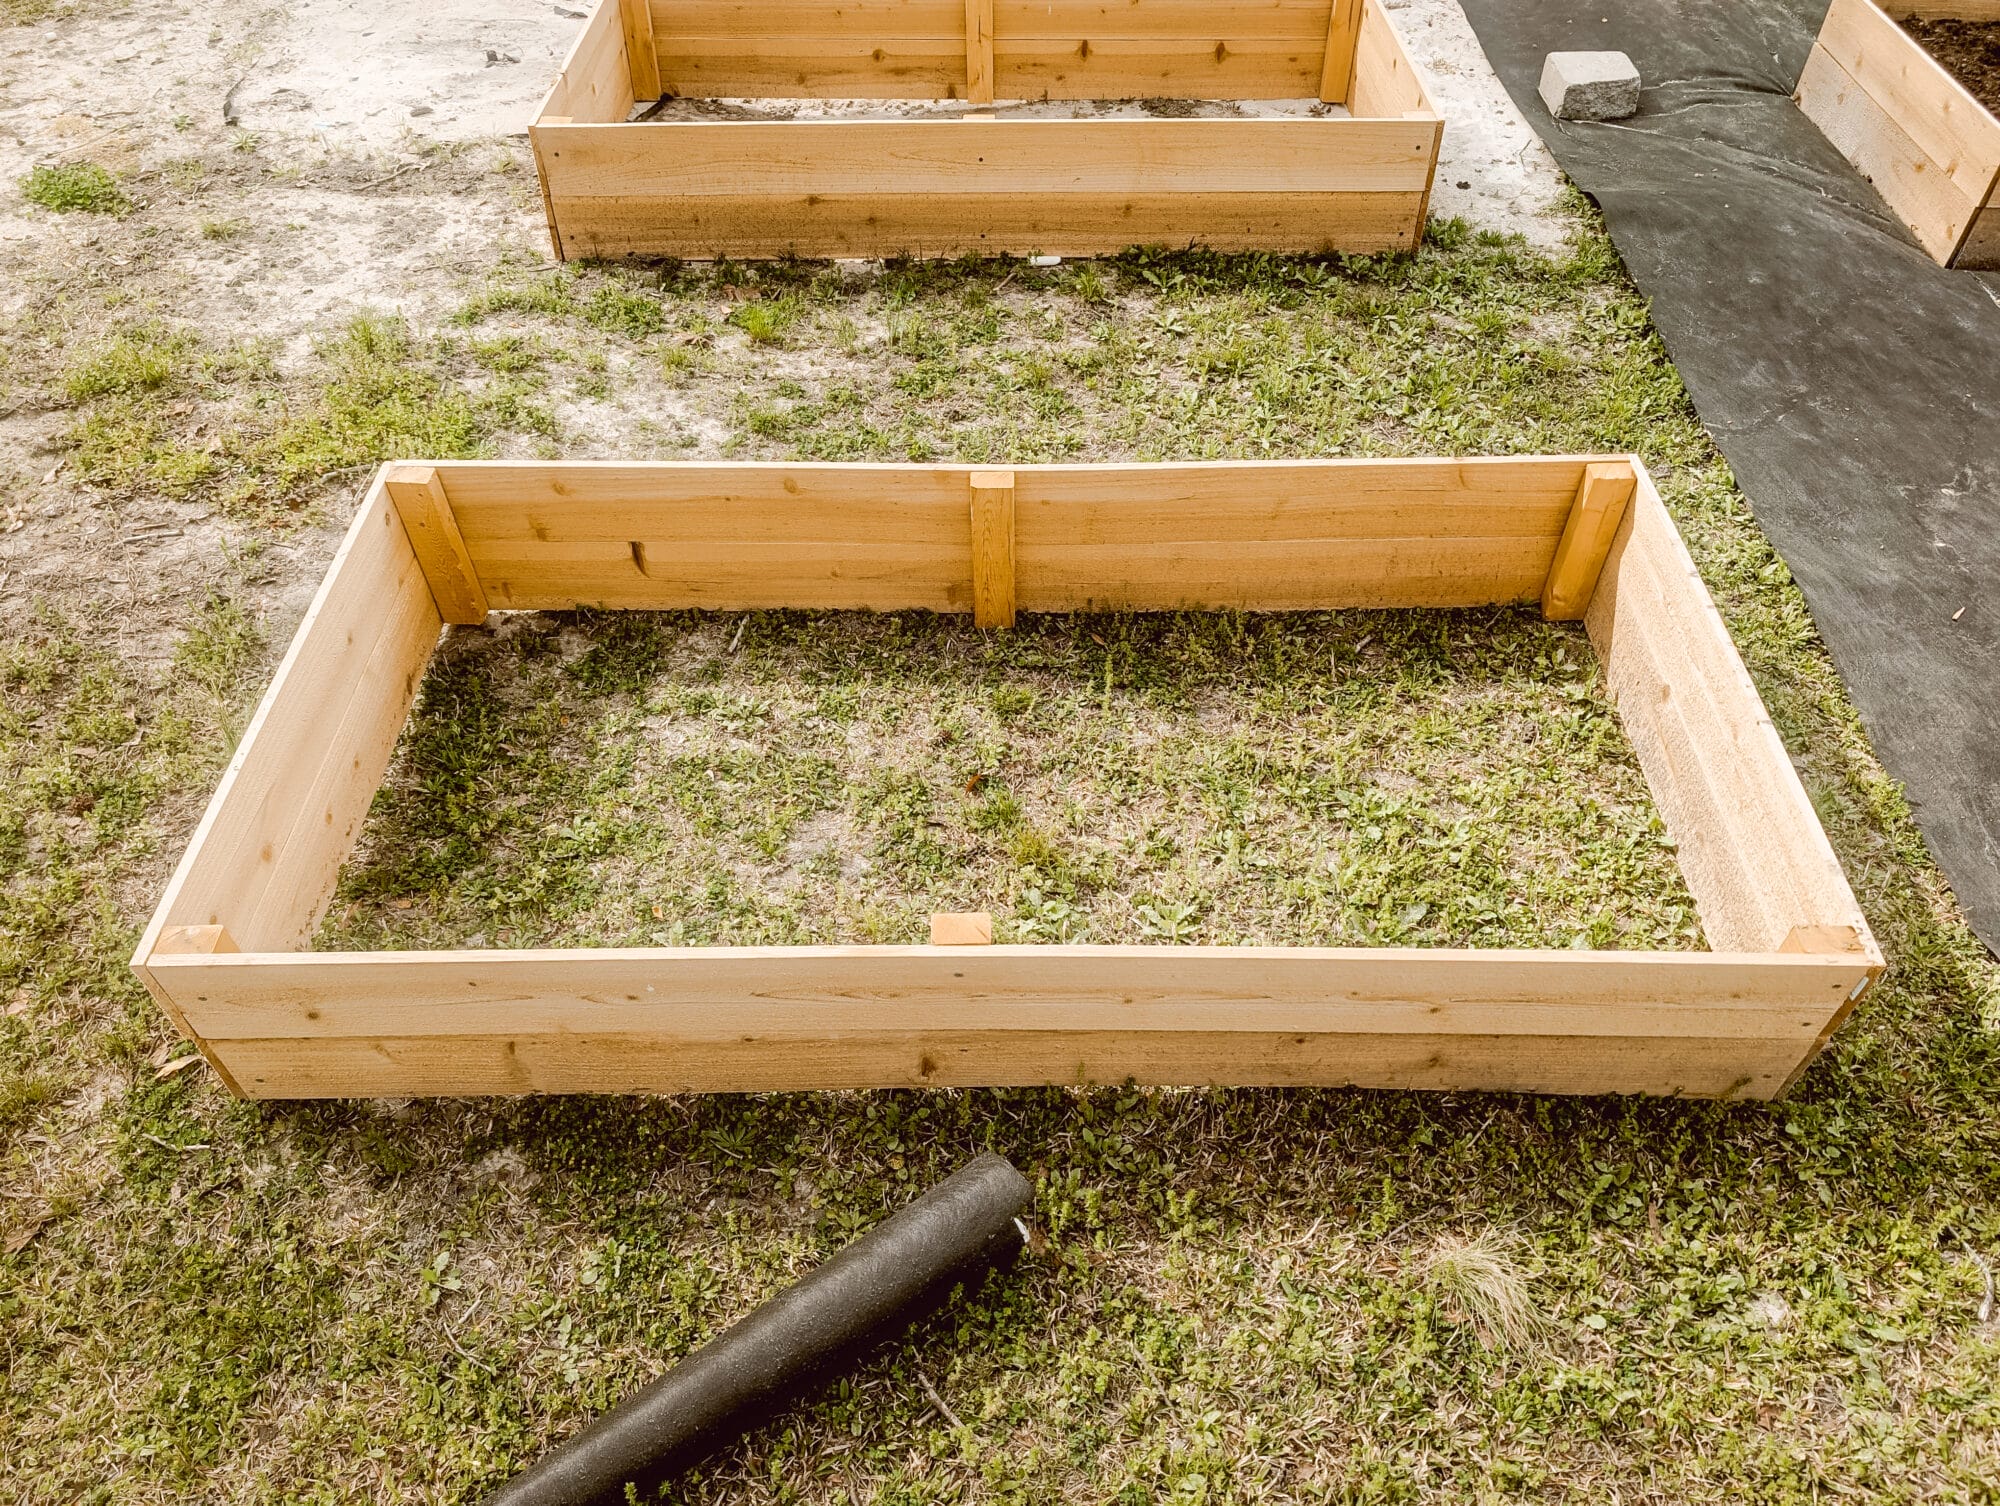
Step 6: Assemble the shorter sides of your raised bed
Now that the long sides are all built, you will need to attach the 3 foot long fence pickets to create the side walls.
The 2 fence pickets that you cut in half will make up the side walls of your garden bed.
Stand up the long side of your bed (the section you assembled in steps 4 and 5), and position one of the shorter fence pickets perpendicular to the long side. It should make an “L” shape with the already assembled side.
Use your drill and a few screws to secure the 3 foot fence picket to the support boards you added on each end of the 6 foot fence pickets.
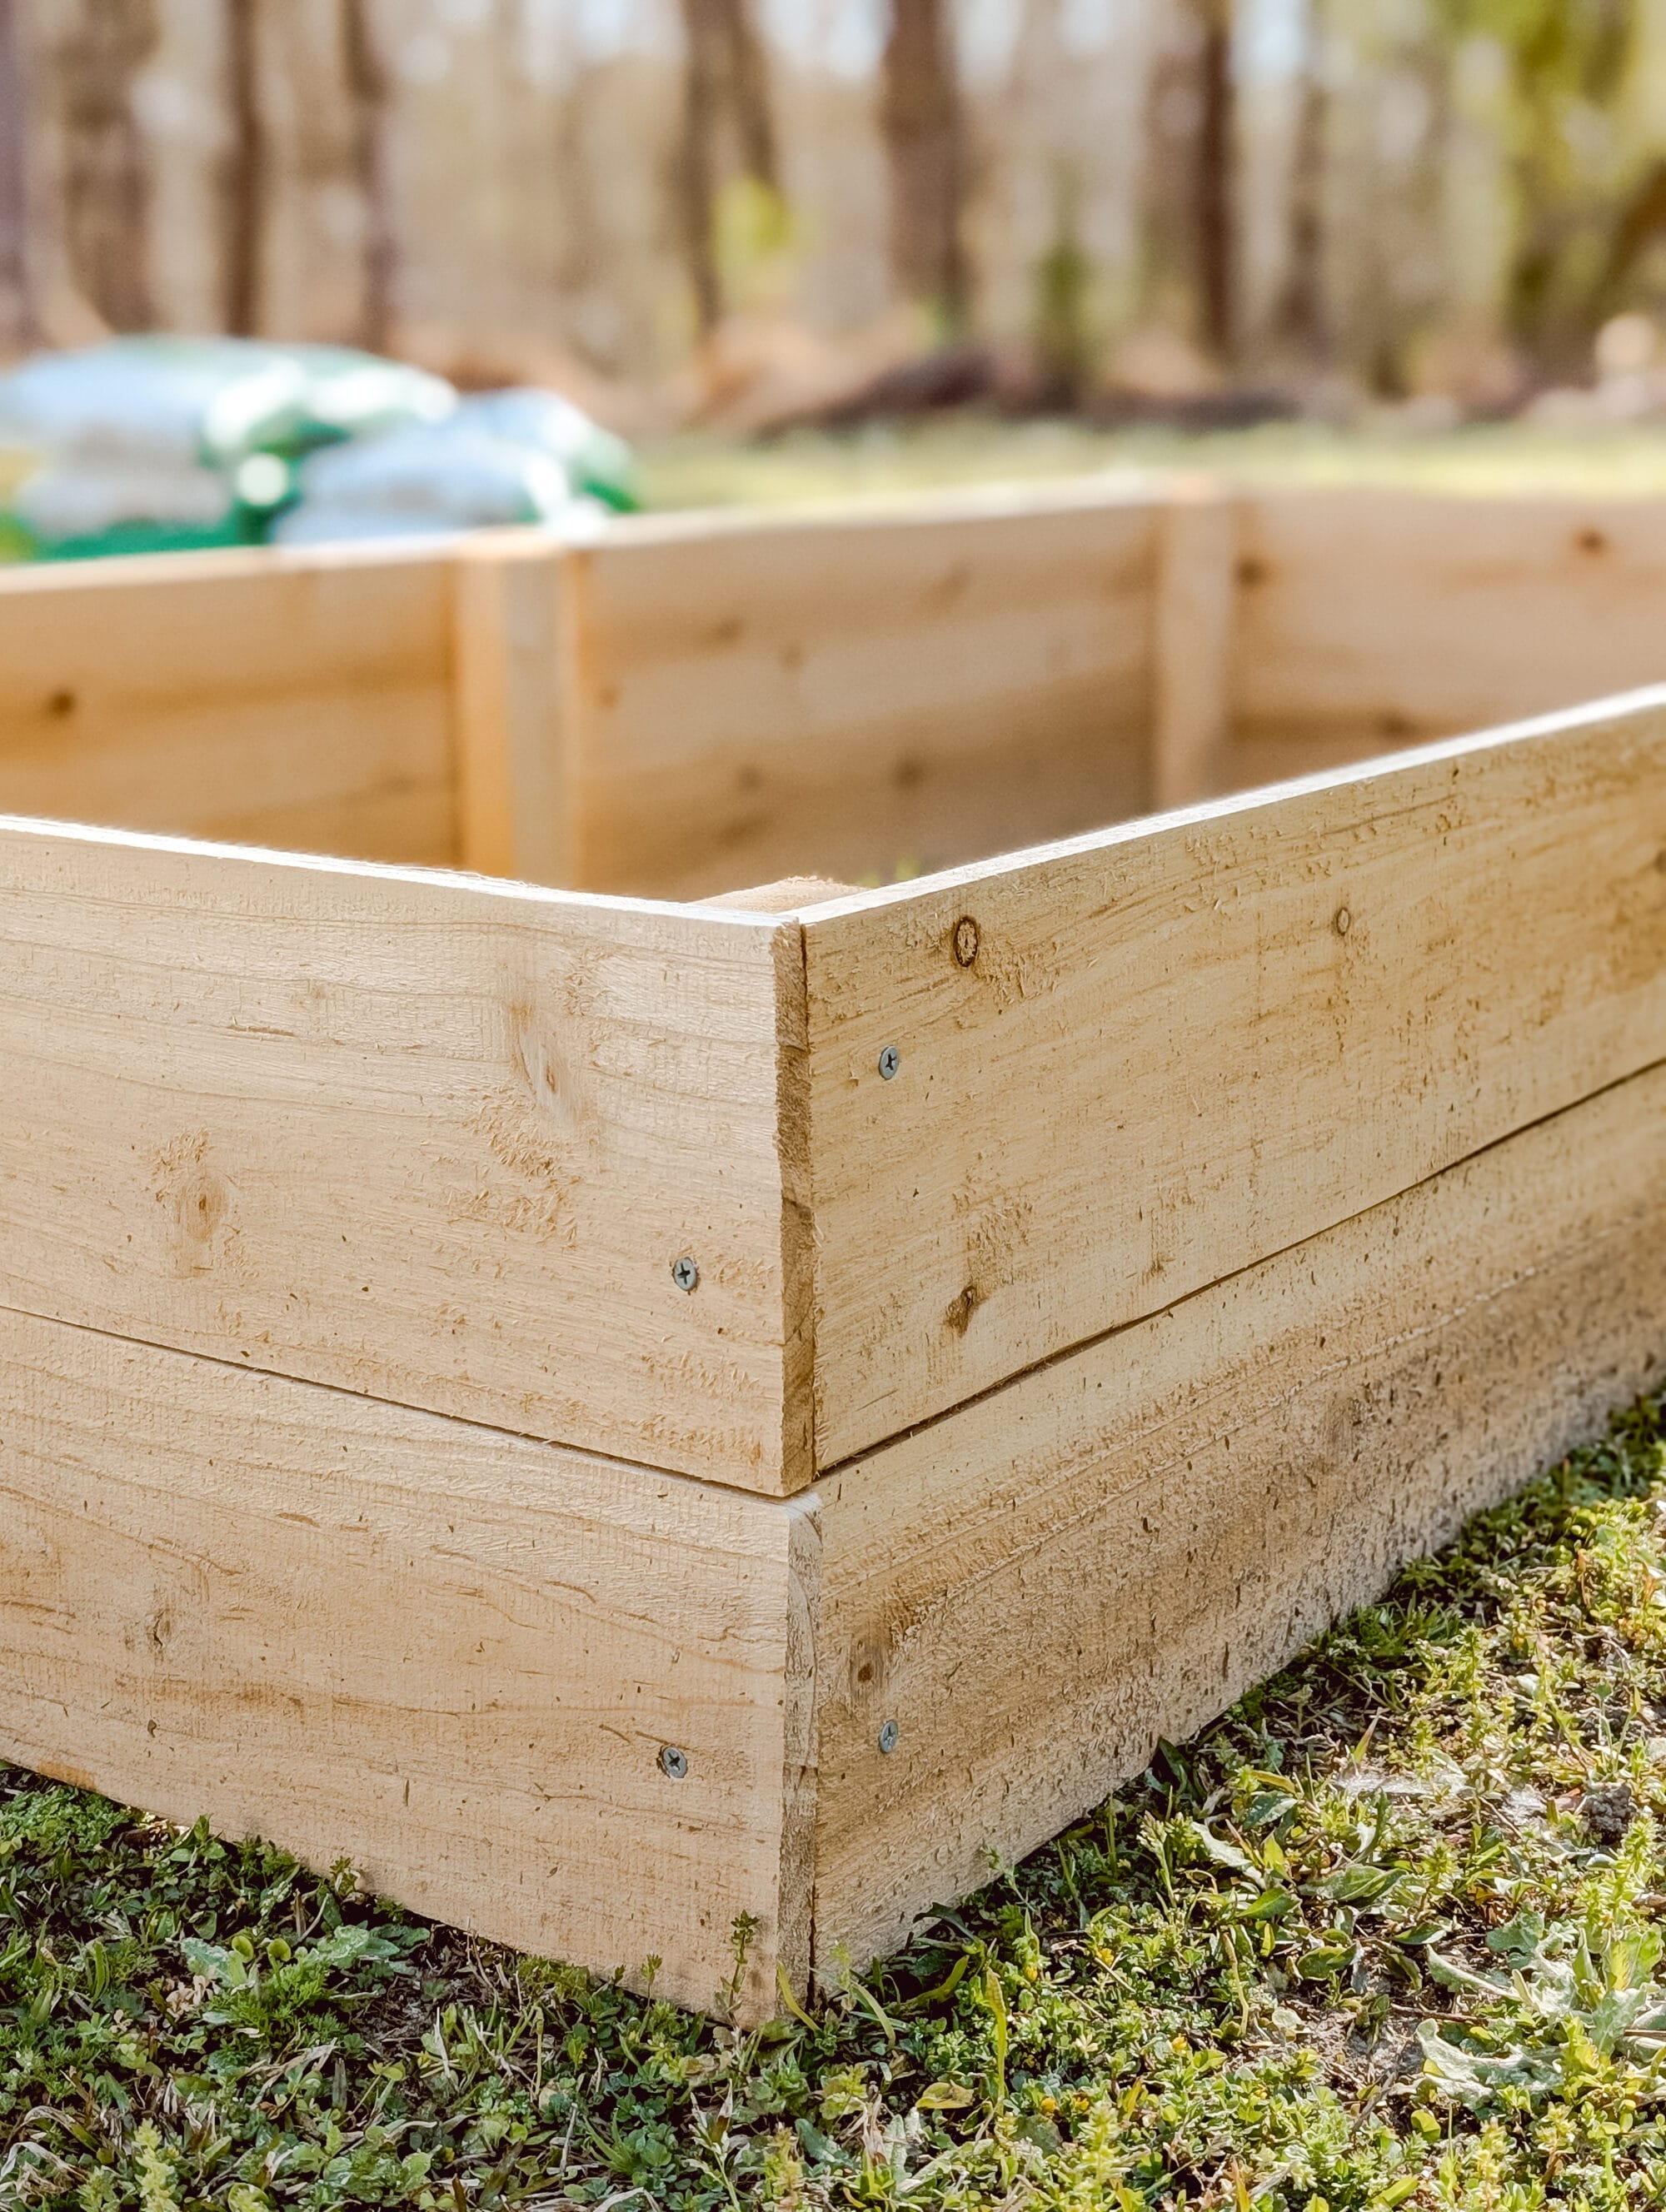
Continue this process until all 4 of your 3 foot fence pickets are attached.
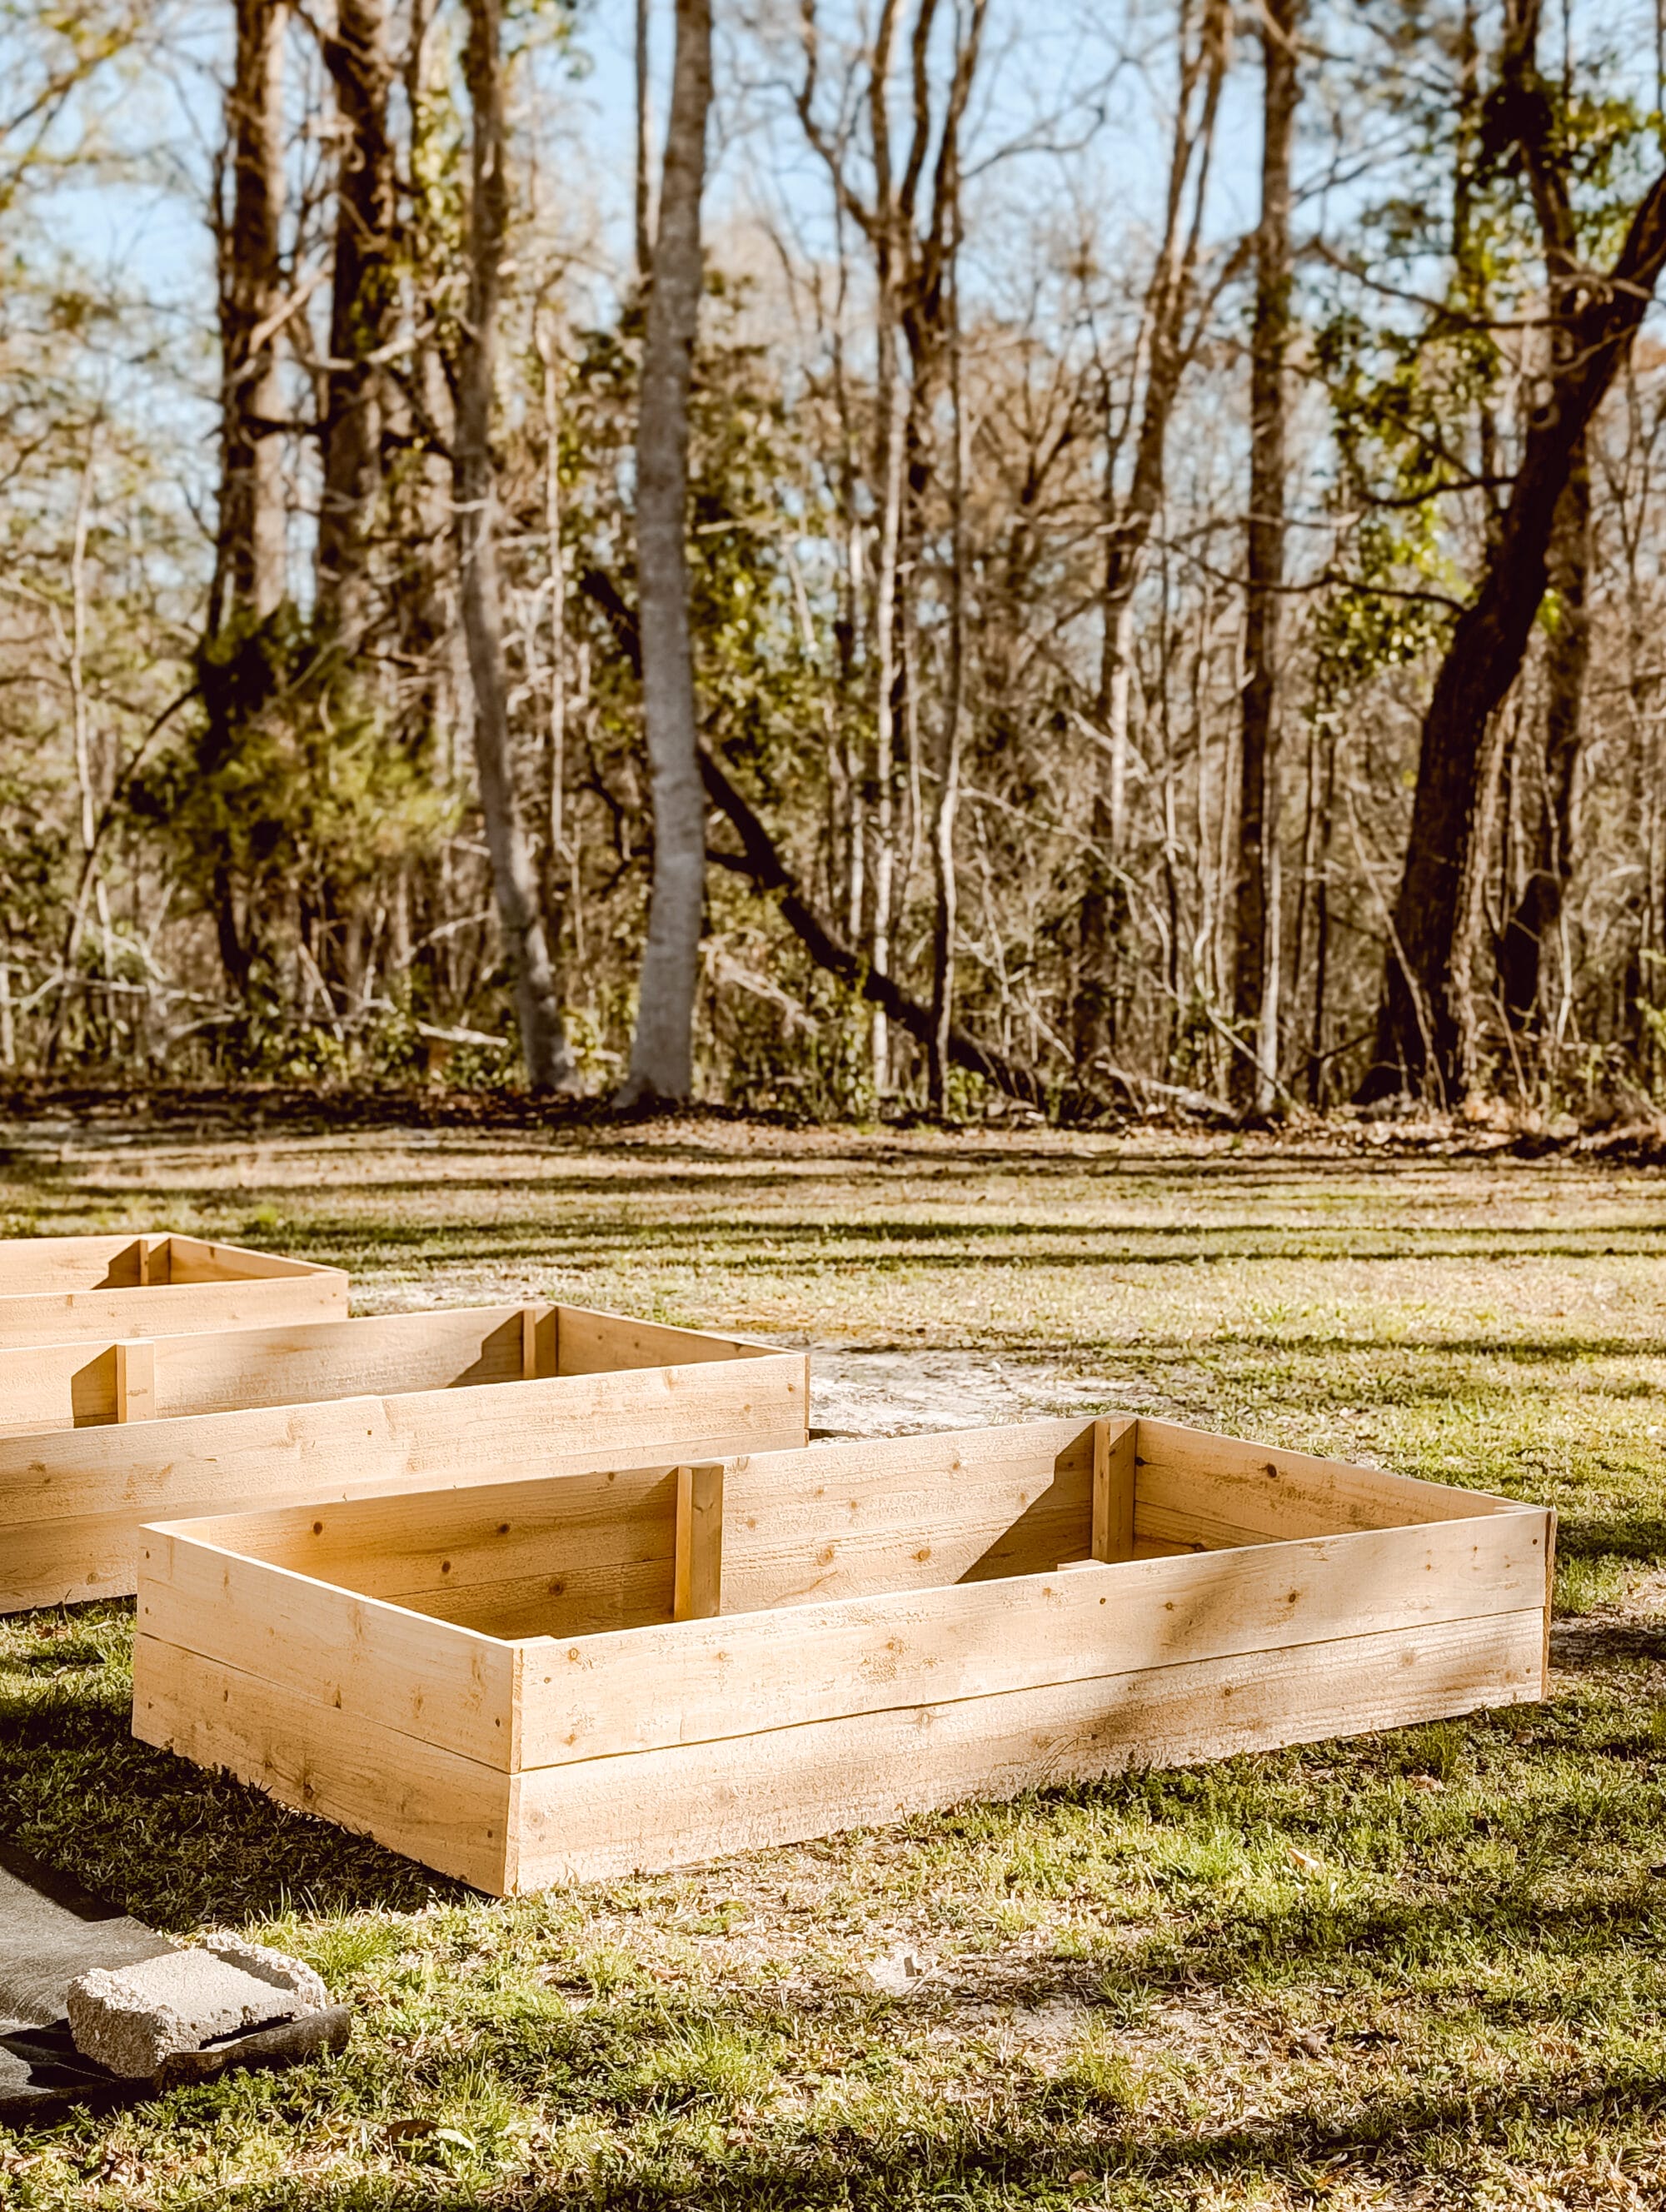
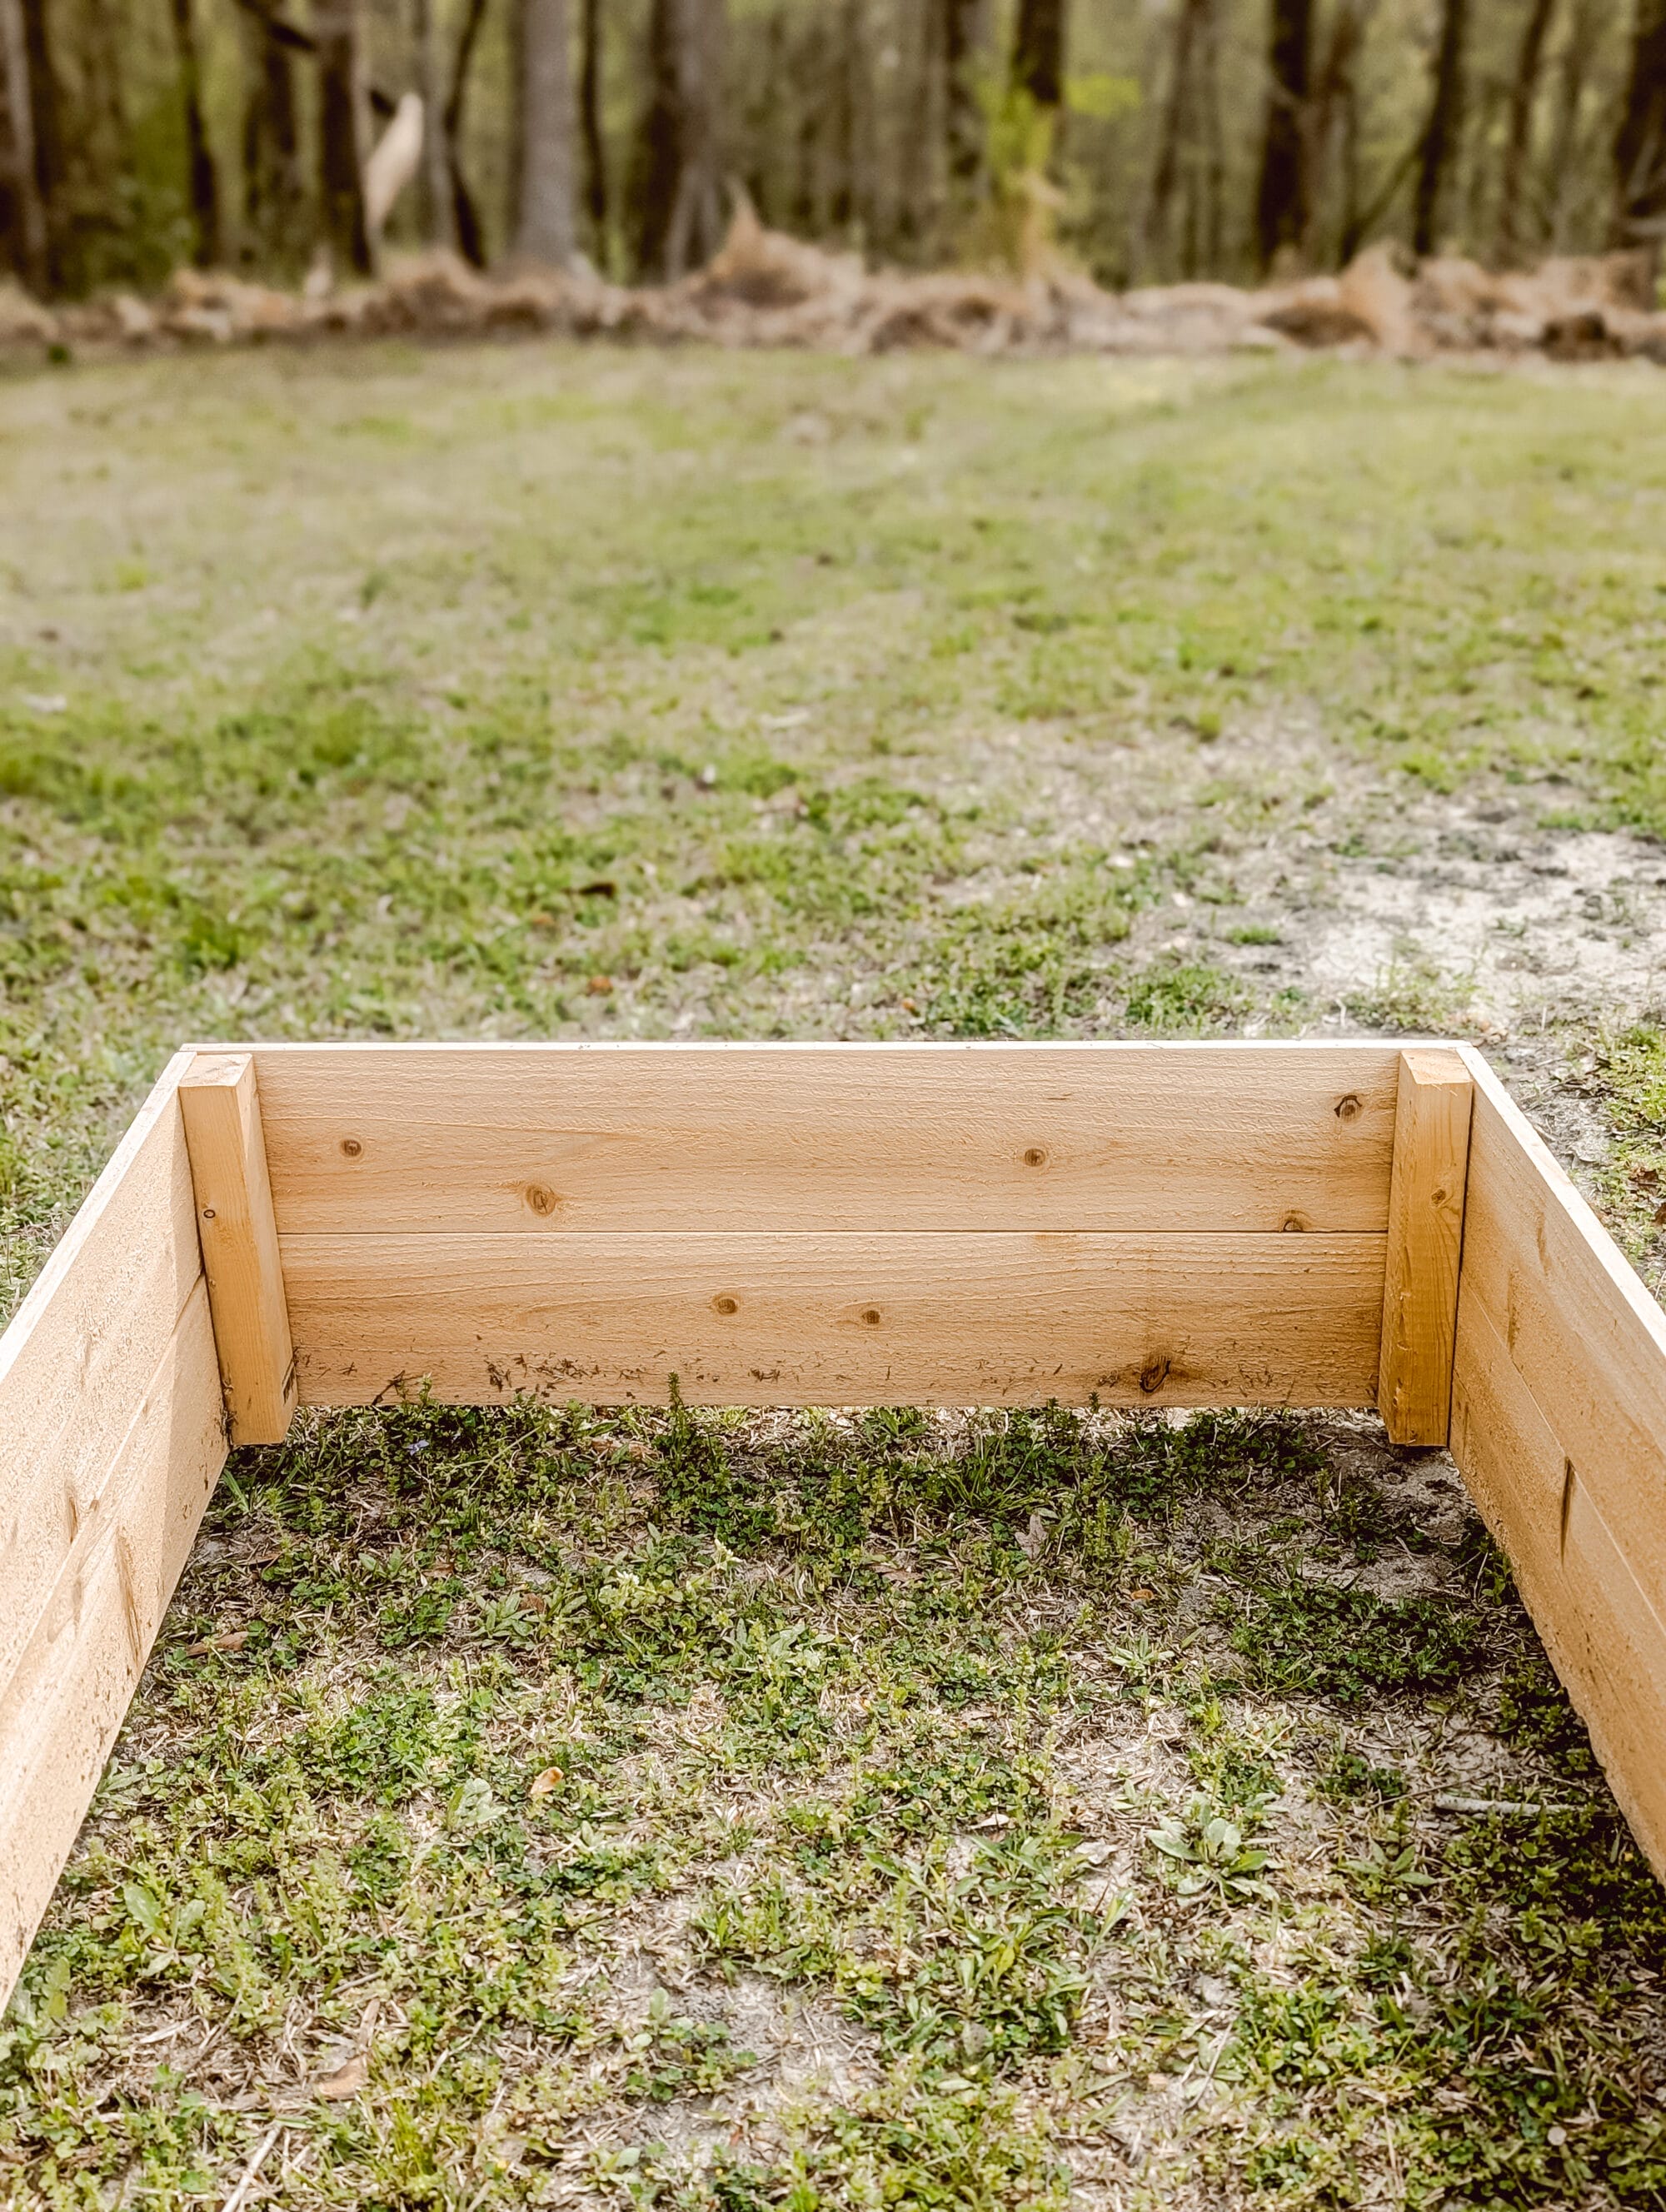
And there you have it. You’ve built your very own budget-friendly cedar raised garden beds!
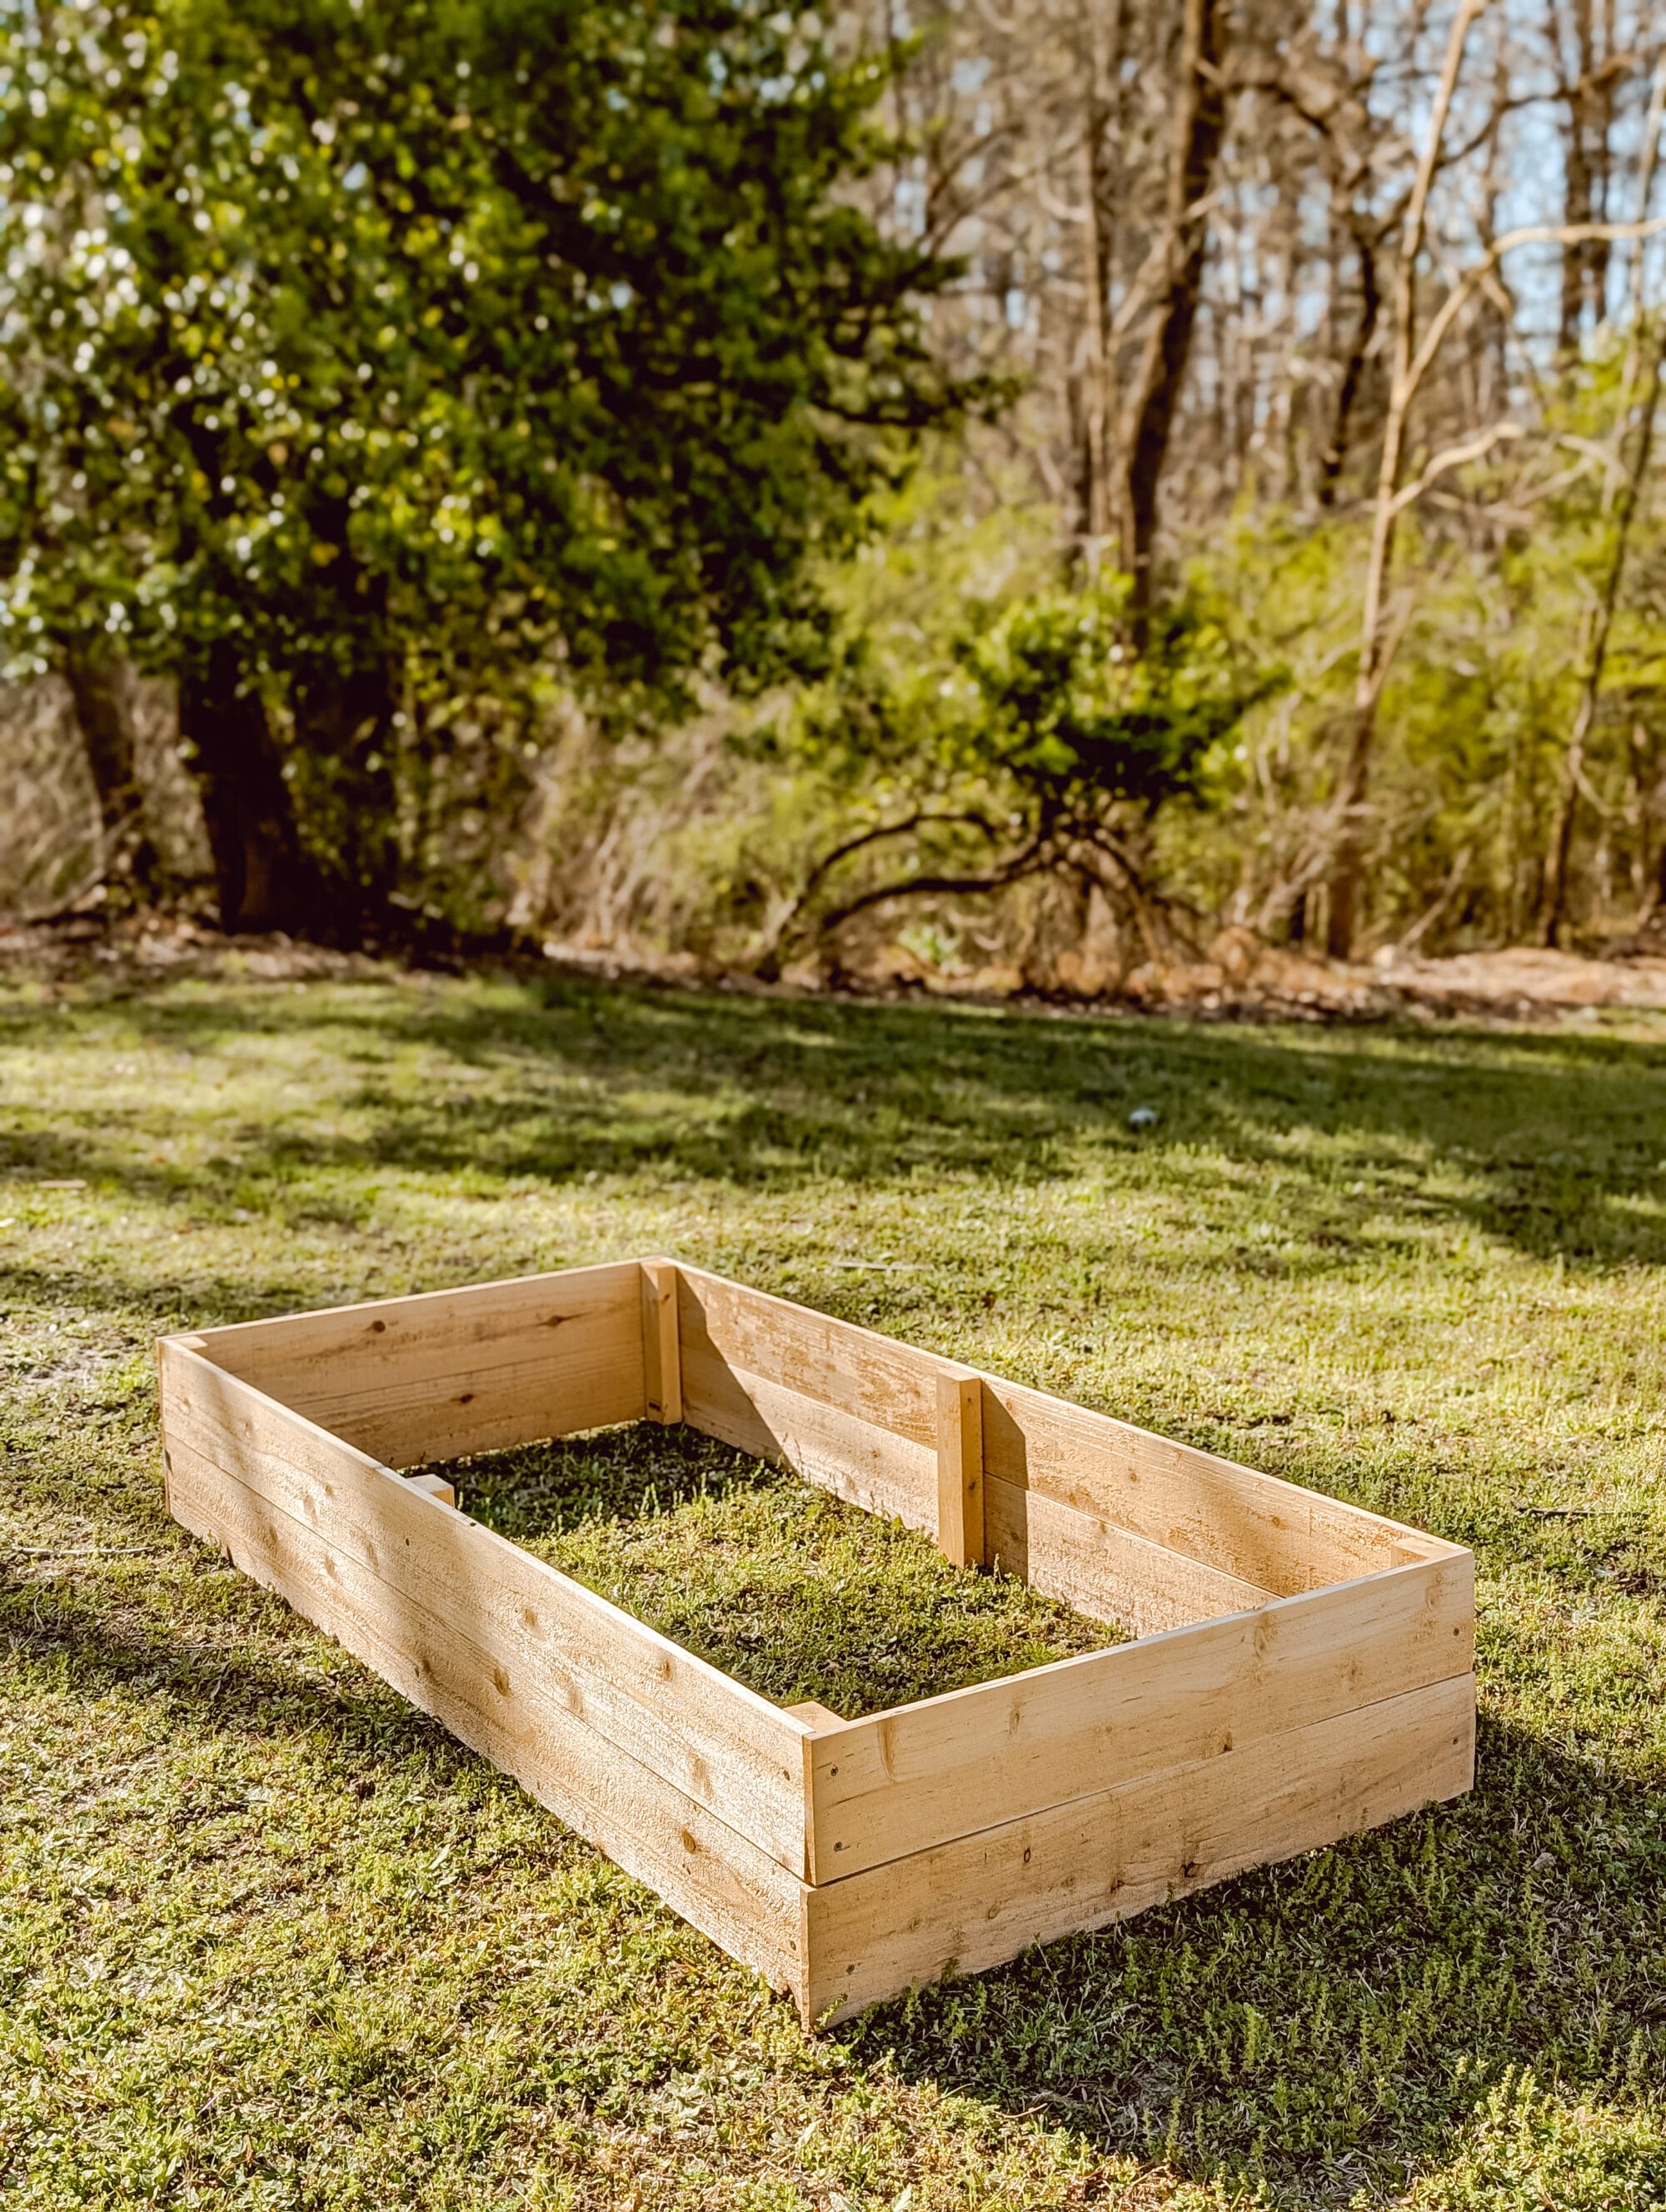
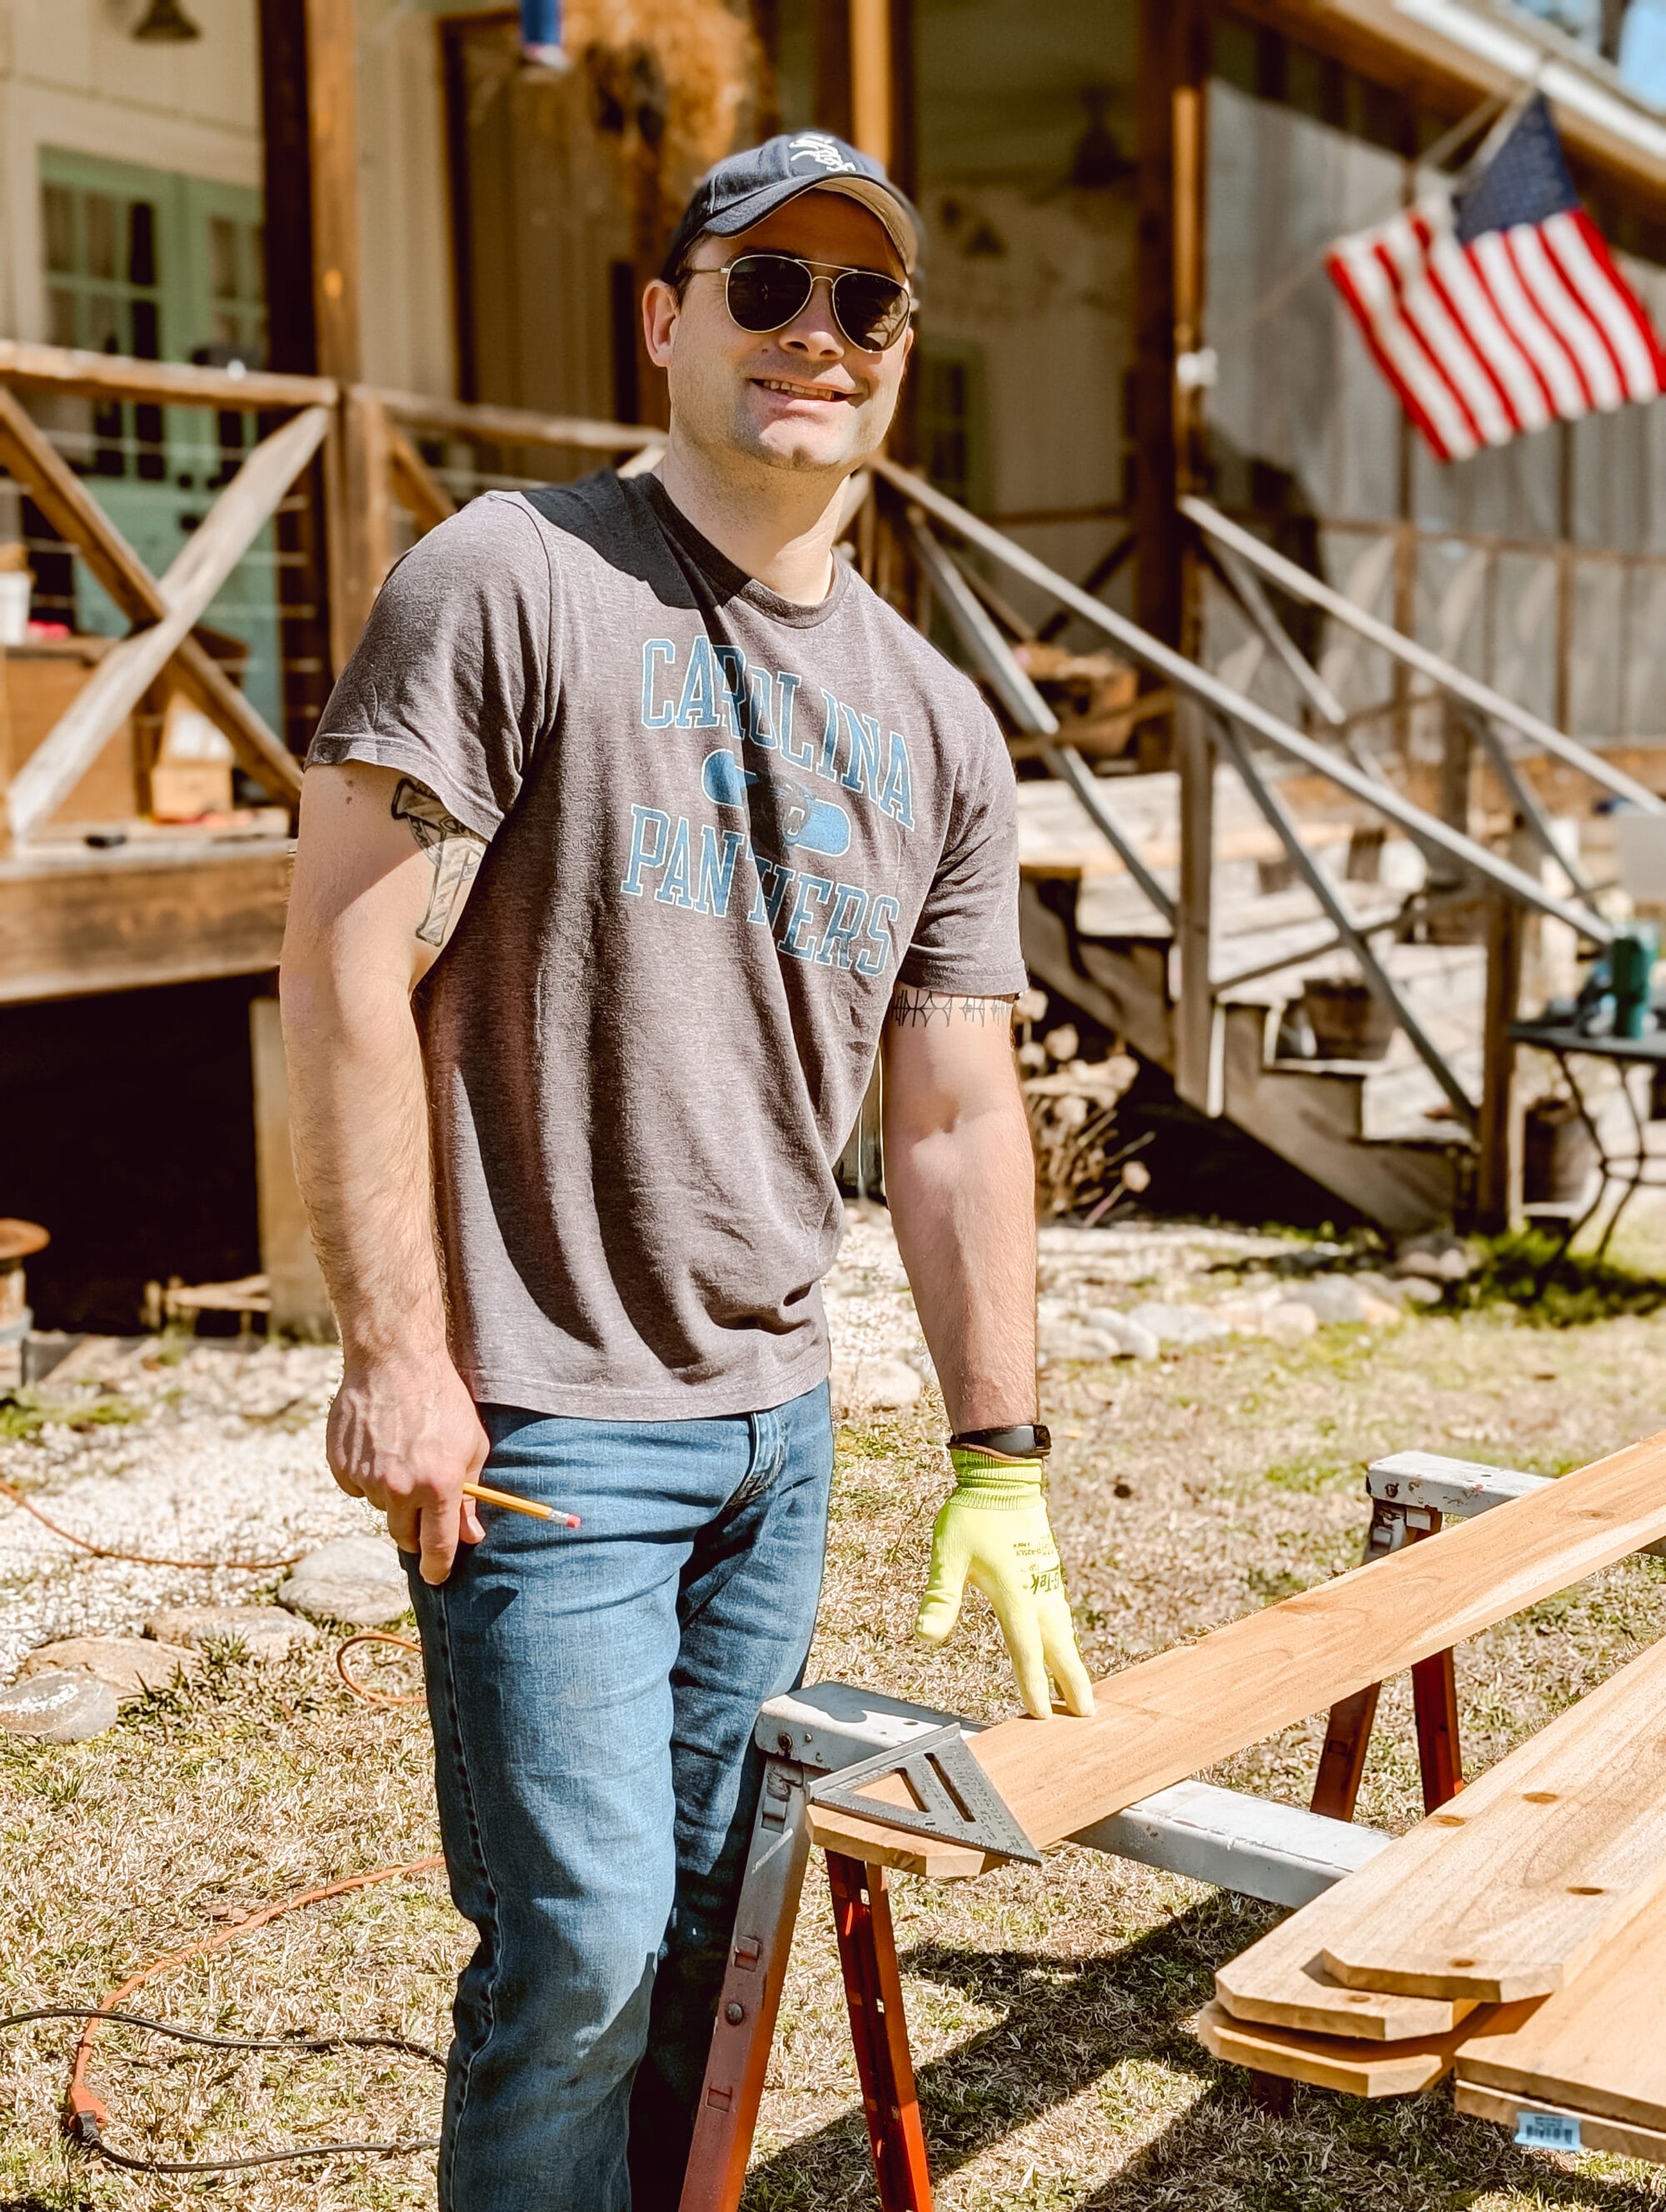
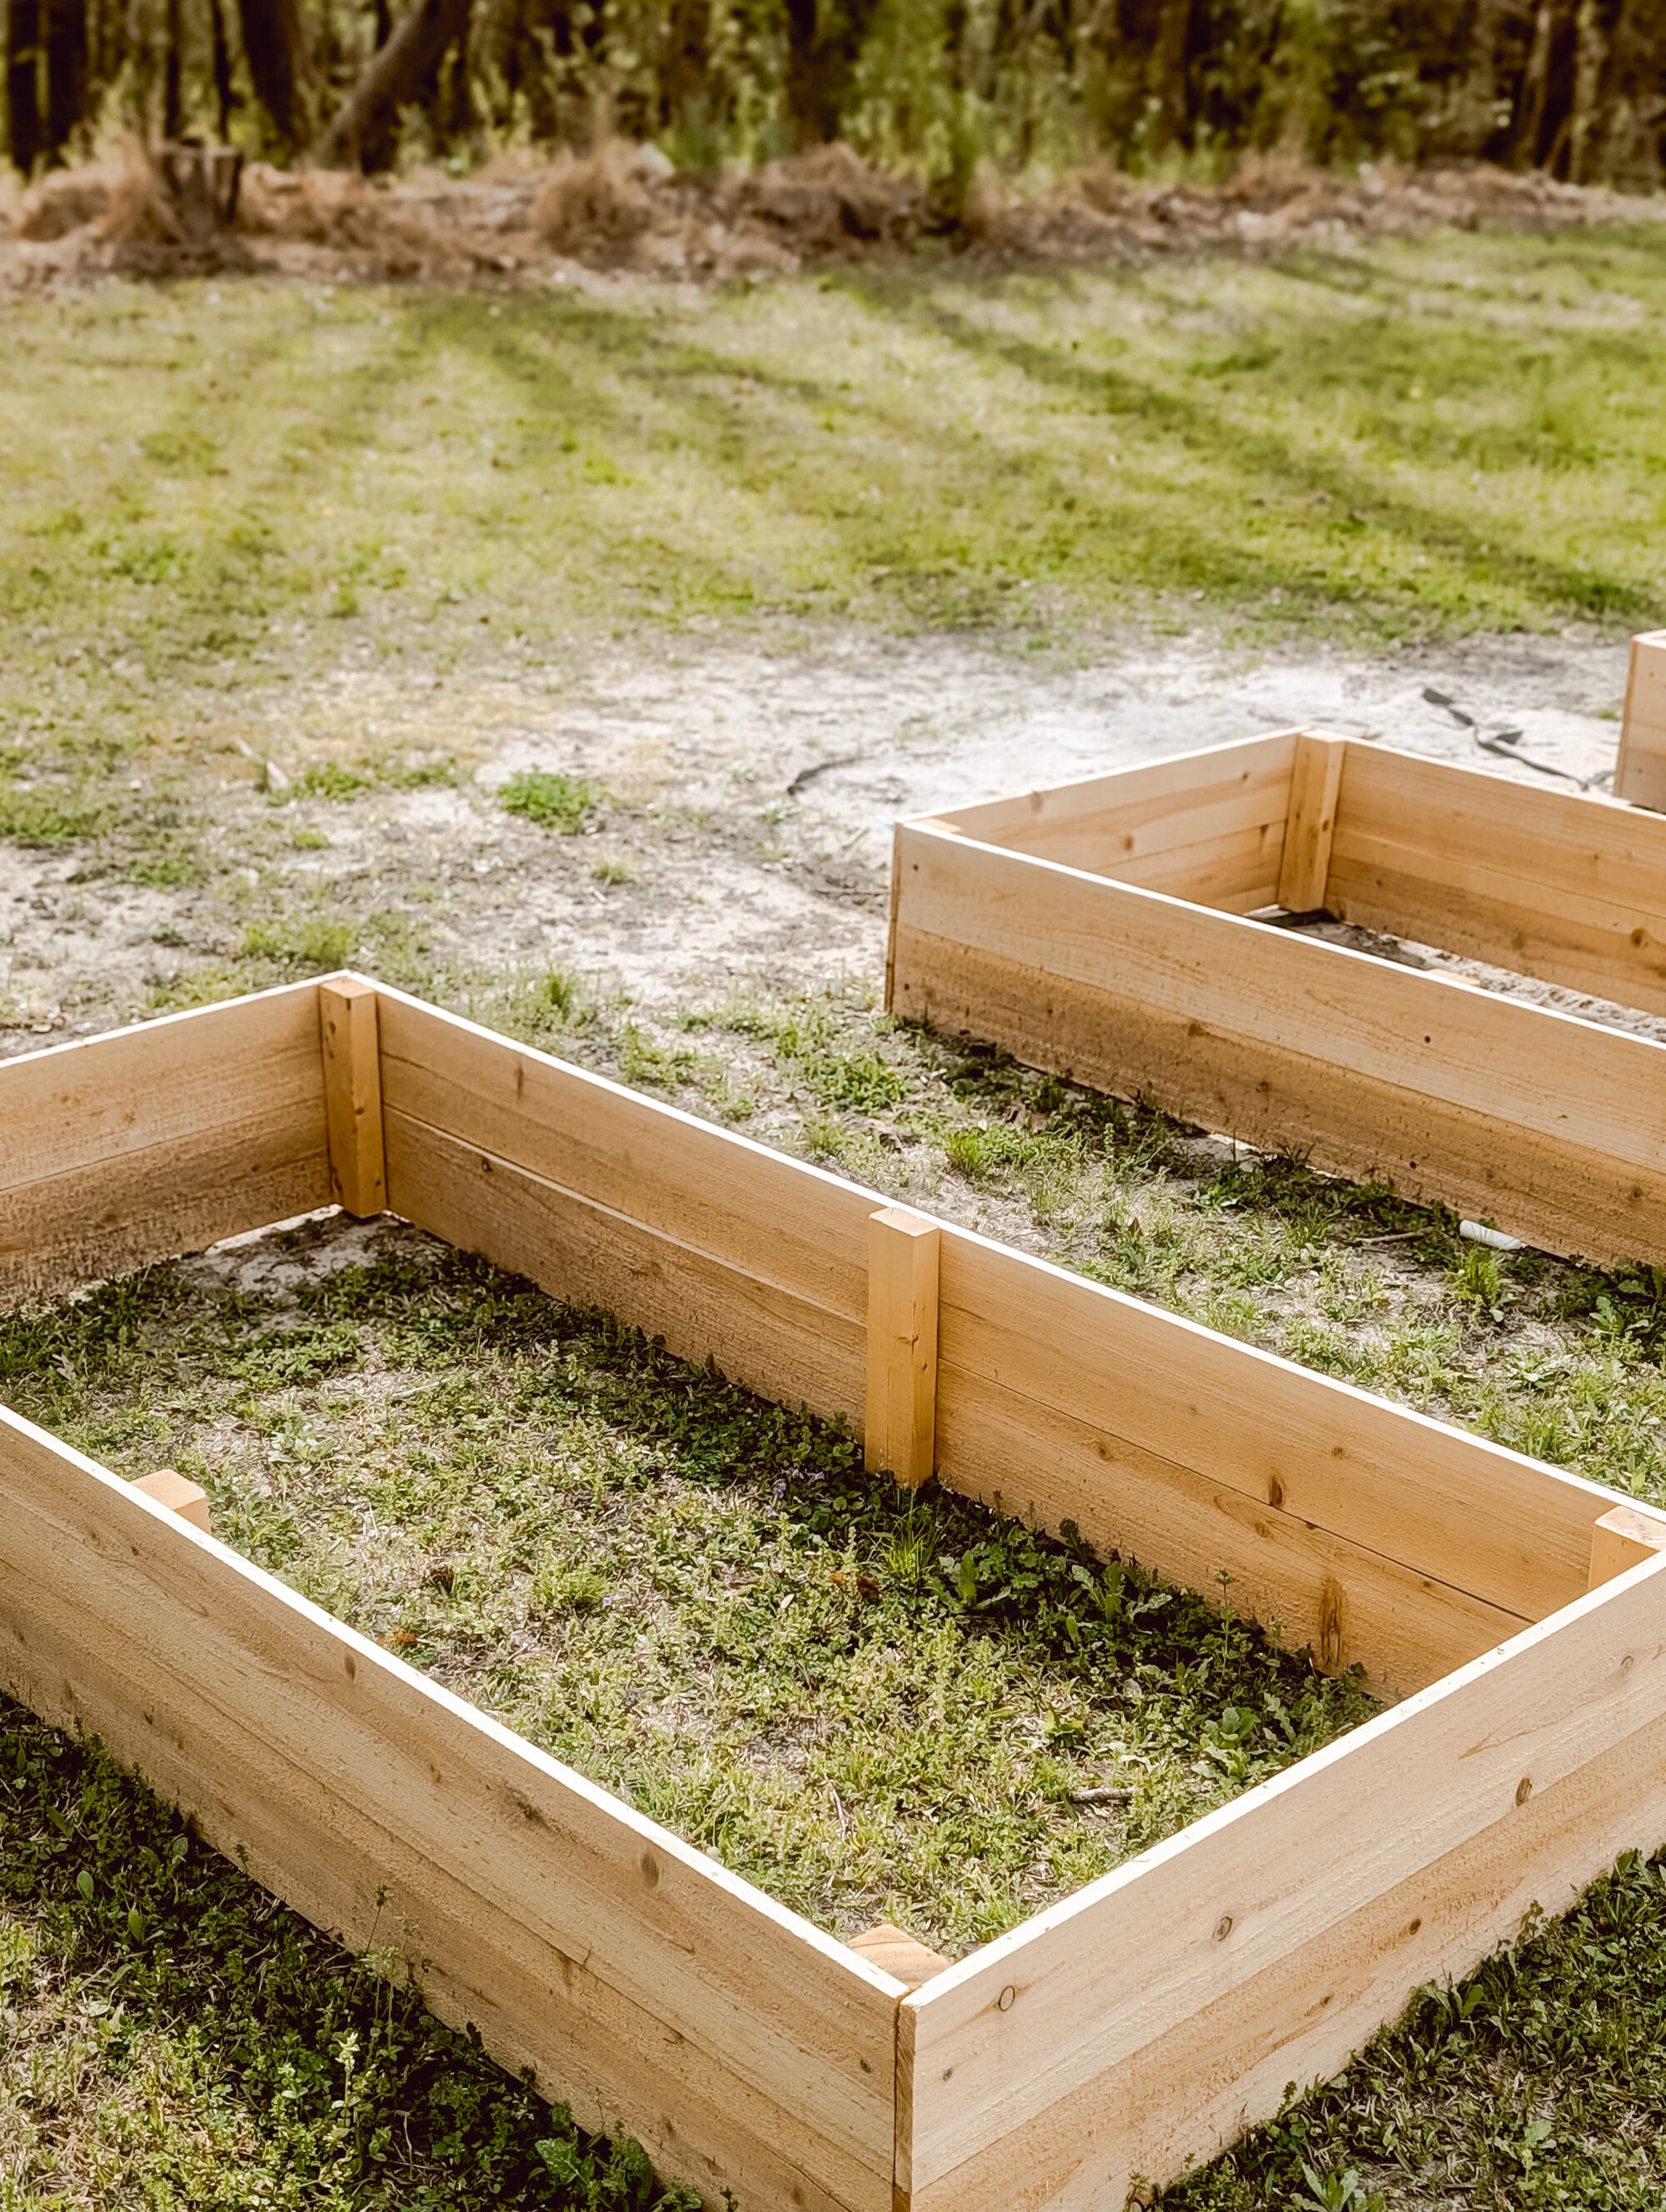
I am so pleased with how our DIY raised cedar garden beds turned out! They were fairly easy to assemble. Jake was able to get all 8 of ours cut and assembled in a Saturday.
They were also very affordable! AND they look beautiful!
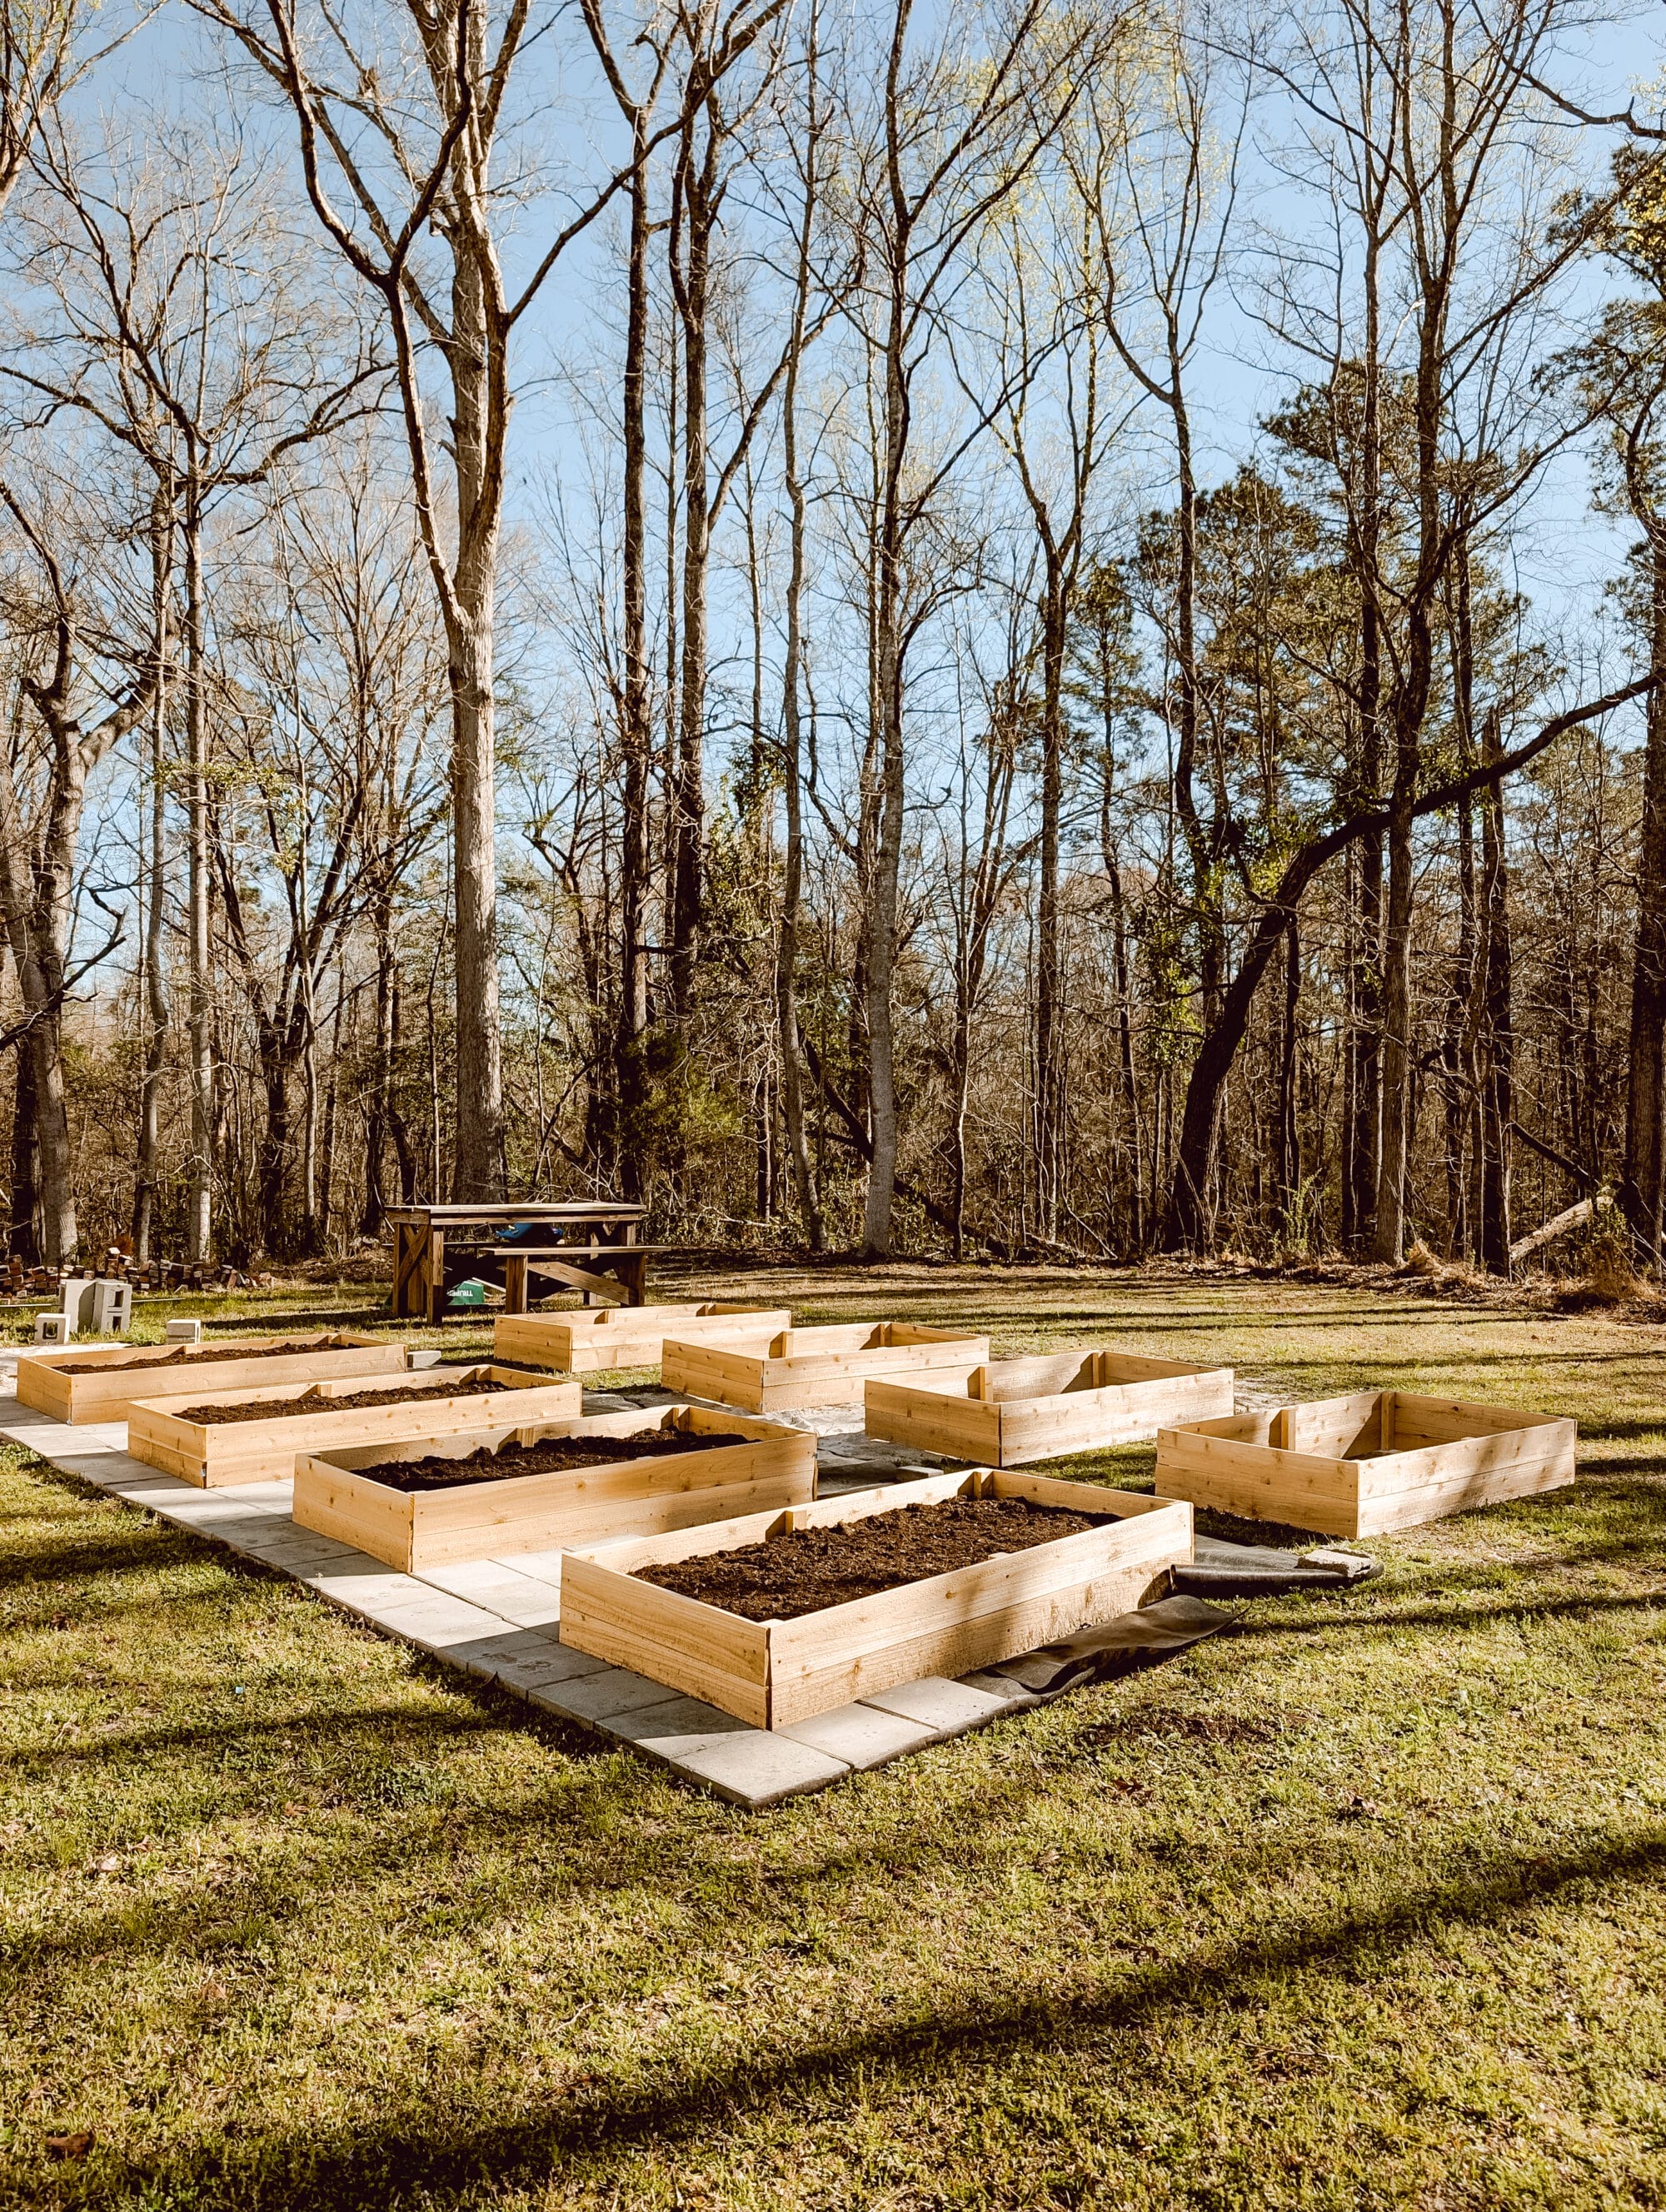
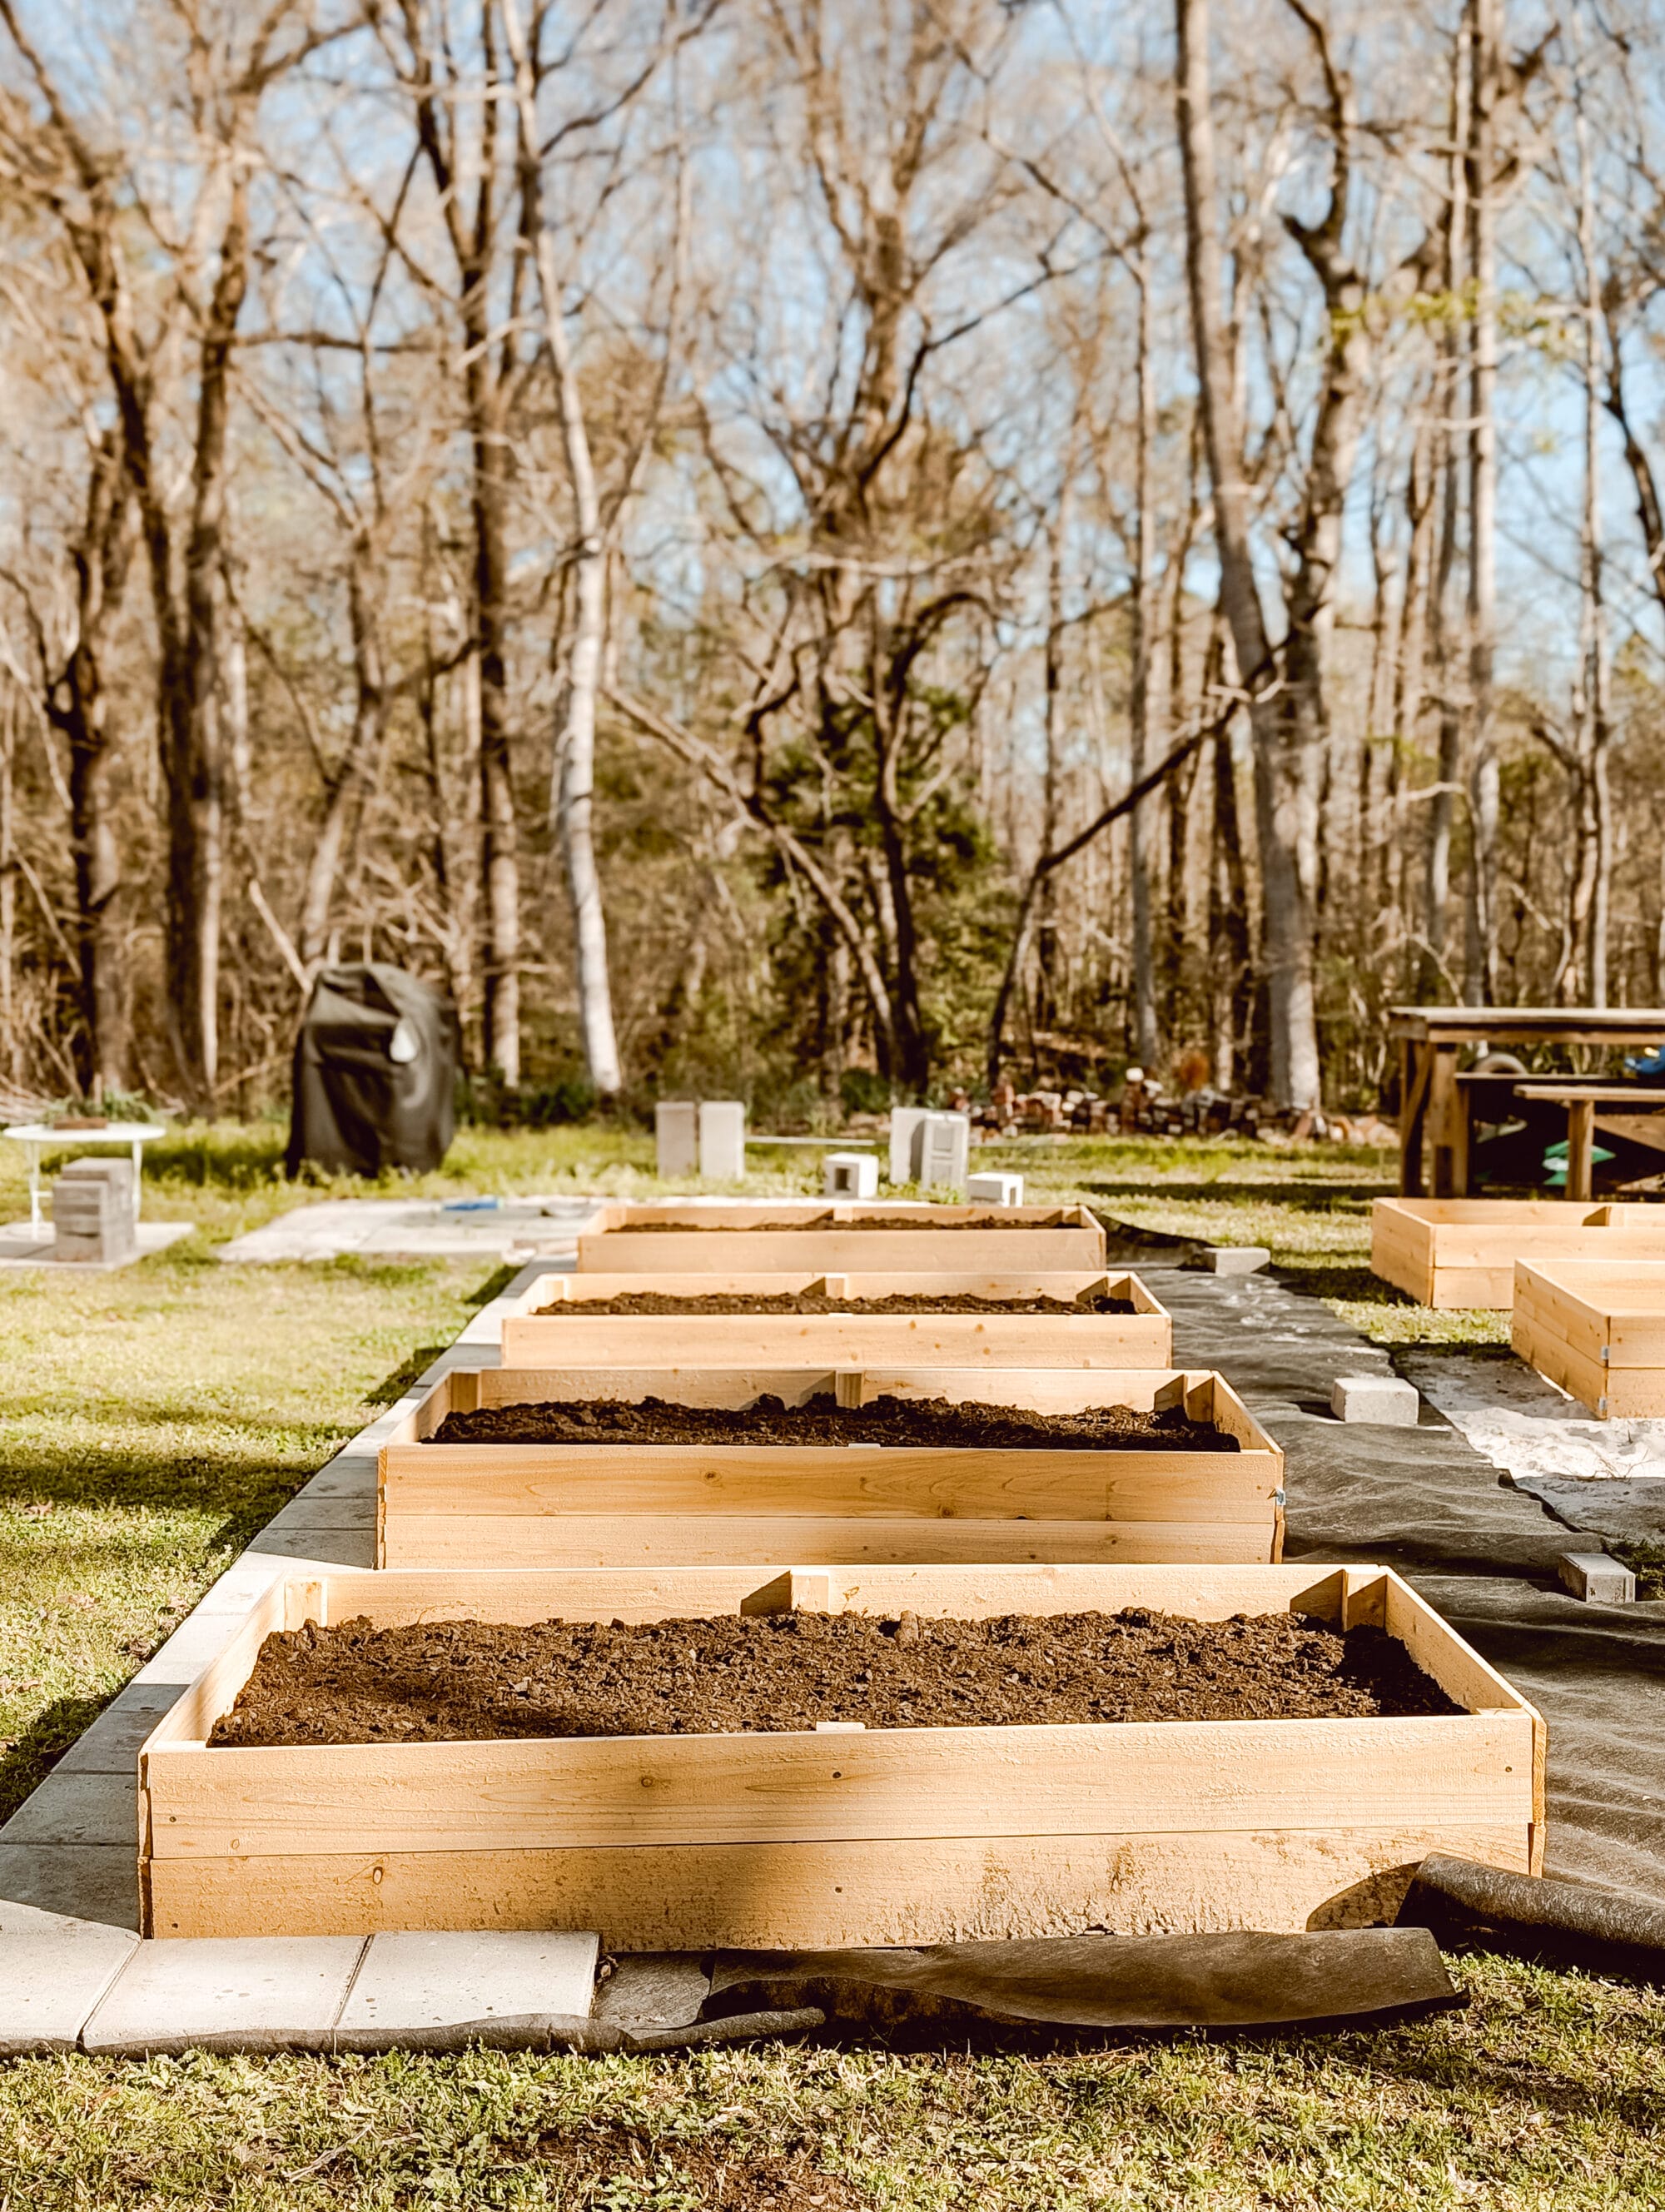
Next Steps for our Potager Garden:
- lay down landscaping fabric under the beds and in the walkways
- add pavers & gravel to create walkways between the garden beds
- fill the remaining beds with soil
- plant vegetables and herbs!
I’ll also move the picnic table, the grill, and the random cinder blocks you see in the background. And I have a fun idea in mind for that stack of reclaimed bricks too! More on that later…
For now I’m just enjoying this view and the progress we’ve made so far. This space is shaping up so nicely with the addition of our new DIY cedar raised garden beds!!
I’m excited to continue working on this space little by little over time to create the potager garden of my dreams!
FALL GARDEN UPDATE: It’s been a few months, and we still LOVE these DIY raised beds. I shared a couple updated photos of this space, (with plants growing in the beds, and pea gravel walkways in between).
Those photos are part of a post I wrote about DIY garden arbors – I’ve been collecting inspo pics for that future garden project. But I wanted to share the link to that post here in case you’re curious how the raised beds look now.
I hope today’s post brought a little inspo to your scroll… even though our garden is very much still in progress. The DIY cedar raised garden beds turned out so good!
If you’ve been wanting to make some raised beds for your garden, let this post be the encouragement you need to get started.
Or if you’re not quite ready to start this project, be sure to pin it for later so you can come back to it when you are ready!
Don’t forget to pin this for later!
Oh, and if you enjoyed this post, you should go and check out the DIY plant markers I made recently!
They were so fun and easy to make. And I can’t wait to use them out in the garden once we get things planted in our new garden beds!
Thanks for stopping by the blog today! Until next time…


The look great! Where did you get your cedar pickets from? I was thinking of filling ours with the container mix from Seaside Mulch or Piney Run Farms in Rocky Point. Have you used either for your beds?
Thank you! We got the fence pickets from Lowe’s and I’ve been slowly filling up the beds a little at the time. Honestly in retrospect we probably should have just gotten dirt delivered to fill up all 8 beds. But I didn’t want to pay for that all at one time. So instead I’ve been layering cardboard on the bottom, then sticks and leaves from our yard, and then adding bags of soil on top of all that. I know I’ll have to top the beds off at the end of the season because the dirt has already settled a lot.