How We Turned a Vintage Children’s Bookshelf into Decorative Bathroom Wall Shelves
This post may contain affiliate links. For more information, you can read my full disclaimer here.
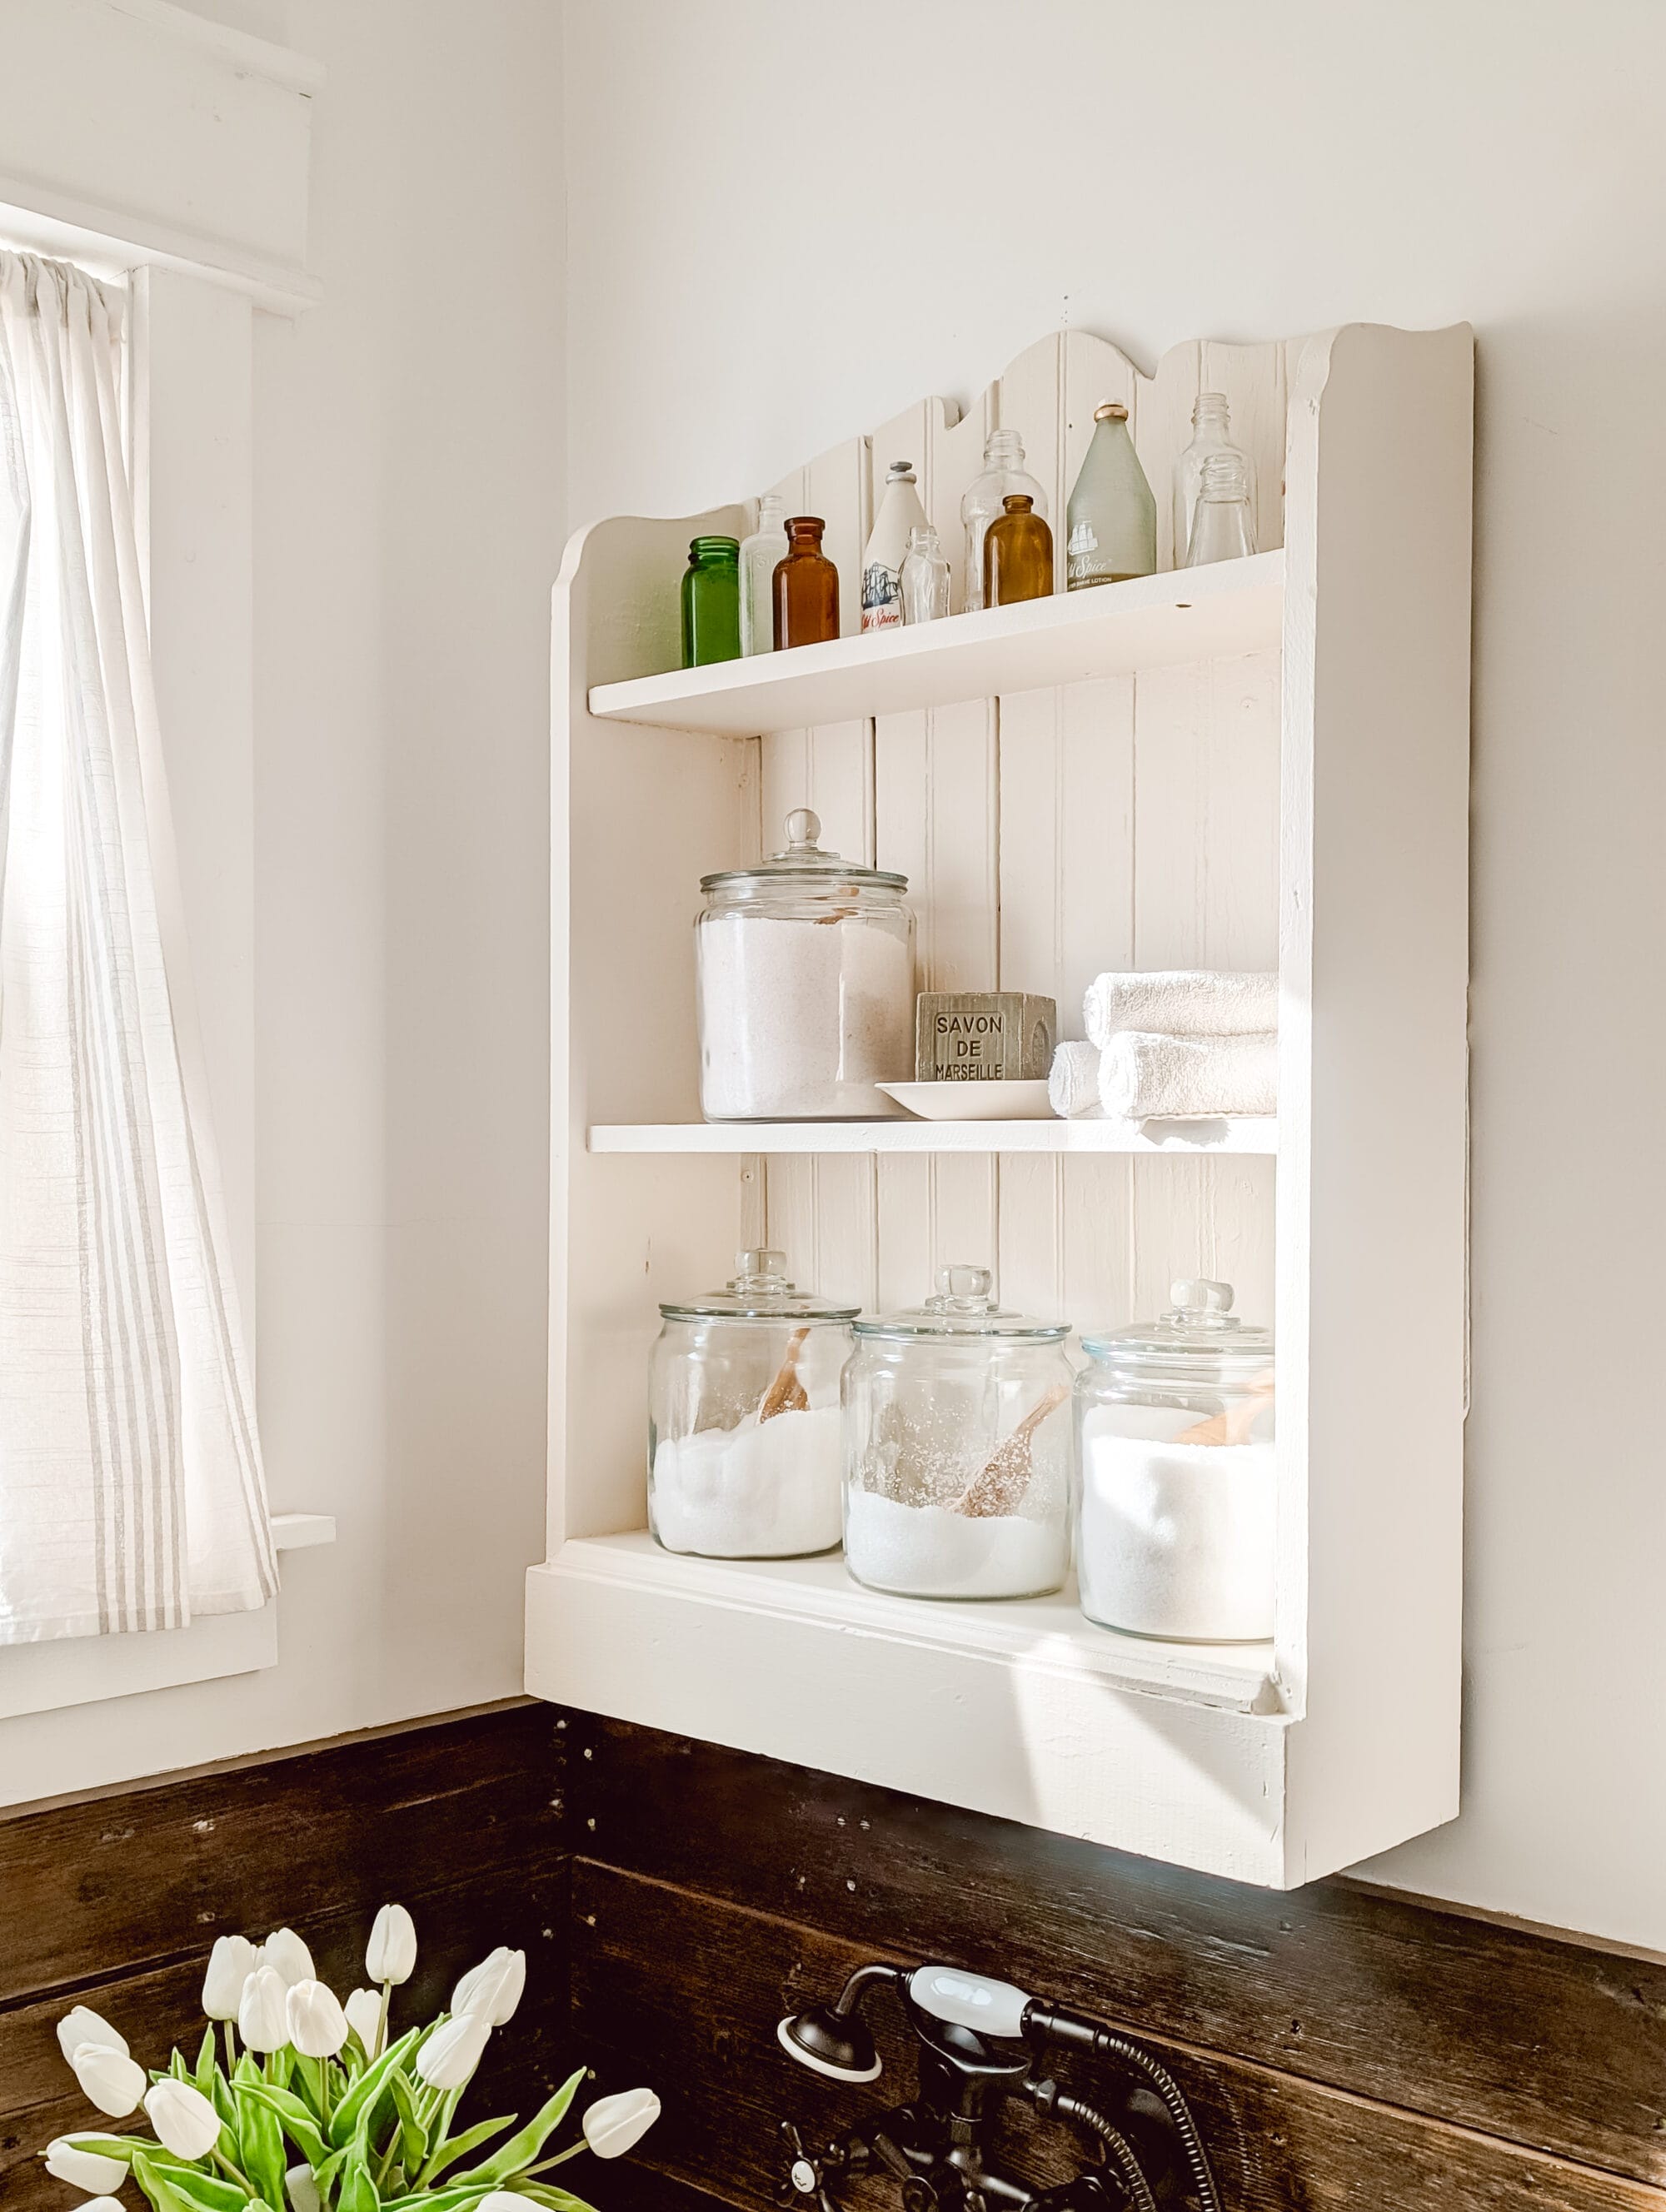
I found this cutie little vintage children’s bookshelf at the thrift a couple months ago, and I can’t wait to show you how we re-purposed it in our primary bath.
We turned it into decorative wall shelves and it’s the added storage piece our bathroom was missing!

Before I get into the DIY, let me show you what the bookshelf looked like when I found it.
A Thrifted Children’s Bookshelf
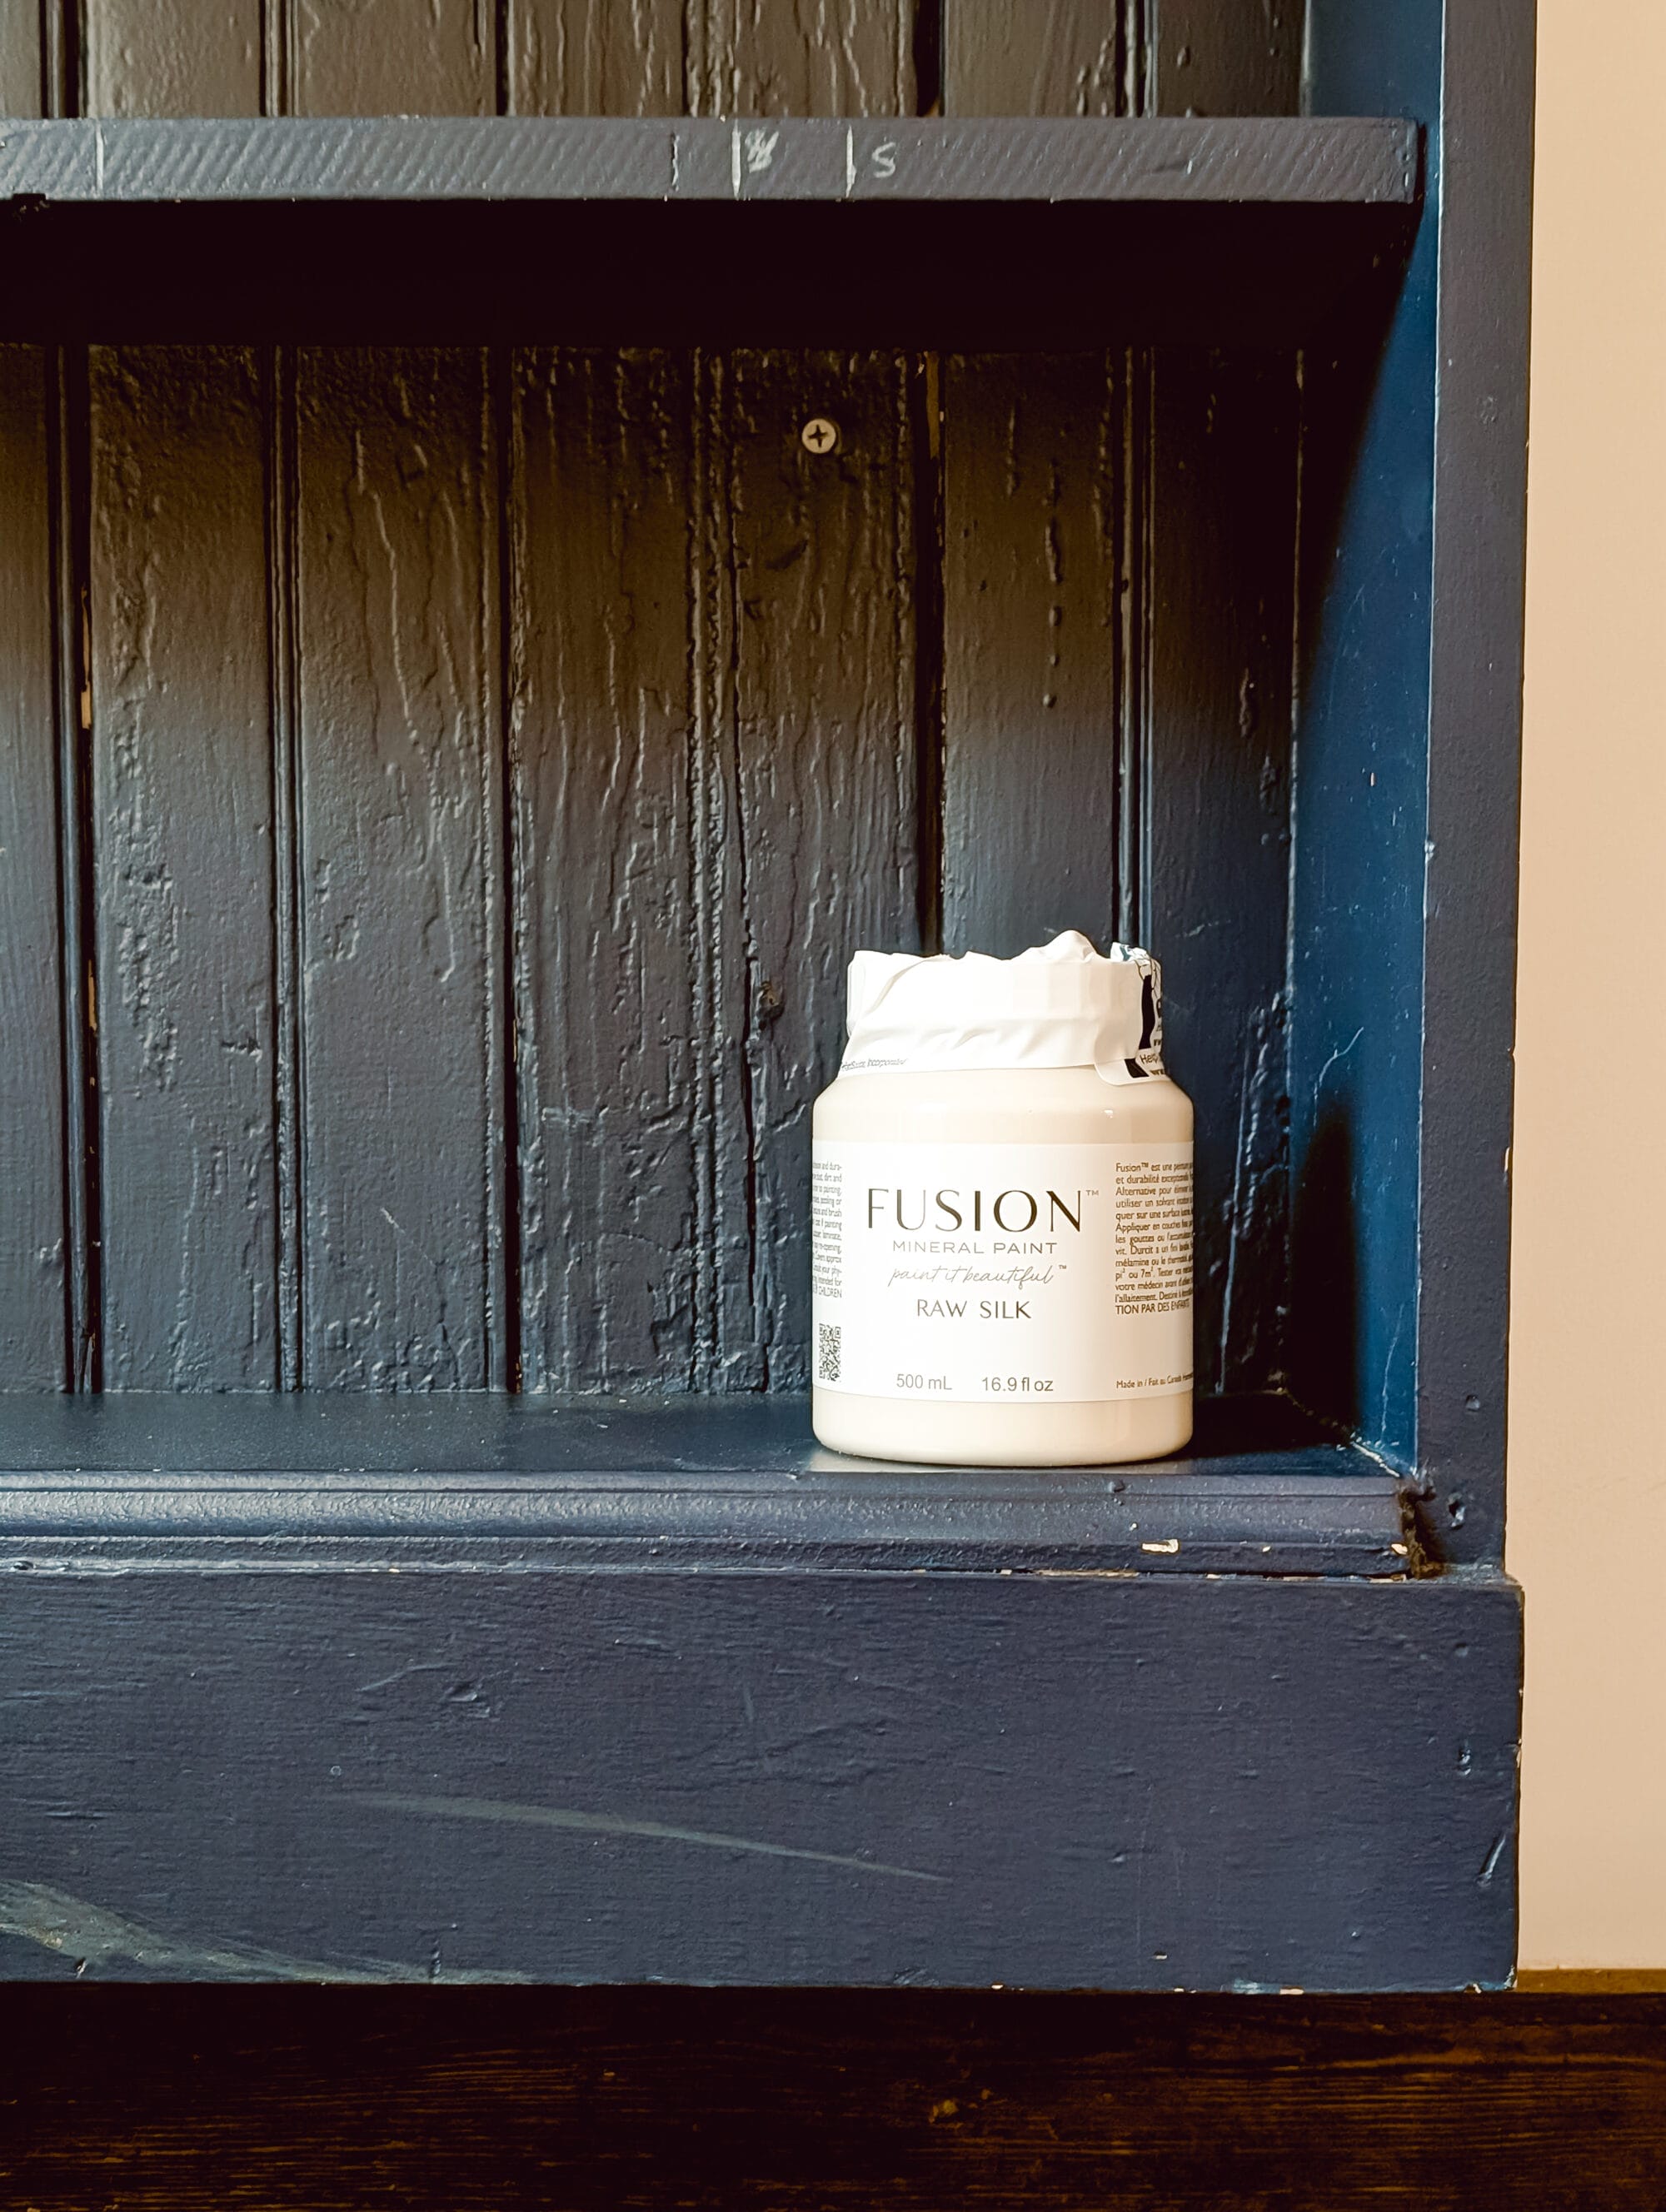
I found this bookcase at our local Habitat ReStore. And for $25, I couldn’t pass it up!
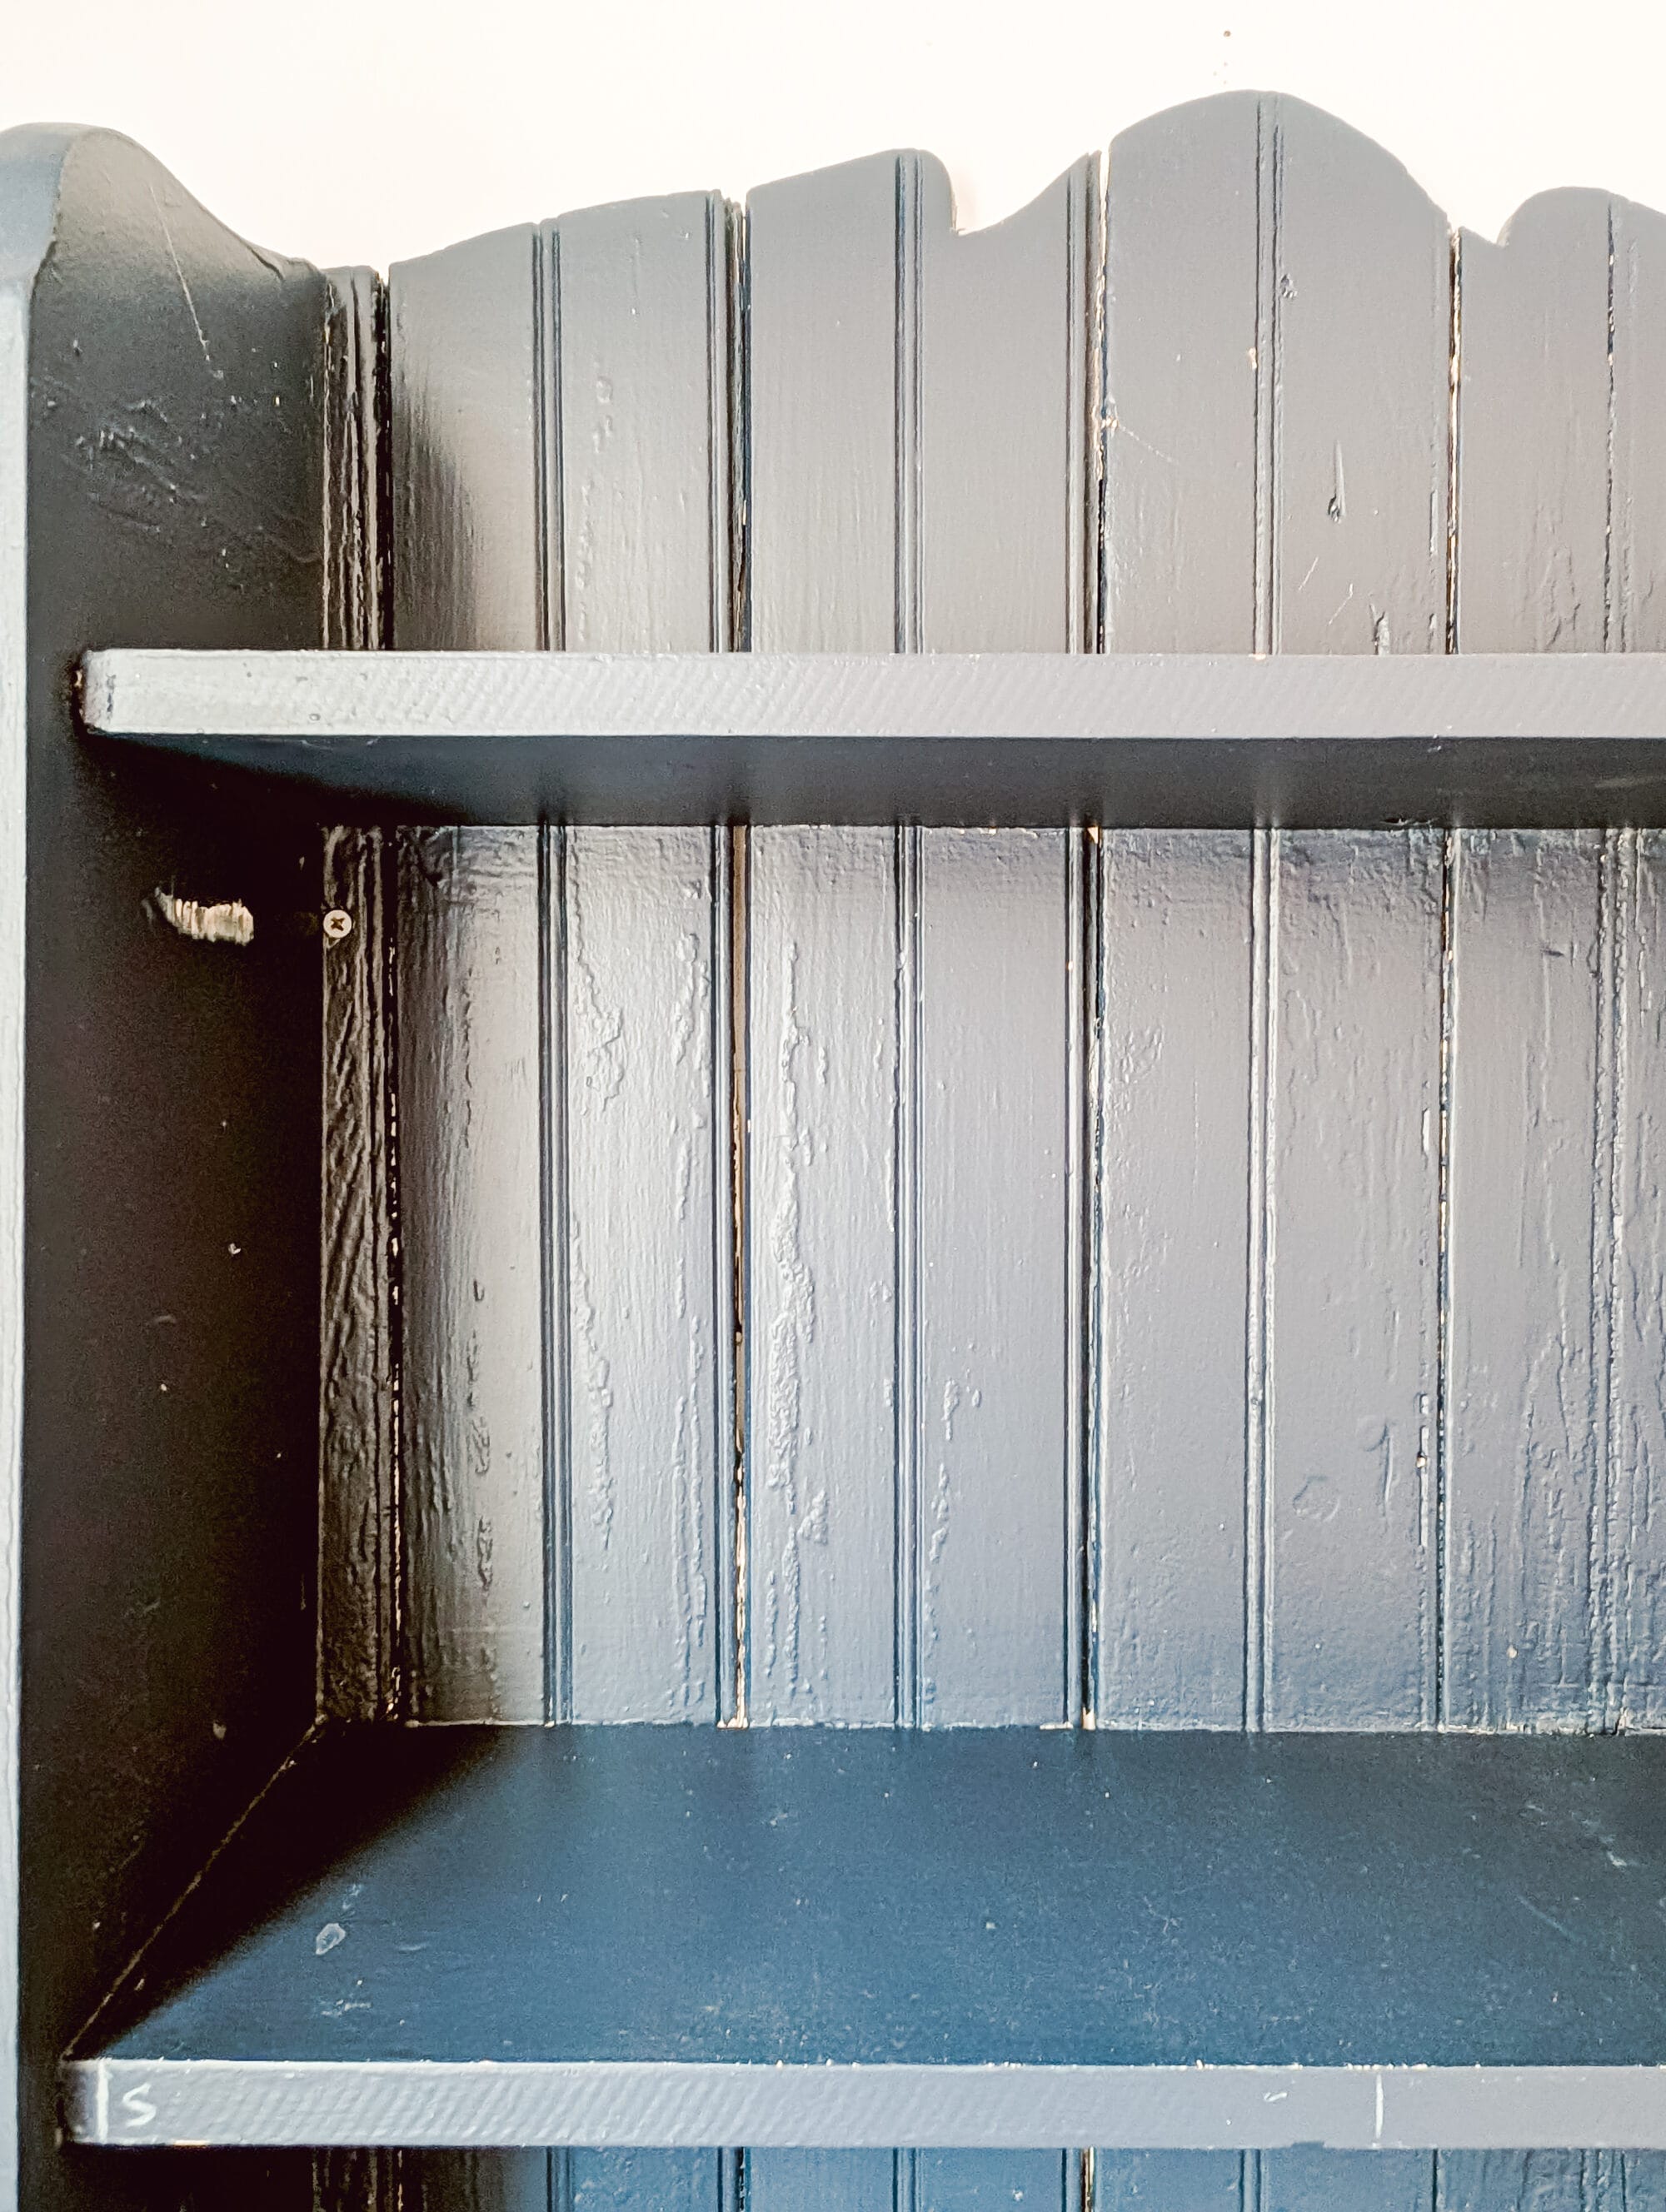
It’s solid wood, and it has a tongue and groove back with the sweetest little detailing at the top.
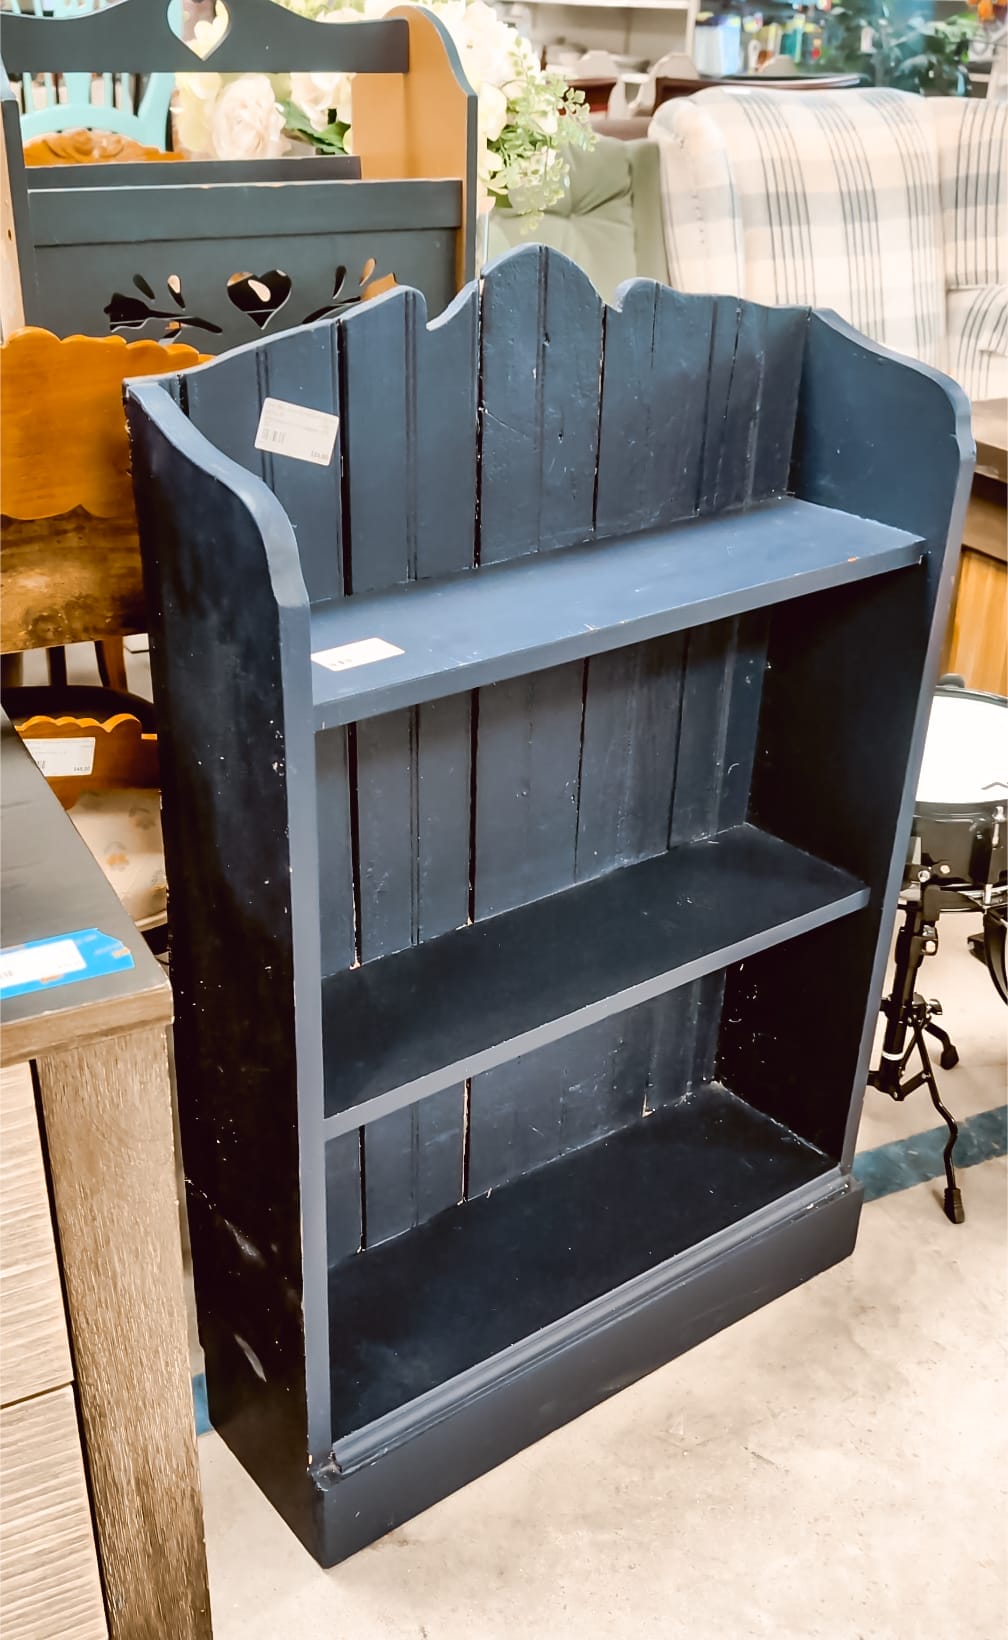
It’s cute right?!
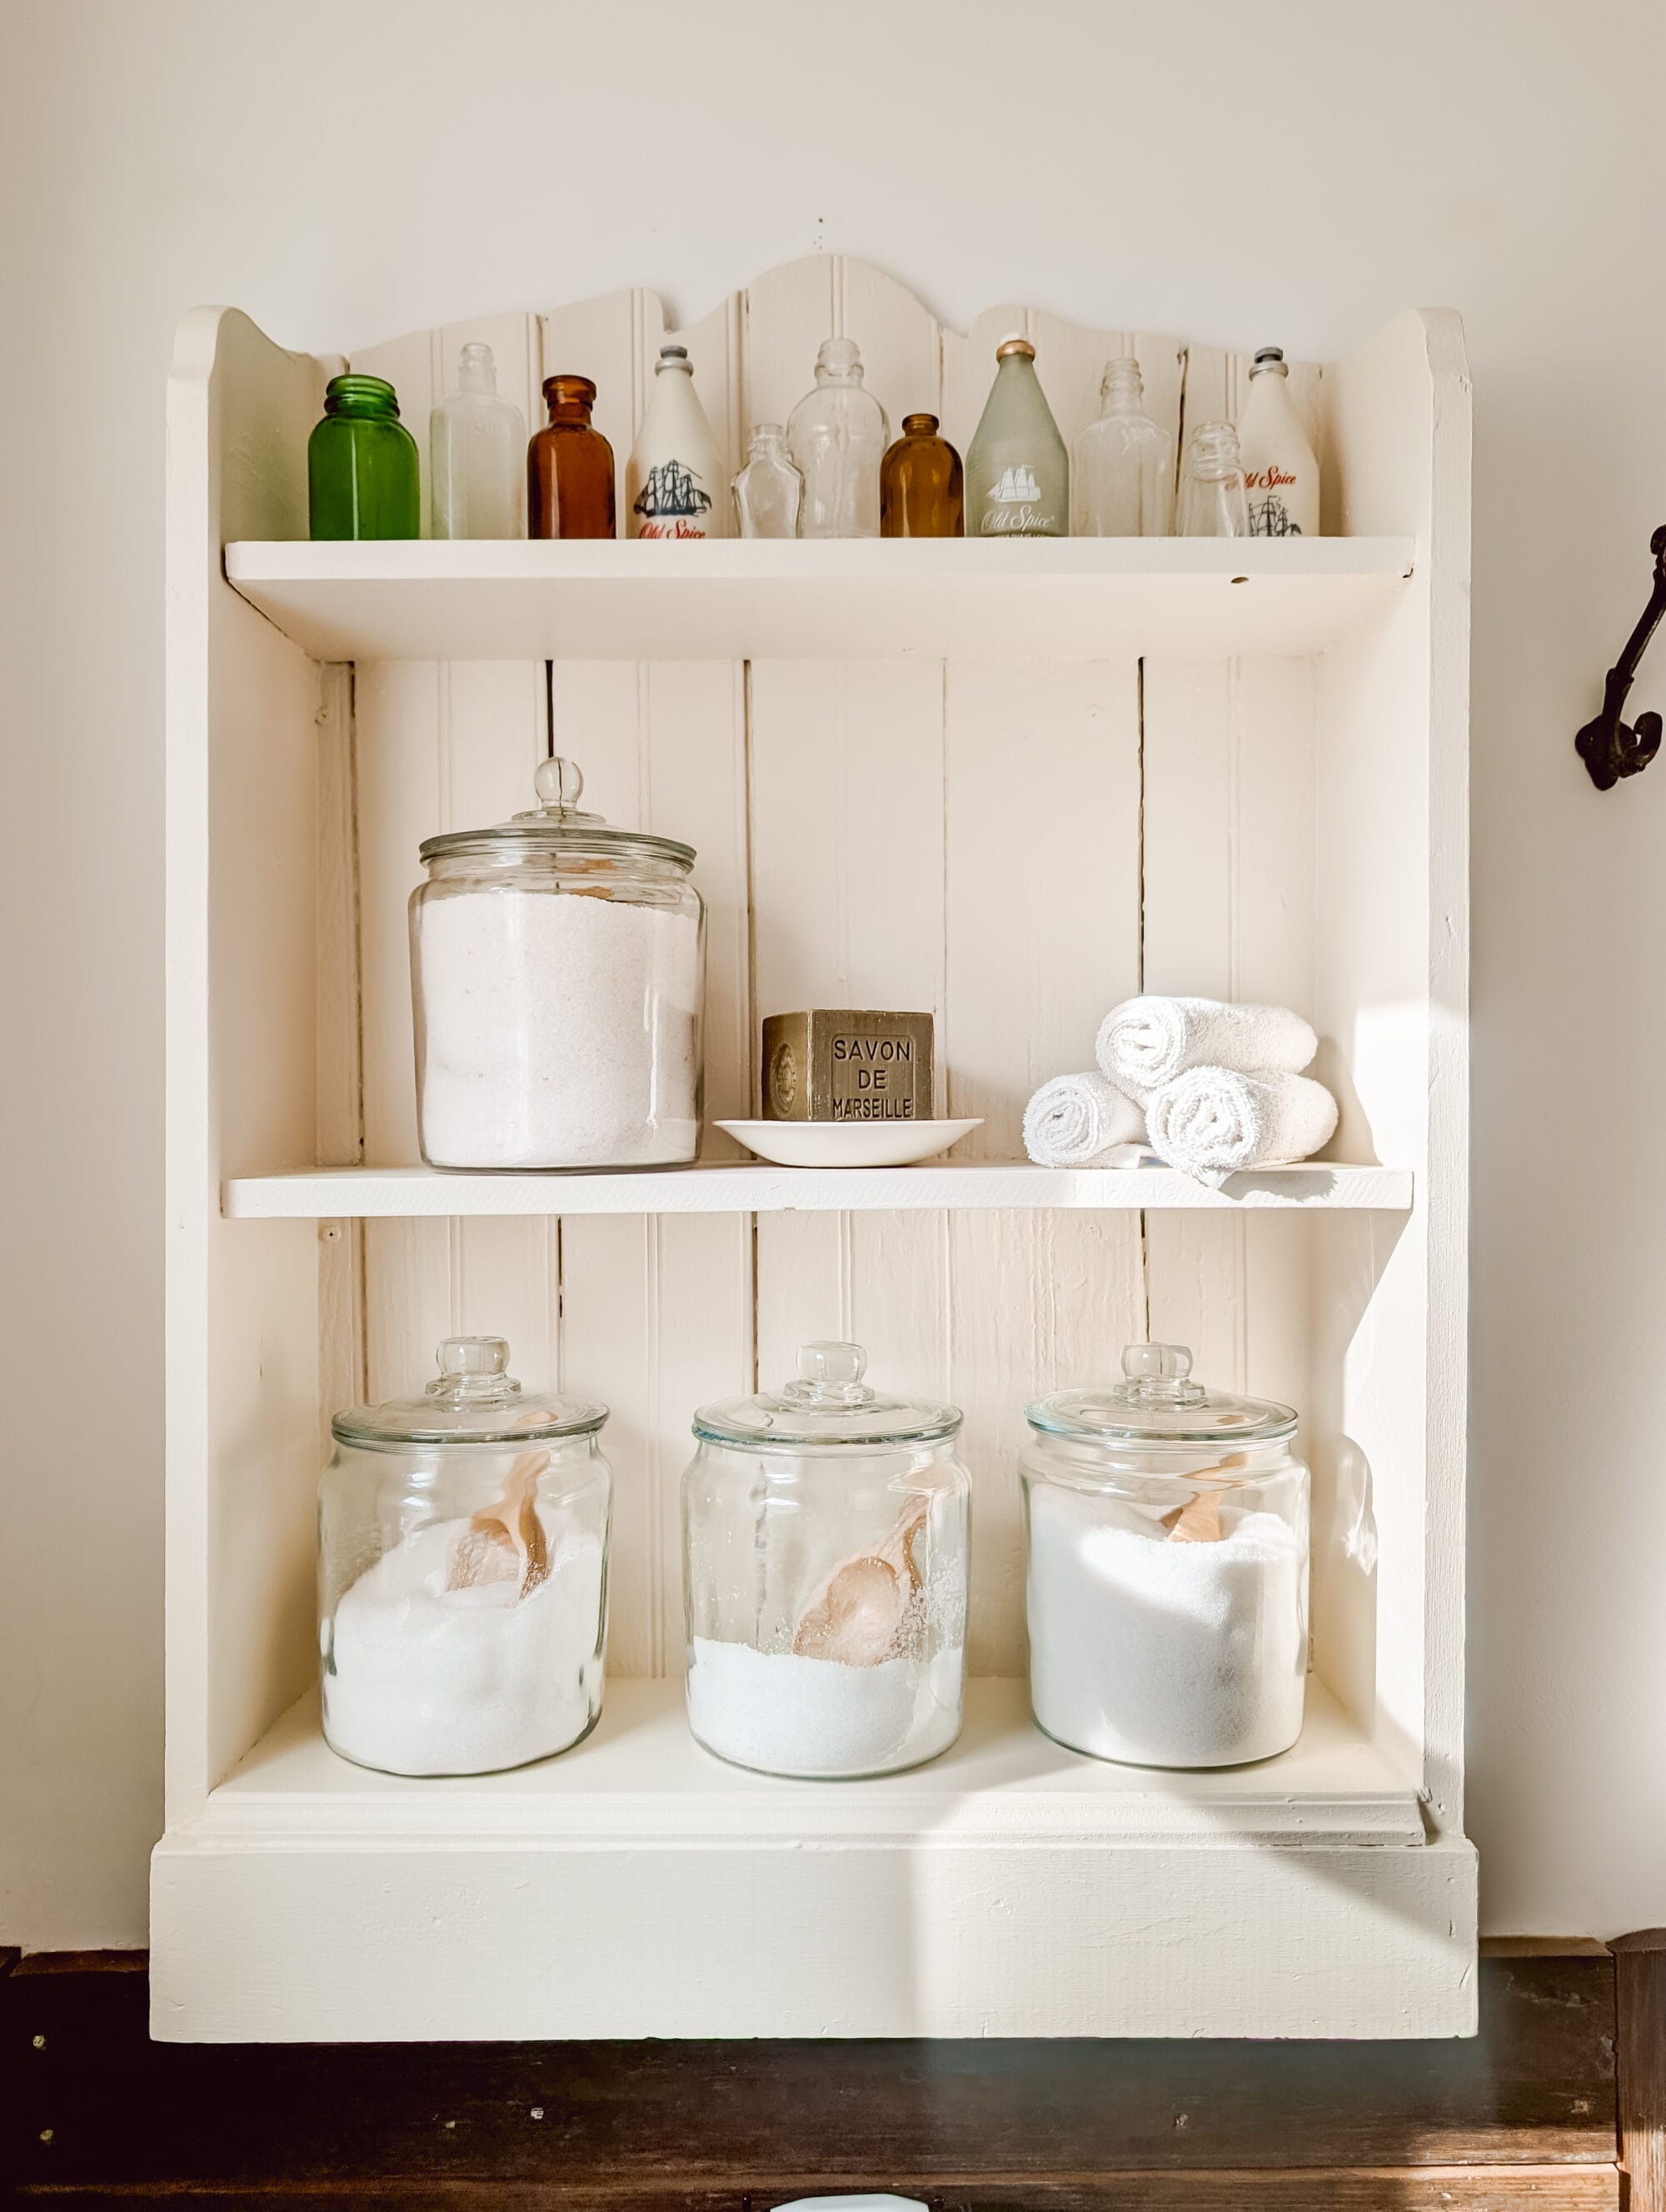
The top part actually reminded me of a vintage wood medicine cabinet I found at the Liberty Antique Festival a while back. I don’t think I’ve ever shared that piece on the blog, but here’s a peek at it.
A Vintage Medicine Cabinet
We hung this vintage wood medicine cabinet over the toilet in our bathroom. It’s chippy, and it’s super functional. We love it!

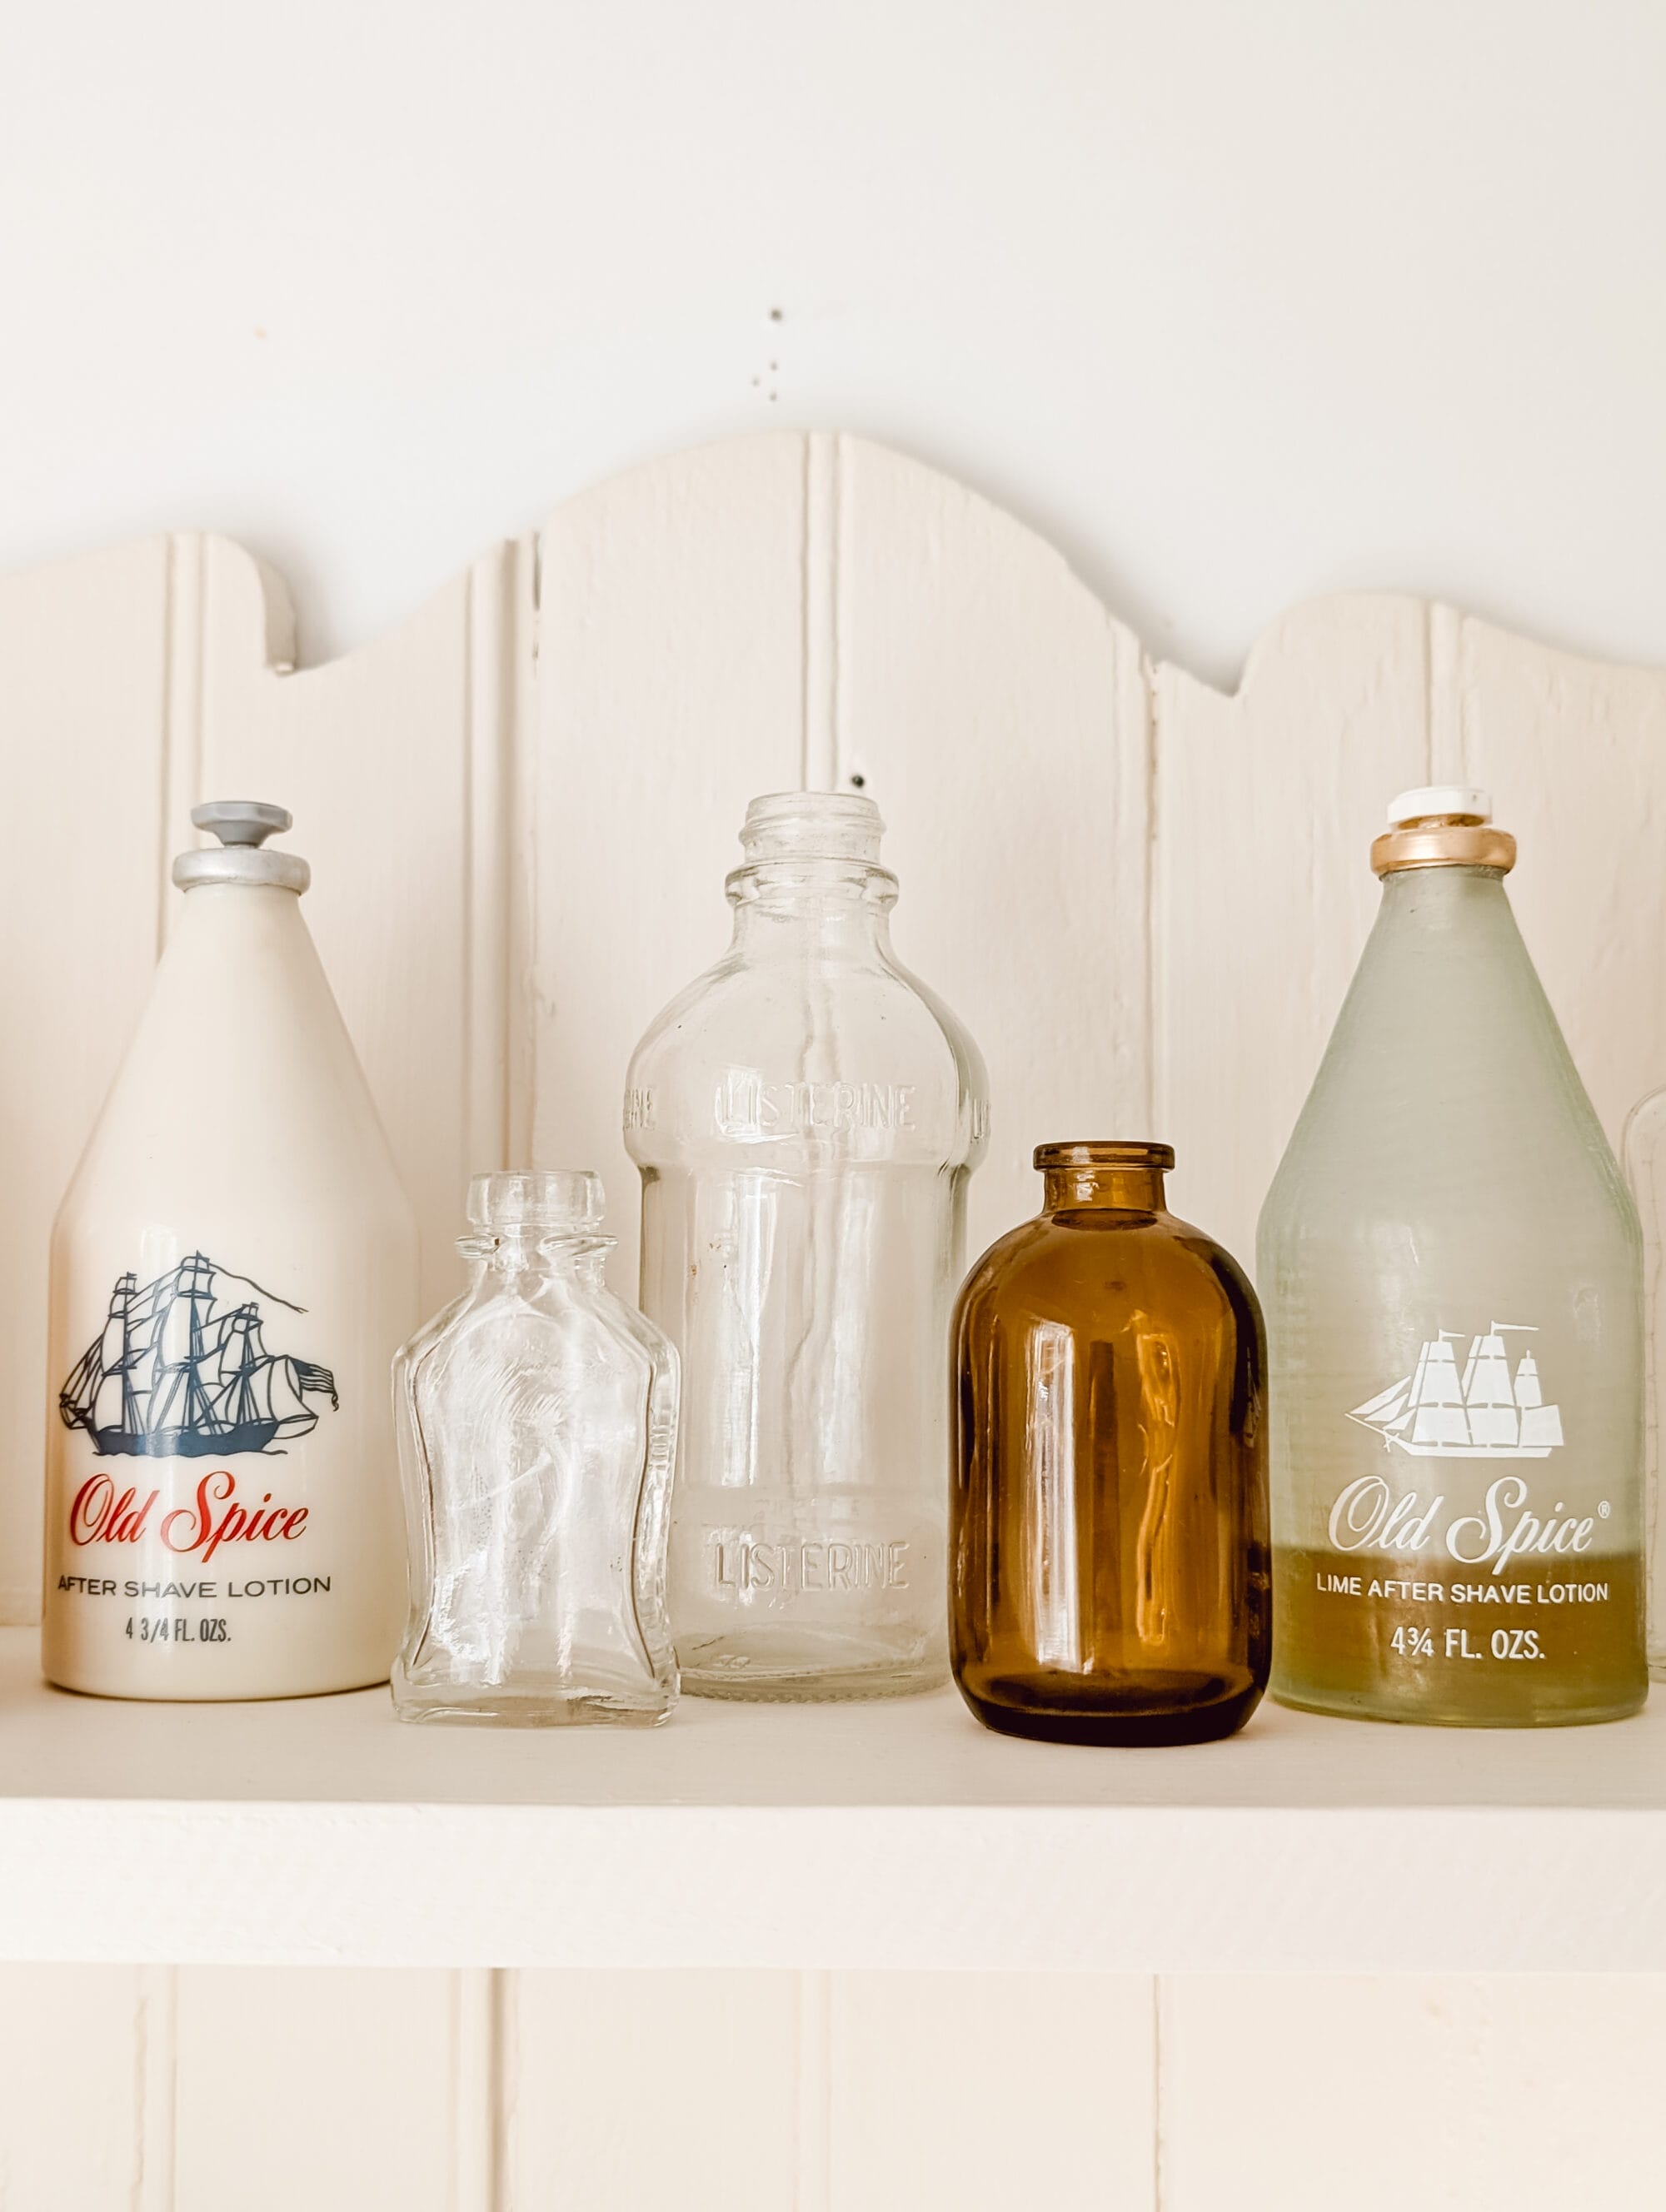
The medicine cabinet has been a great little storage piece for medicines, first aid supplies, the thermometer, and all the things I didn’t want out on display.

Ever since we got it hung up on the wall, I have been looking for a second storage piece for this bathroom.

Something we could use to display prettier items in this space.
When I saw the blue bookshelf at the thrift store, it reminded me so much of our medicine cabinet.
I think because they are about the same size, and both pieces have a similar curved detail at the top / bottom.

And so even though they don’t quite “match”, they felt like they go together!
How We Hung the Bookshelf
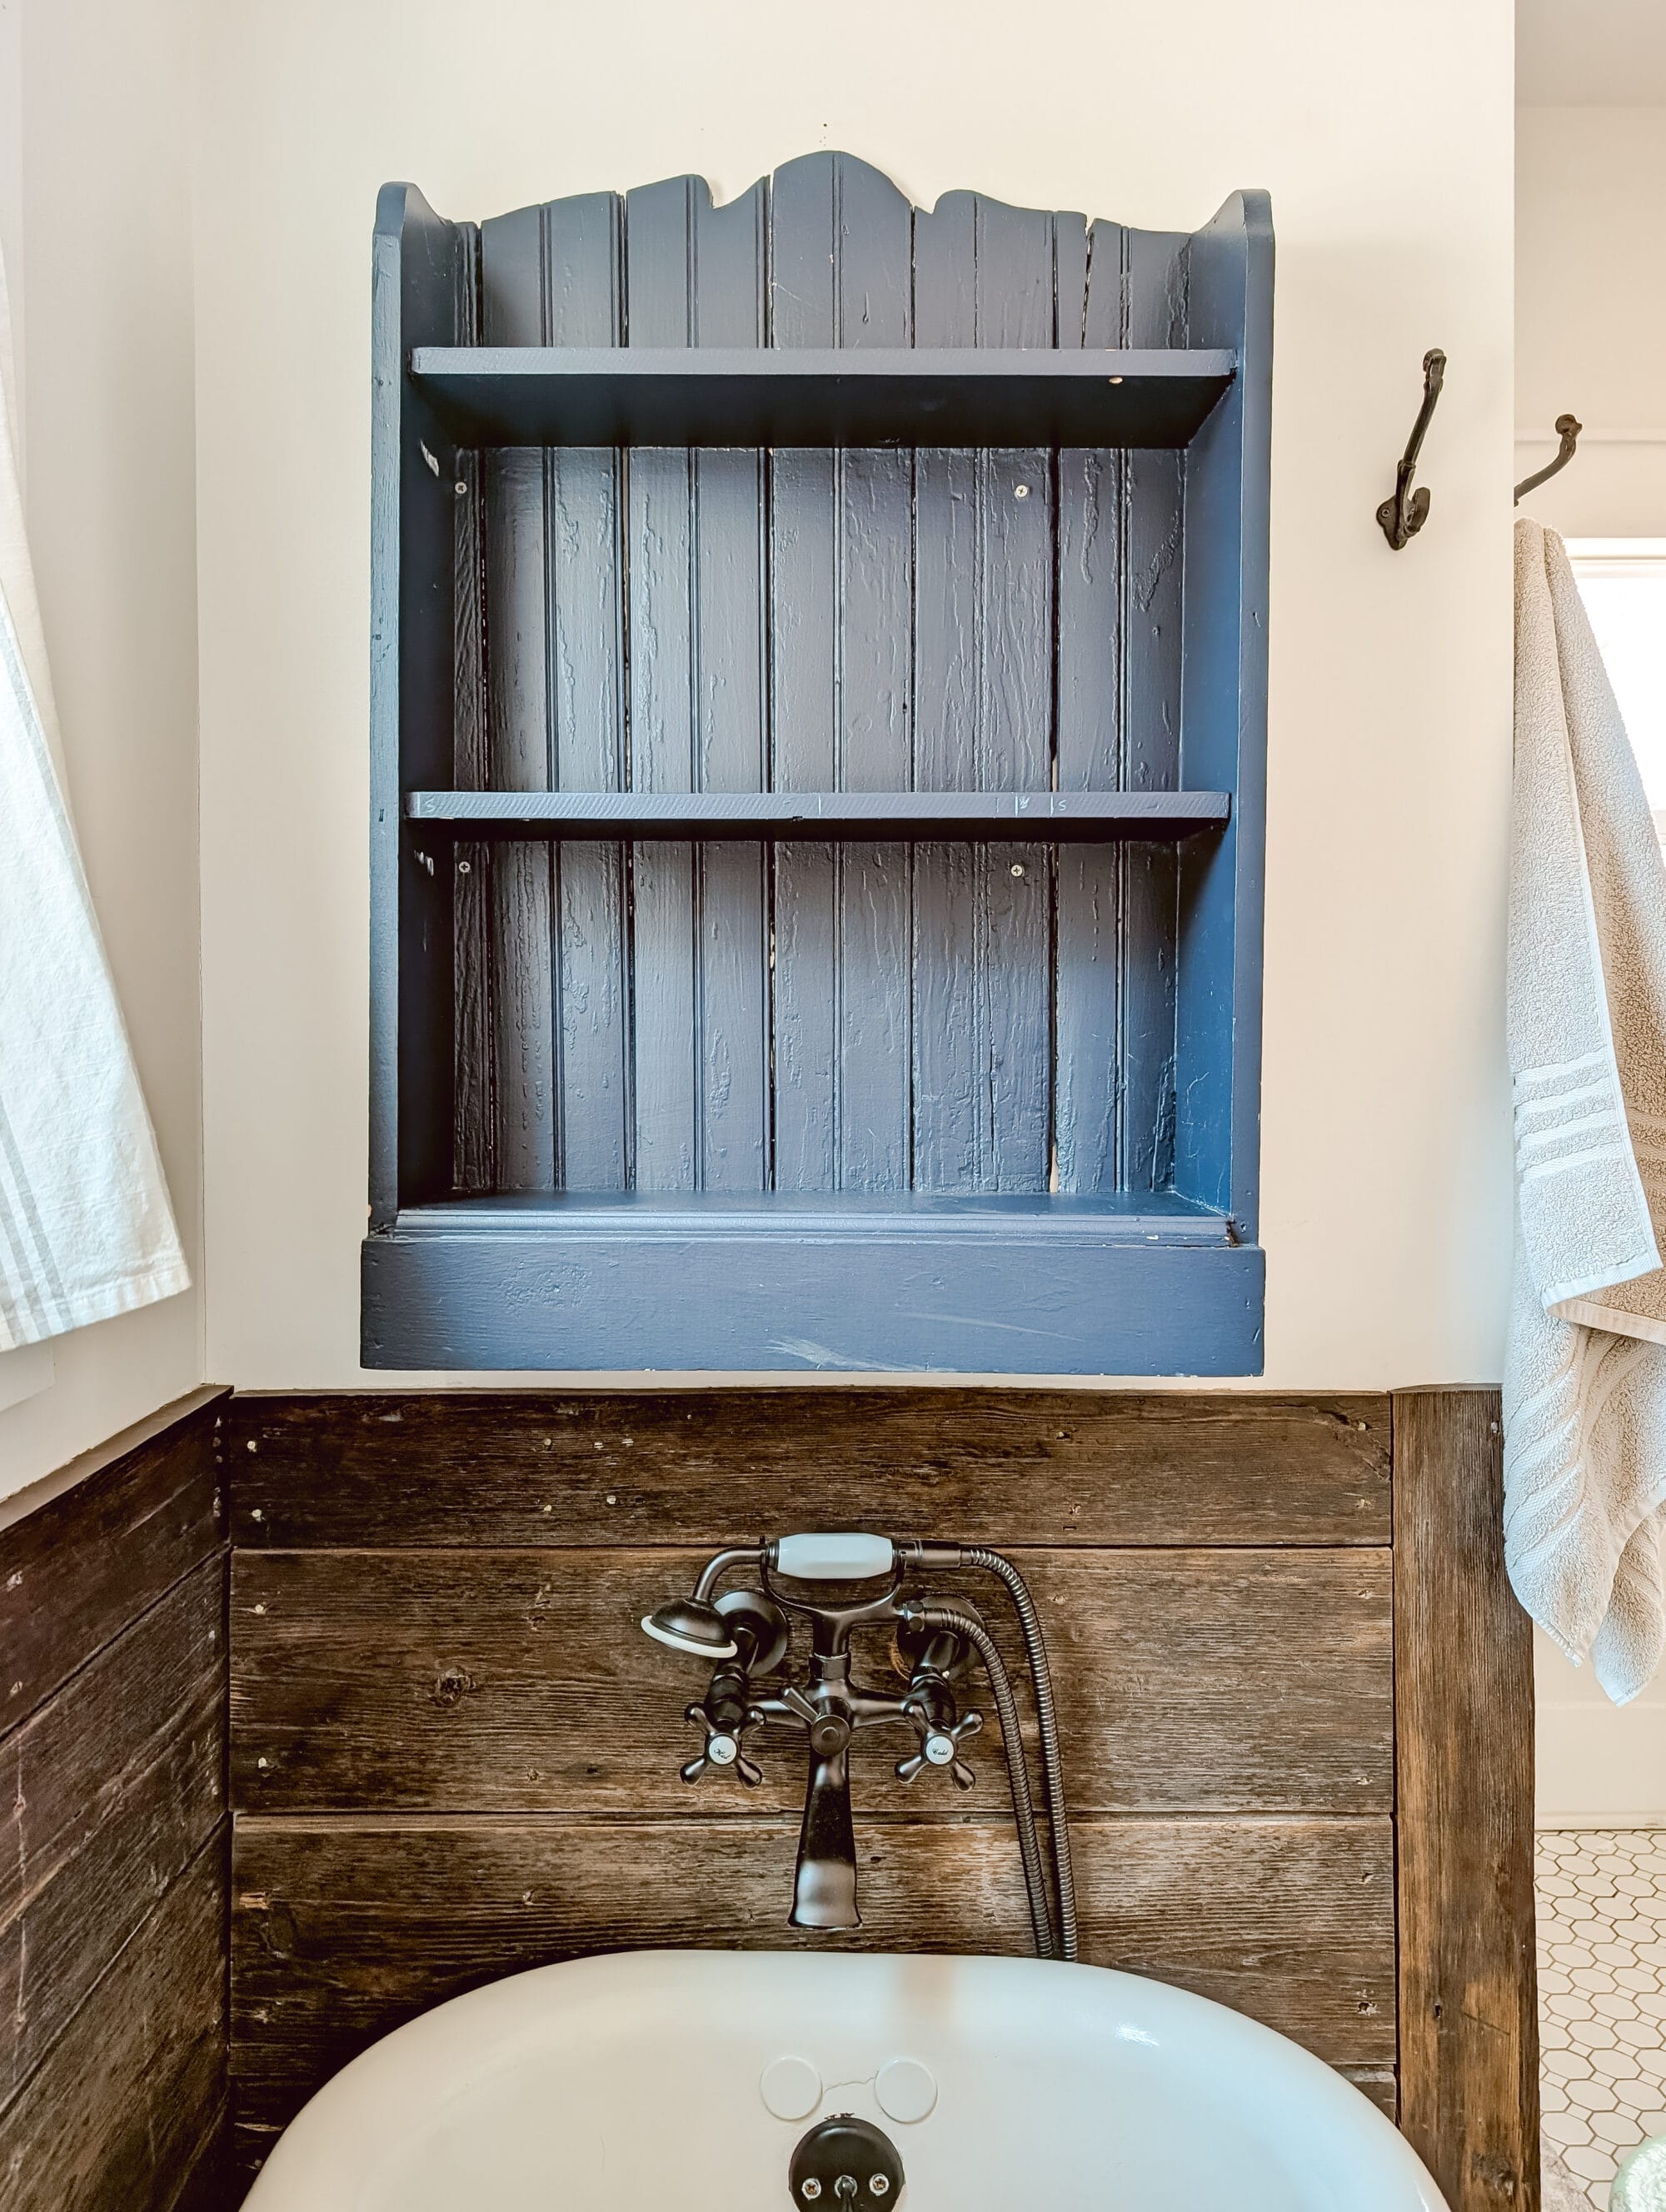
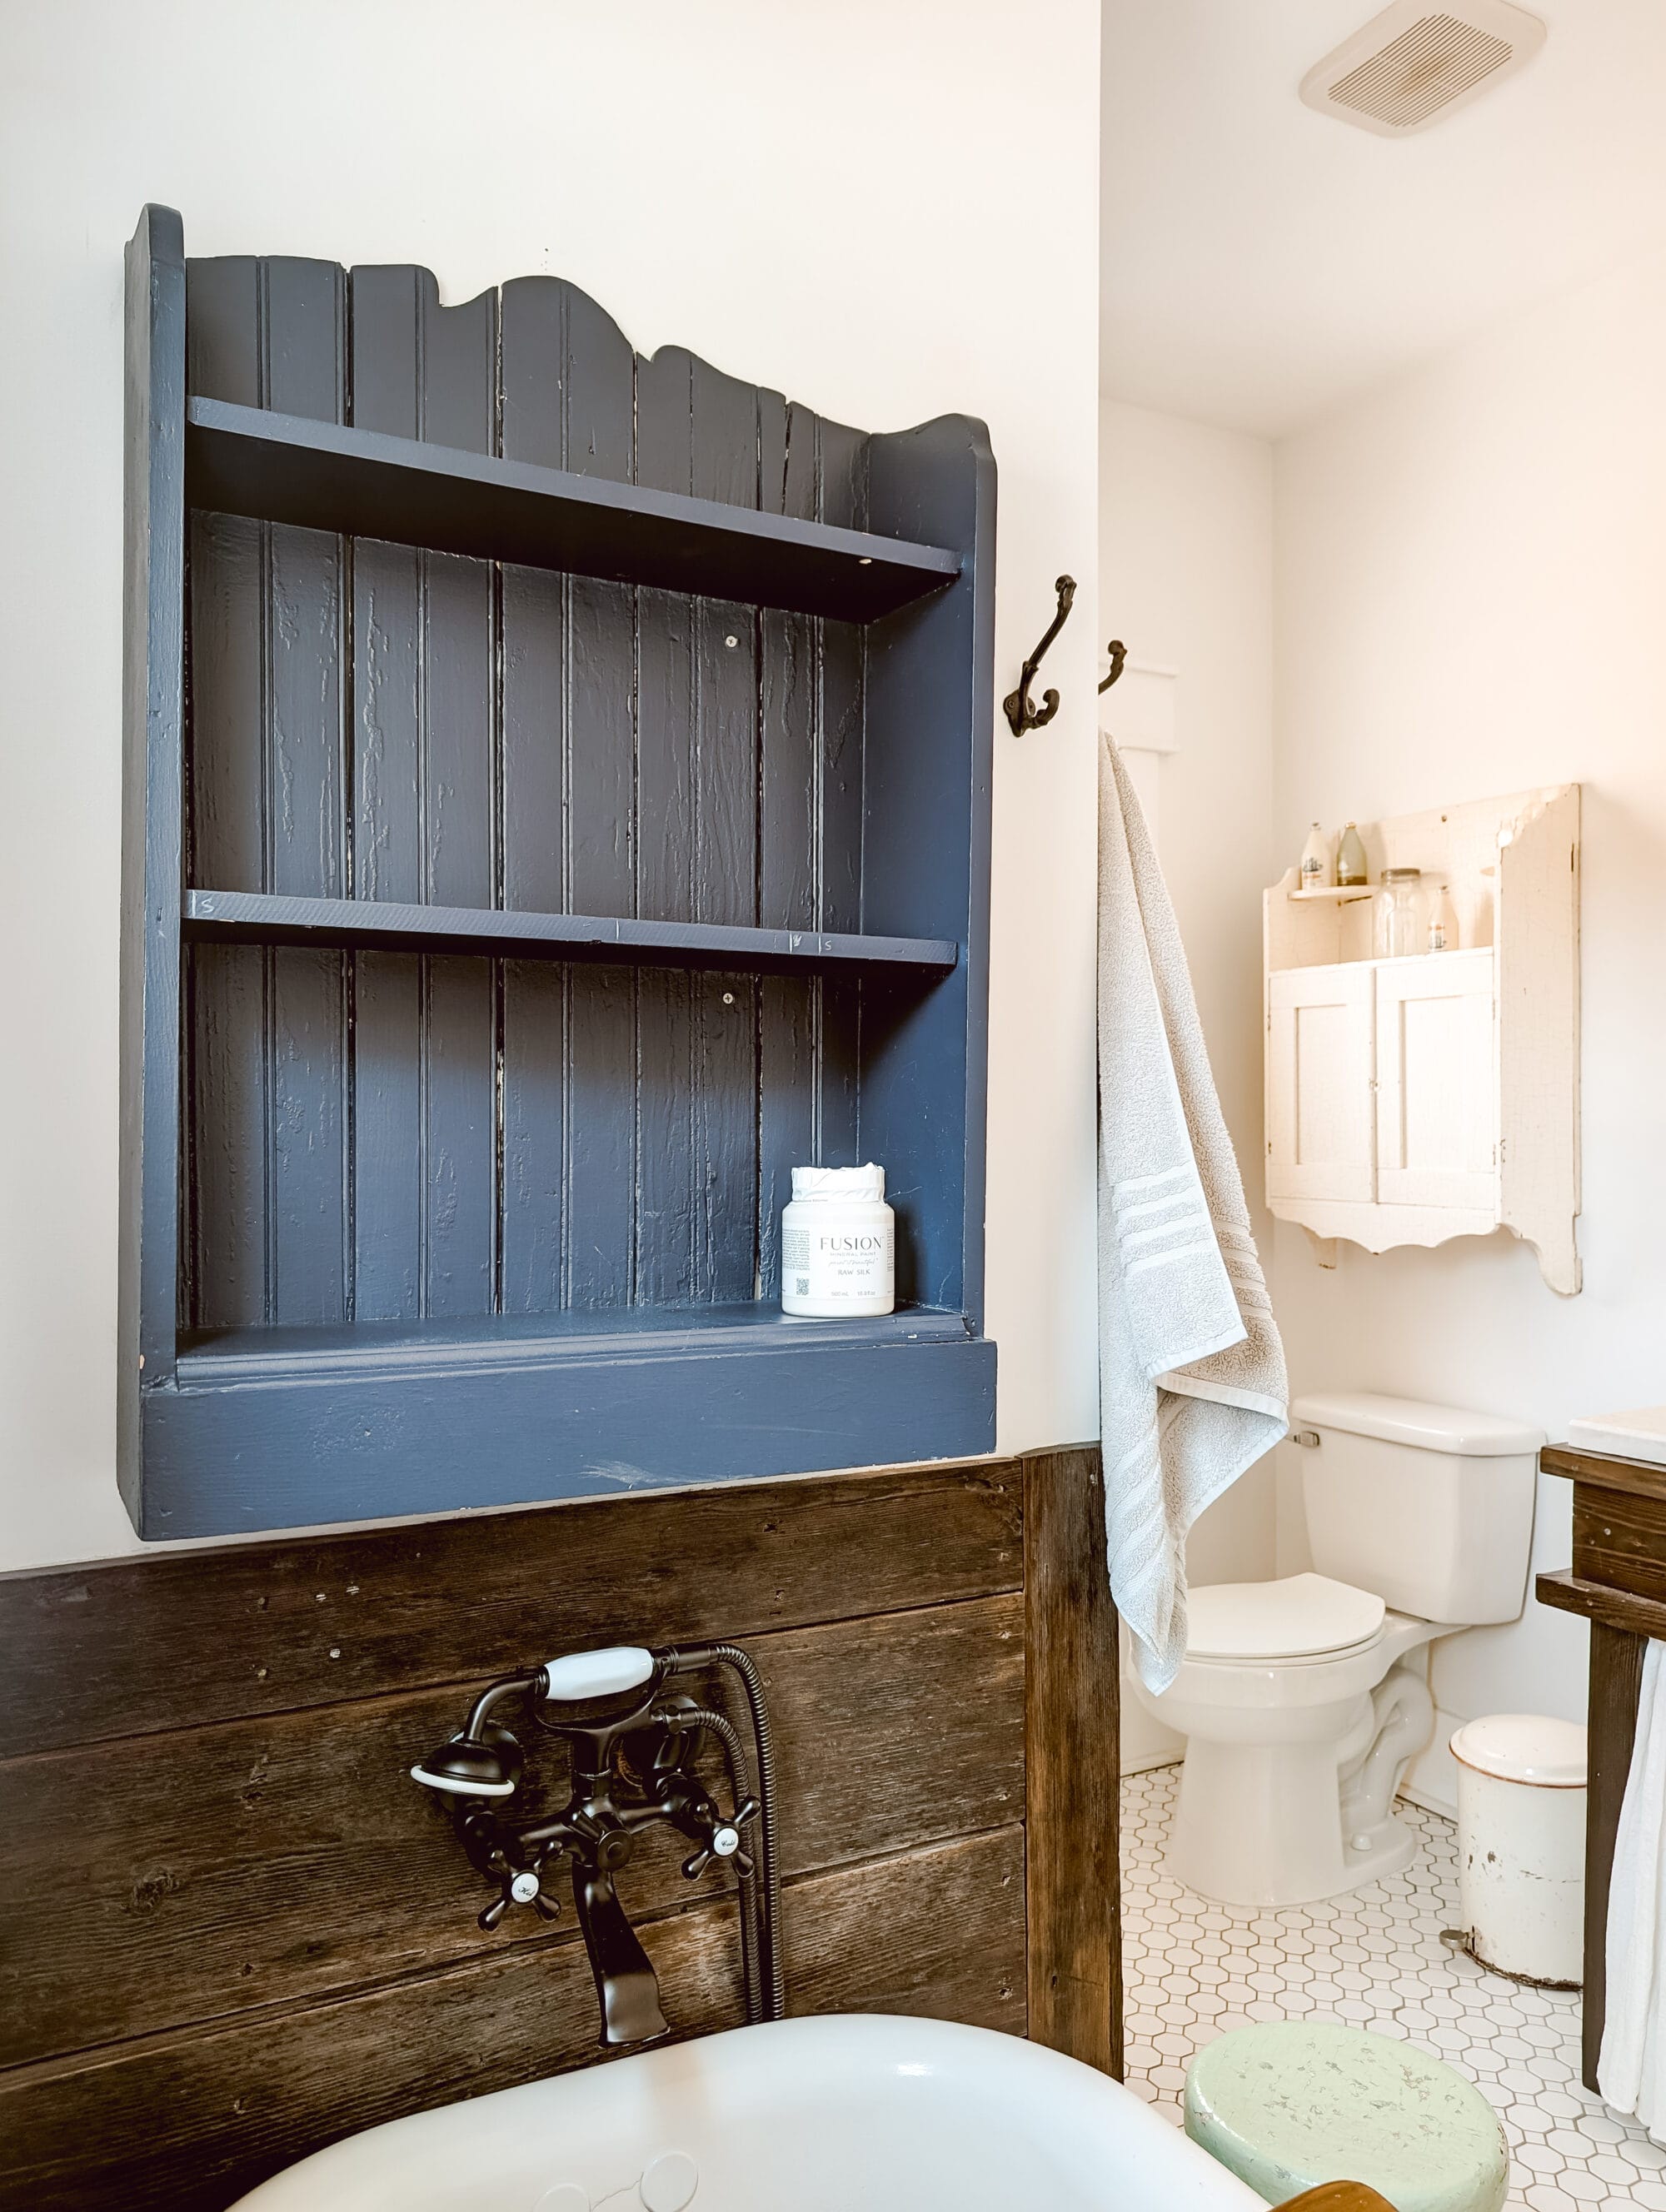
Ok, now that I’ve shown you both pieces, let me tell you how we hung the little bookshelf on the wall over our clawfoot tub.
We used our drill and a few screws to secure the shelf to the wall.
Because the shelf was super sturdy and the back was made of thick tongue and groove boards, we were able to drill right through the back of the shelf, through the drywall, and into the studs.
I believe we used a 3 or 4 inch wood screws just to be on the safe side.
It took a little bit of planning and a little bit of research to line everything up just right.
We used our stud finder, and took lots of measurements of the wall and the cabinet to make sure it would be centered before we hung it up.
And we also looked through old construction photos to make sure we didn’t hit any of the plumbing!
When our farmhouse was under construction, we would come down here several times a week to check on things. And usually my mom or I would take photos of the house and all the progress that had been made.
I can’t tell you how many times I’ve scrolled back through those construction photos, checking to see exactly where our electrical runs, how the studs are situated, and what all our pipes and plumbing looks like behind the drywall.
Those photos were especially helpful in planning out how we would hang this bookshelf.

They gave us piece of mind that we wouldn’t hit any pipes with a screw when we hung up this shelf!
Once we had everything lined up, centered, the studs marked, the cabinet marked… it really was as simple as securing it to the wall with a few screws.
Painting the Bookshelf a Creamy White
After the shelf was installed, it was time to paint it so it fit this space a little better!
I ended up painting the shelf white. More specifically in the color Raw Silk by Fusion Mineral Paint.
Raw Silk is one of my favorite, go-to warm white paint colors from Fusion.

If you’re looking for the perfect white for your next paint project, I’ve tested out quite a few. Click below to see some of my past paint projects and more of my favorite whites from Fusion Mineral Paint.
Color Reviews
with Fusion Mineral Paint
-
Fusion Mineral Paint Cashmere: Color Review & Project Inspo
-
Fusion Mineral Paint Picket Fence: Color Review & Project Inspo
-
Fusion Mineral Paint Putty: Color Review & Project Inspo
-
Fusion Mineral Paint Raw Silk: Color Review & Project Inspo
-
Sampling all the Neutral and White Fusion Mineral Paint Colors
It took 3 coats of paint to fully cover the navy blue.
Normally 2 coats covers pretty well with Fusion Mineral Paint. But you typically need 3 when you’re going from this dark of a color to white.
I’m so glad I went with Raw Silk because it truly is such a pretty, creamy shade white. And it was almost a perfect match to the original paint color on our vintage medicine cabinet!

Now these two mis-matched storage pieces feel more like “sisters”.
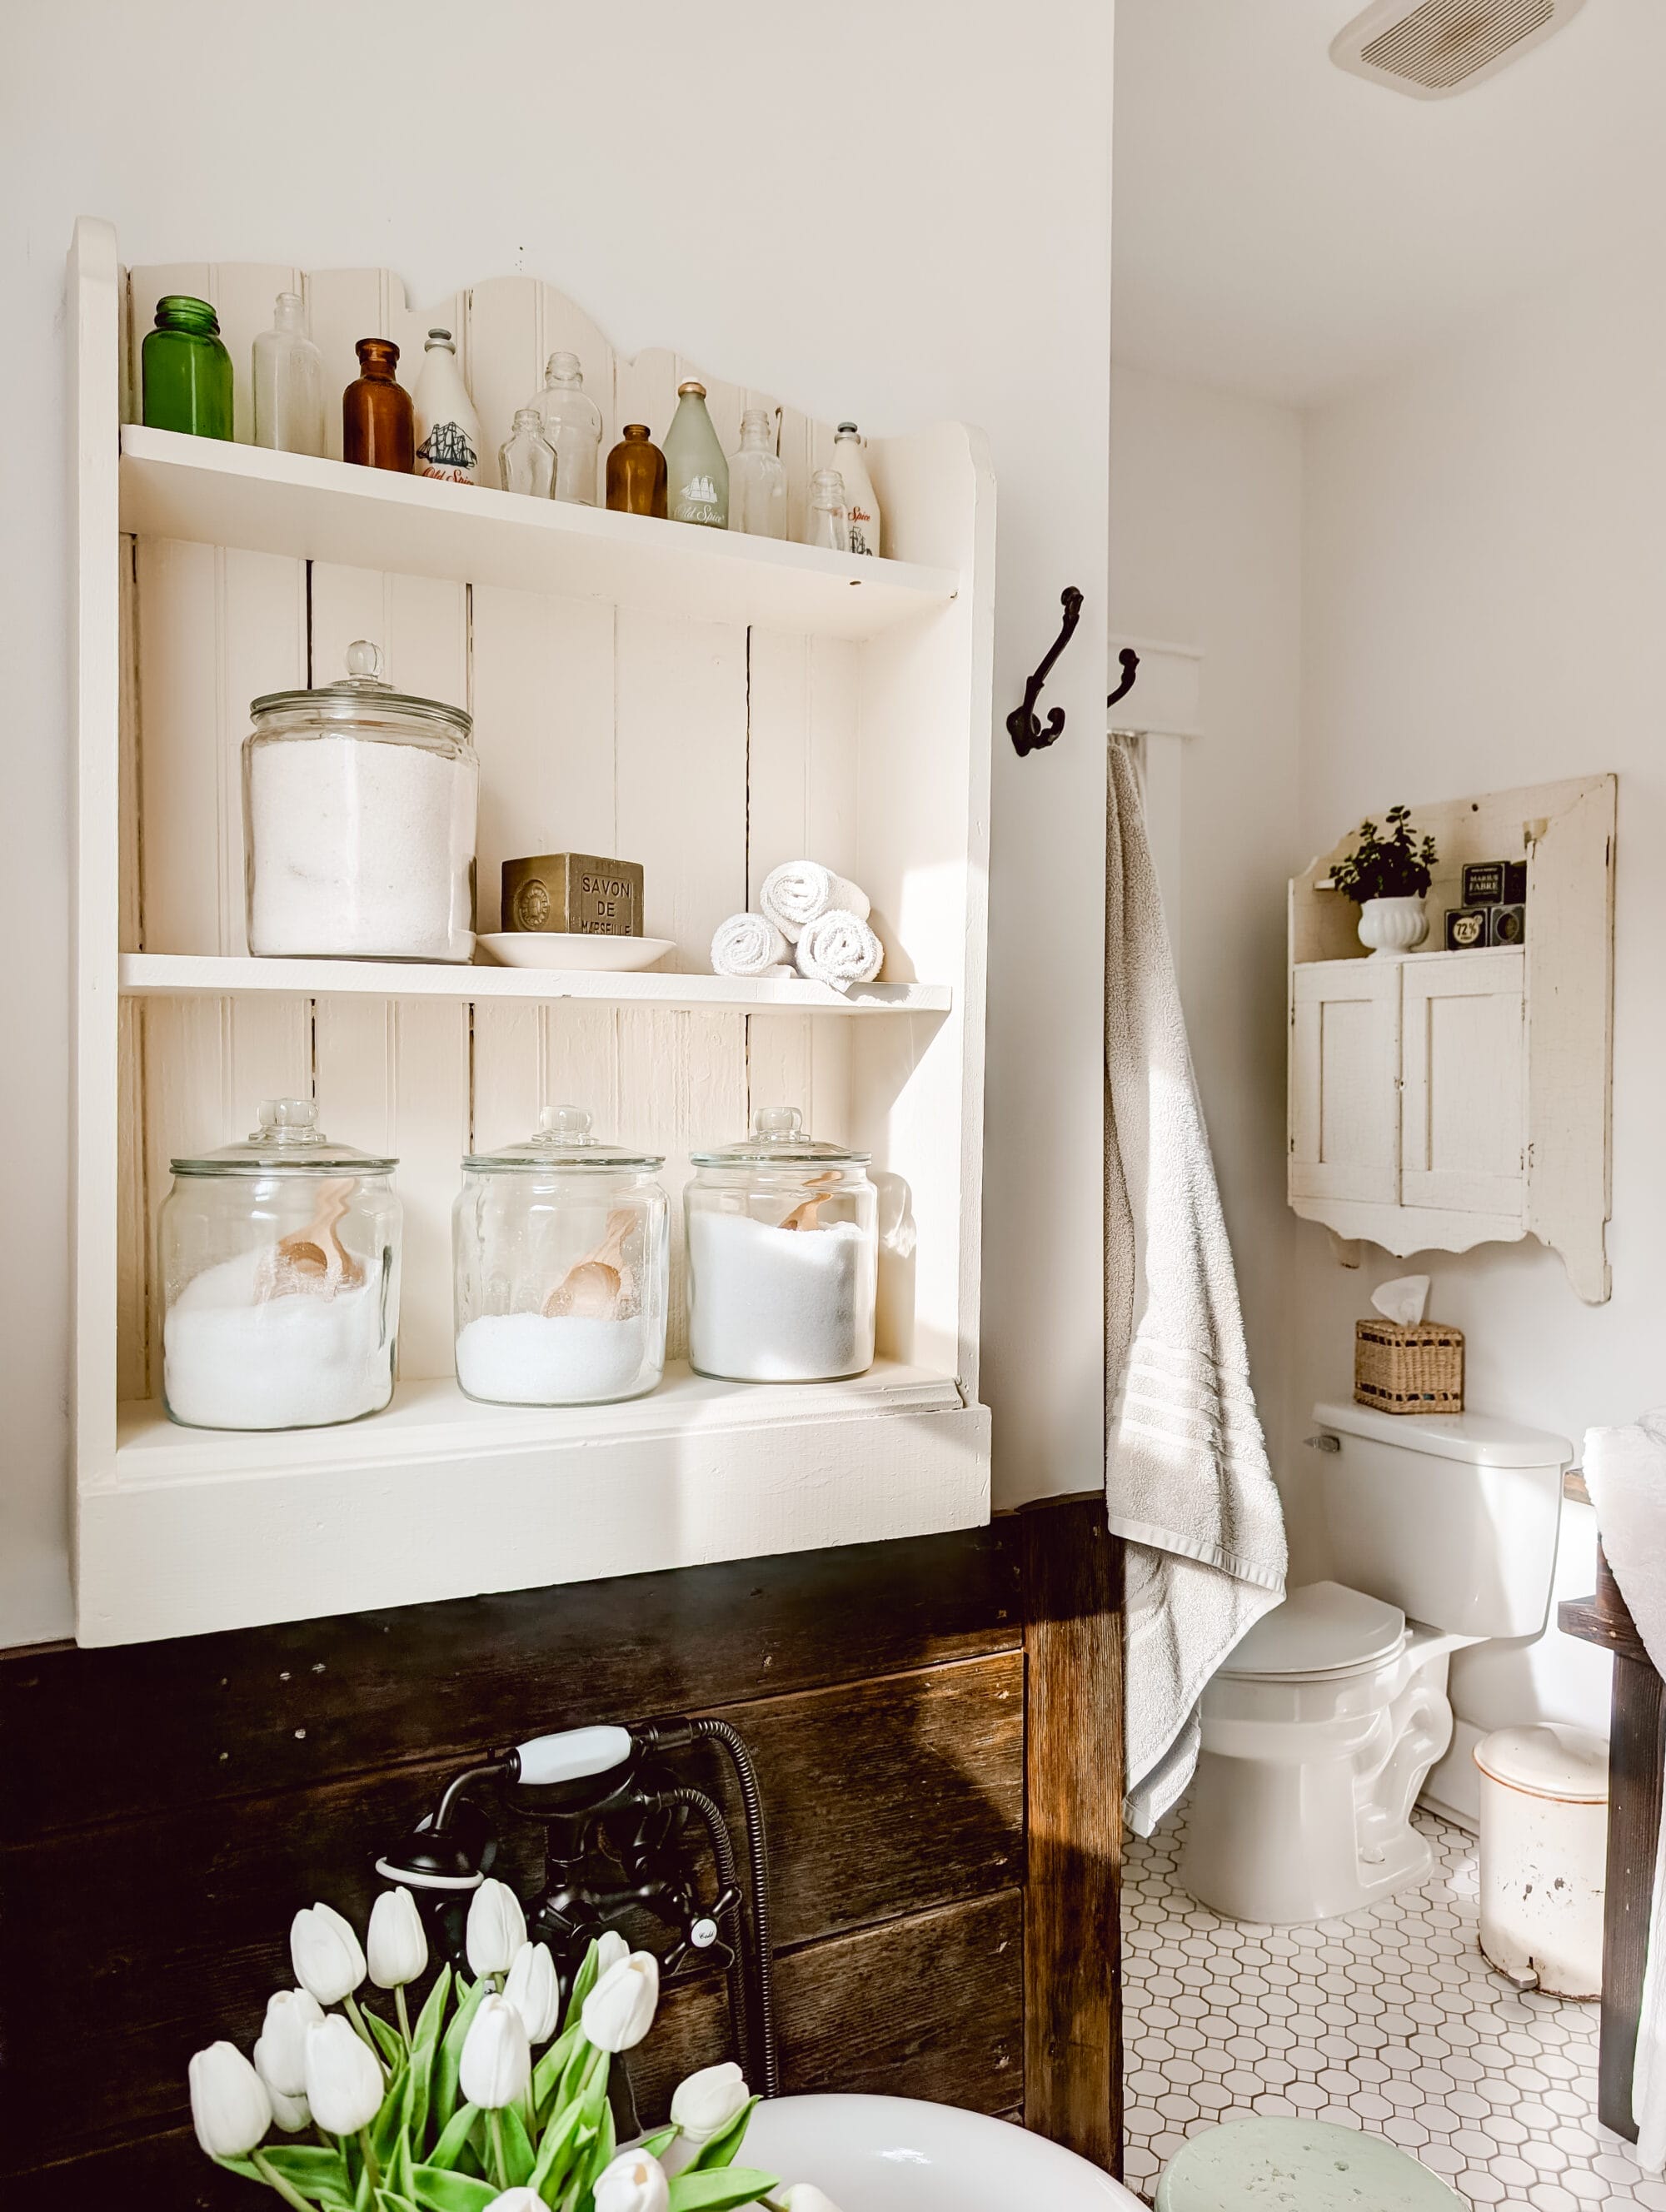
Like they were both meant to be in our bathroom!
Getting Started with Paint Projects
Paint is a great way to make your thrift store scores and your Facebook Marketplace finds feel a little more like you!
But getting started can be intimidating, especially if you’ve never painted furniture before.

Maybe you’re feeling overwhelmed. Maybe you’re scared you’ll mess it up. Should you sand it first, or prime it, and do you need to seal it after you paint? And what kind of paint should you even use?
A Beginner’s Guide to Painting Furniture
That’s why I created my furniture painting guide. To answer some of those questions that are holding you back from transforming a piece of furniture you kindof like, into a piece you LOVE!
Save on Fusion Mineral Paint
Or maybe you’re not a beginner. Maybe you’re a DIY-er like me who loves painting furniture and just needs to stock up on some paint for your next project?
If that’s you, be sure to use my code and save 10% on paint and supplies for your project!
for your next DIY
Save 10% on Fusion Mineral Paints with code:
Thanks for stopping by the blog today!
I LOVE how this project turned out!

And I’m so glad I got the idea to turn this vintage children’s bookshelf into a decorative wall shelf for our bathroom.

I hope you love it too, and I hope today’s post brought a little inspo to your scroll!
Until next time…