
DIY Embroidery Hoop Christmas Ornaments
This post may contain affiliate links. For more information, you can read my full disclaimer here.
Today on the blog I’m going to show you how I made these DIY embroidery hoop Christmas ornaments!
Wait till you see how pretty these turned out…

Cute right?
I’m obsessed with them! And they were so easy to make, I wish I bought a few more embroidery hoops because I would have made more ornaments!!
Let’s jump into the DIY so you can make some for your tree this year…
How to Make Vintage Embroidery Hoop Ornaments
One thing I love about this DIY is that you can make it totally your own and create a look that’s unique to you and your style.
I used a piece of vintage fabric. It was fairly small, about the size of a cloth napkin. And it had the most beautiful pattern on it. The pattern almost reminds me of an antique Ohio Star quilt pattern!
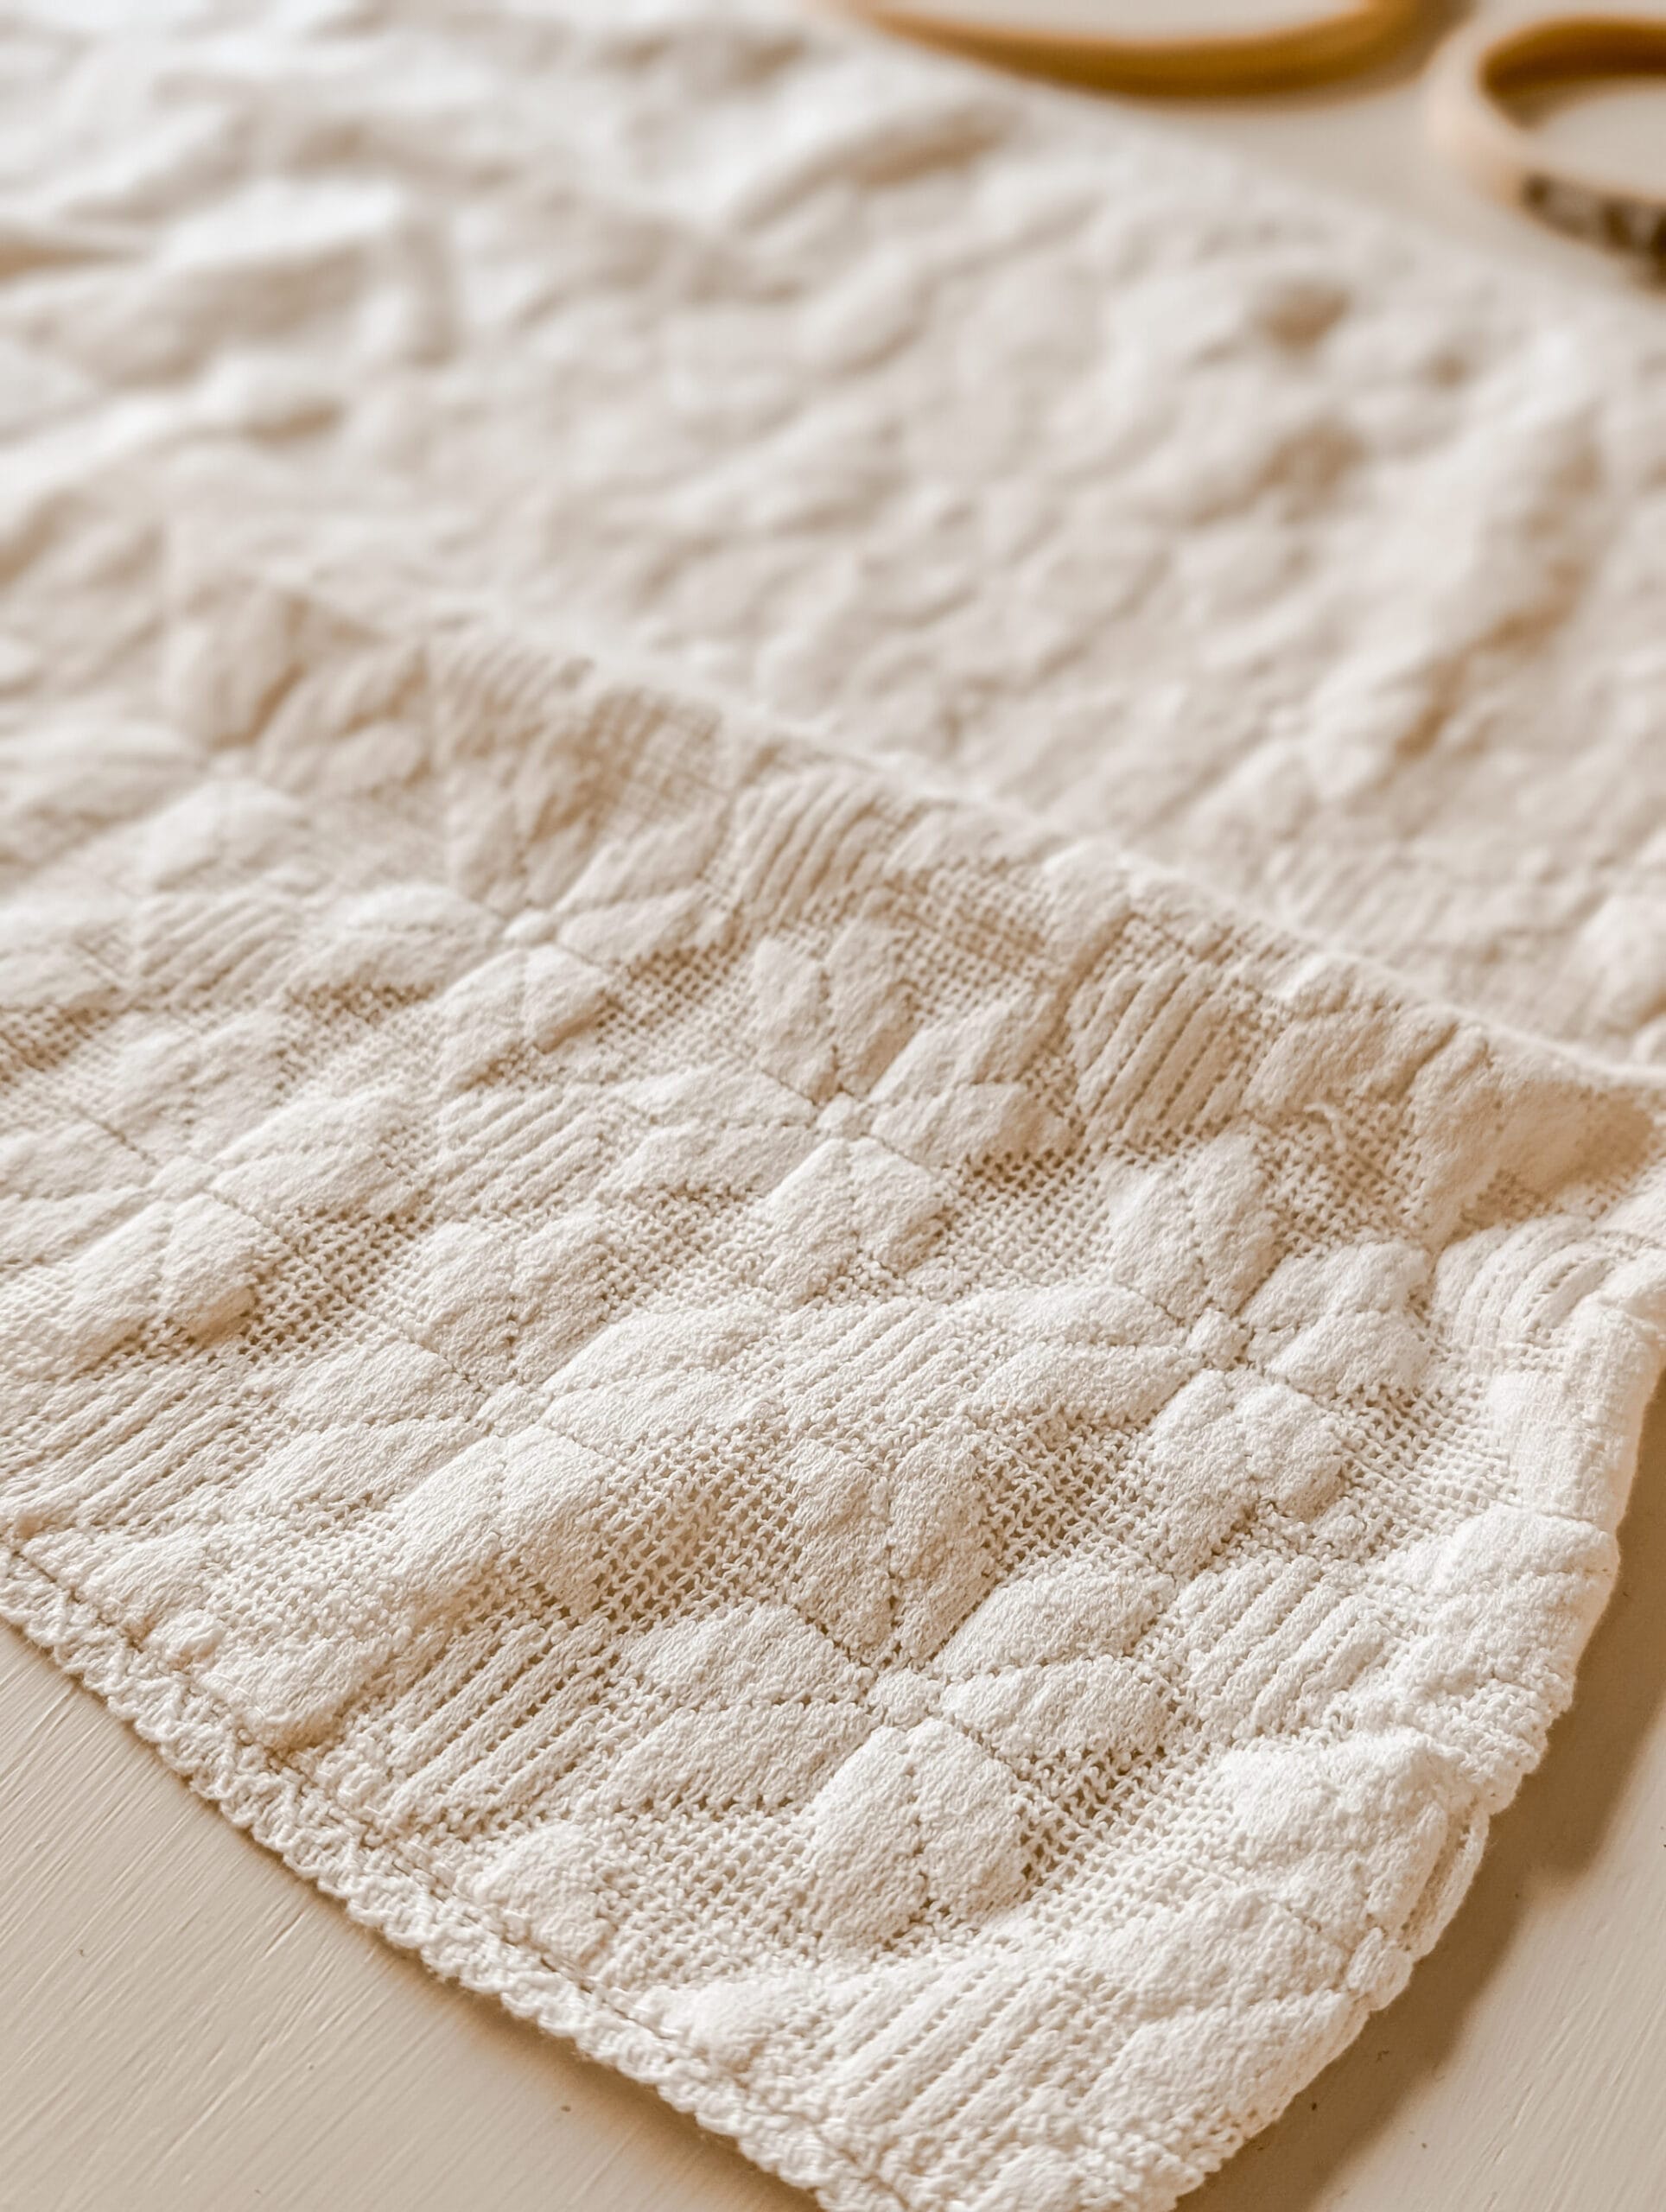
I’m calling this old fabric piece a doily for this post, and I know that’s not quite the right name for it. But it’ll have to do because I don’t know what else to call it.
Vintage linen lovers, help me out if you know of a better term!

You can use any fabric you like for this DIY.
Lace, doilies, a thin sweater you thrifted, an old cutter quilt, a pretty tea towel, a yard of fabric you found at the fabric store… I could keep going, but you get the idea.
The point is you can use just about any piece of fabric you like to make these DIY embroidery hoop Christmas ornaments fit your style.
Supplies You Need for this DIY:
- wooden embroidery hoops – I used a few different sizes (3 inch, 4 inch, and 5 inch).
- a piece of vintage fabric – lace, doilies, old cutter quilts, scrap fabric, etc.
- very sharp scissors
- twine or ribbon
Step by Step Instructions for DIY Embroidery Hoop Ornaments
Step 1: gather your supplies
Depending on the fabric you choose, you won’t want to get started until you have all the supplies you need ready to go.
Certain fabrics will unravel once you start cutting them. Especially doilies and lace.

Step 2: arrange your embroidery hoops on the fabric
Once you have all your supplies, you can start arranging the embroidery hoops on the fabric.
I wanted to squeeze as many hoops onto my doily as I could. So I played around with the arrangement a couple times until I was happy with it.

Experiment with your layout. When you’re cutting an old piece like this, you just want to arrange the hoops in a way that will give you the most Christmas ornaments before you start cutting.
Step 3: attach the hoops to the fabric and tighten to secure
Once you’re happy with how you’ve arranged your embroidery hoops, start attaching them to the fabric.
Loosen the screw at the top of your embroidery hoop to open up the ring.

I placed the smaller ring underneath the back side of the fabric, then I placed the larger ring on top to create a frame around the fabric.
Tighten the screw at the top of the embroidery hoop to secure it in place.
Continue securing all the rest of your embroidery hoops to the fabric in the same way.
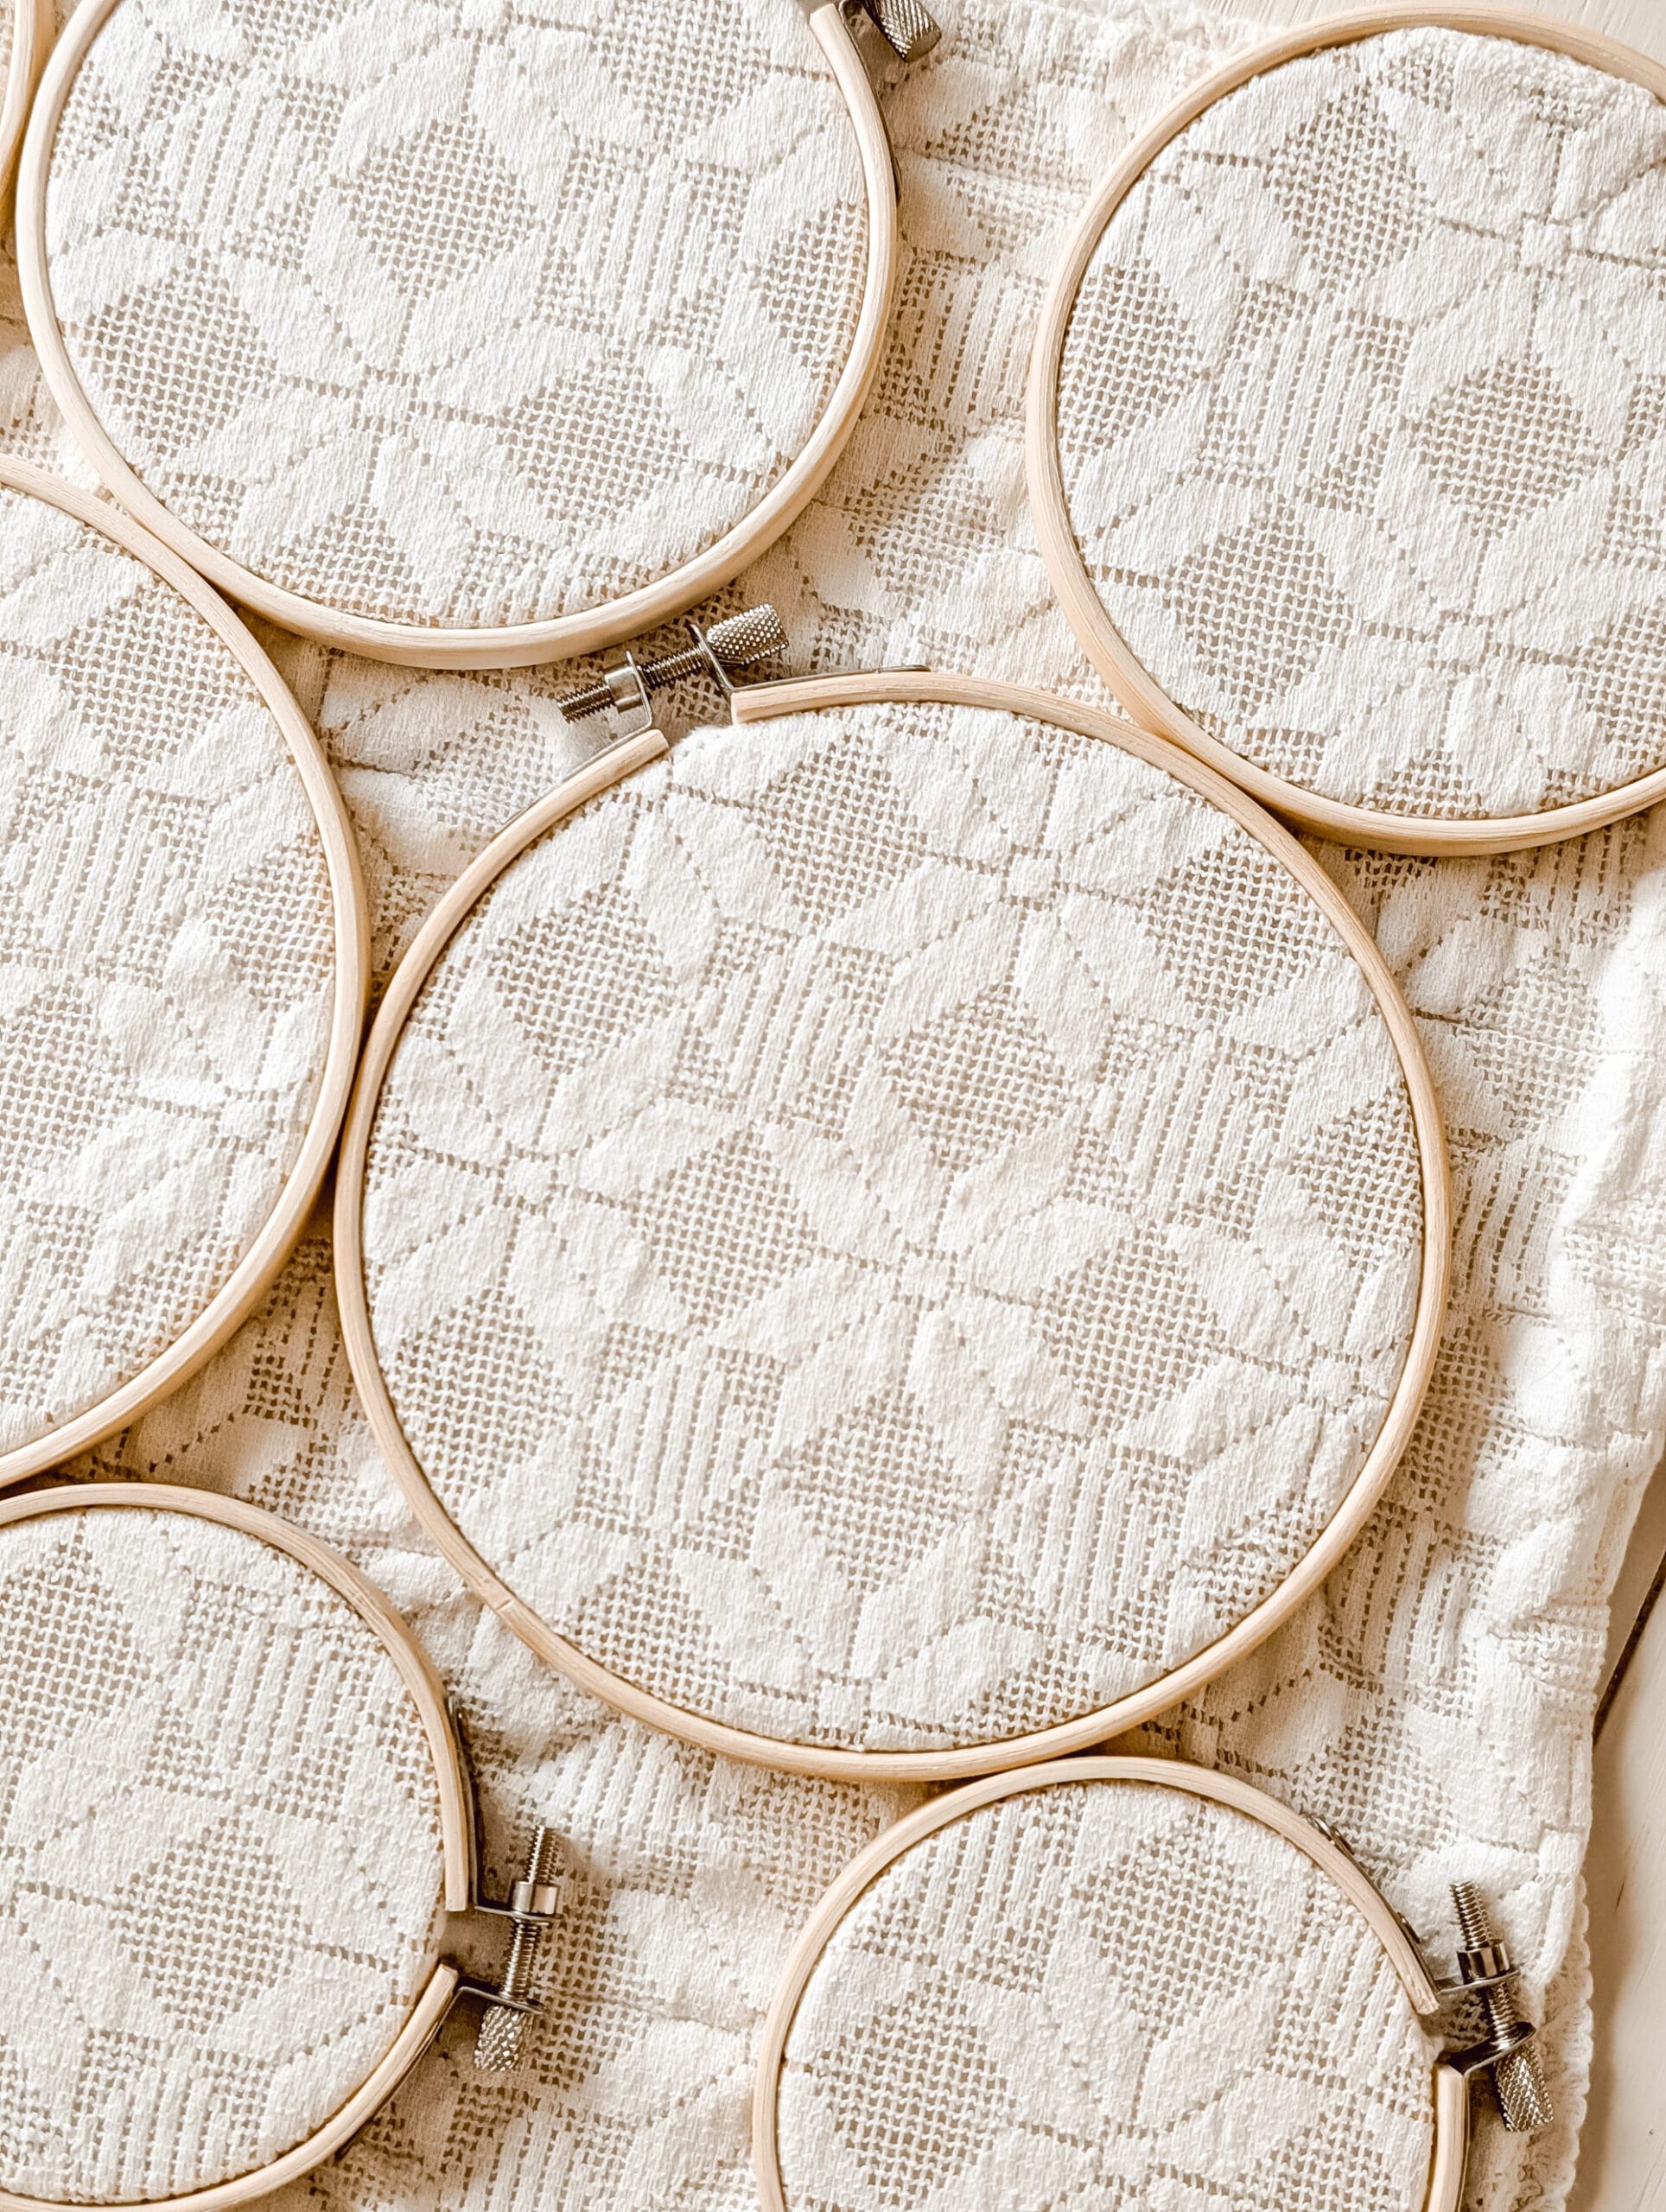
You don’t need a ton of space in between the ornaments. Some of mine were basically touching each other as you can see above.
As long as you can get your scissors in between the hoops you’ll be fine.
But don’t move on to the next step until all of your hoops are attached!
Step 4: cut out each individual embroidery hoop
Once all your embroidery hoops are secured to the fabric, you can start cutting out your ornaments.
You’ll want to use very sharp scissors to get a clean edge and with less pulling on the fabric!

It may not be as crucial to wait to cut out your ornaments if you’re working with a regular piece of fabric.

But if you’re working with a doily, or lace even, you don’t want the fabric to start unraveling when you cut it. That would be a mess!

Step 5: add ribbon or twine as an ornament hanger
You’re almost there. Now you just need to add some twine or a ribbon!
I chose twine for my DIY embroidery hoop ornaments.

Thread the twine through the top of your embroidery hoop, right under the screw fastener. Then secure the twine by tying a knot.
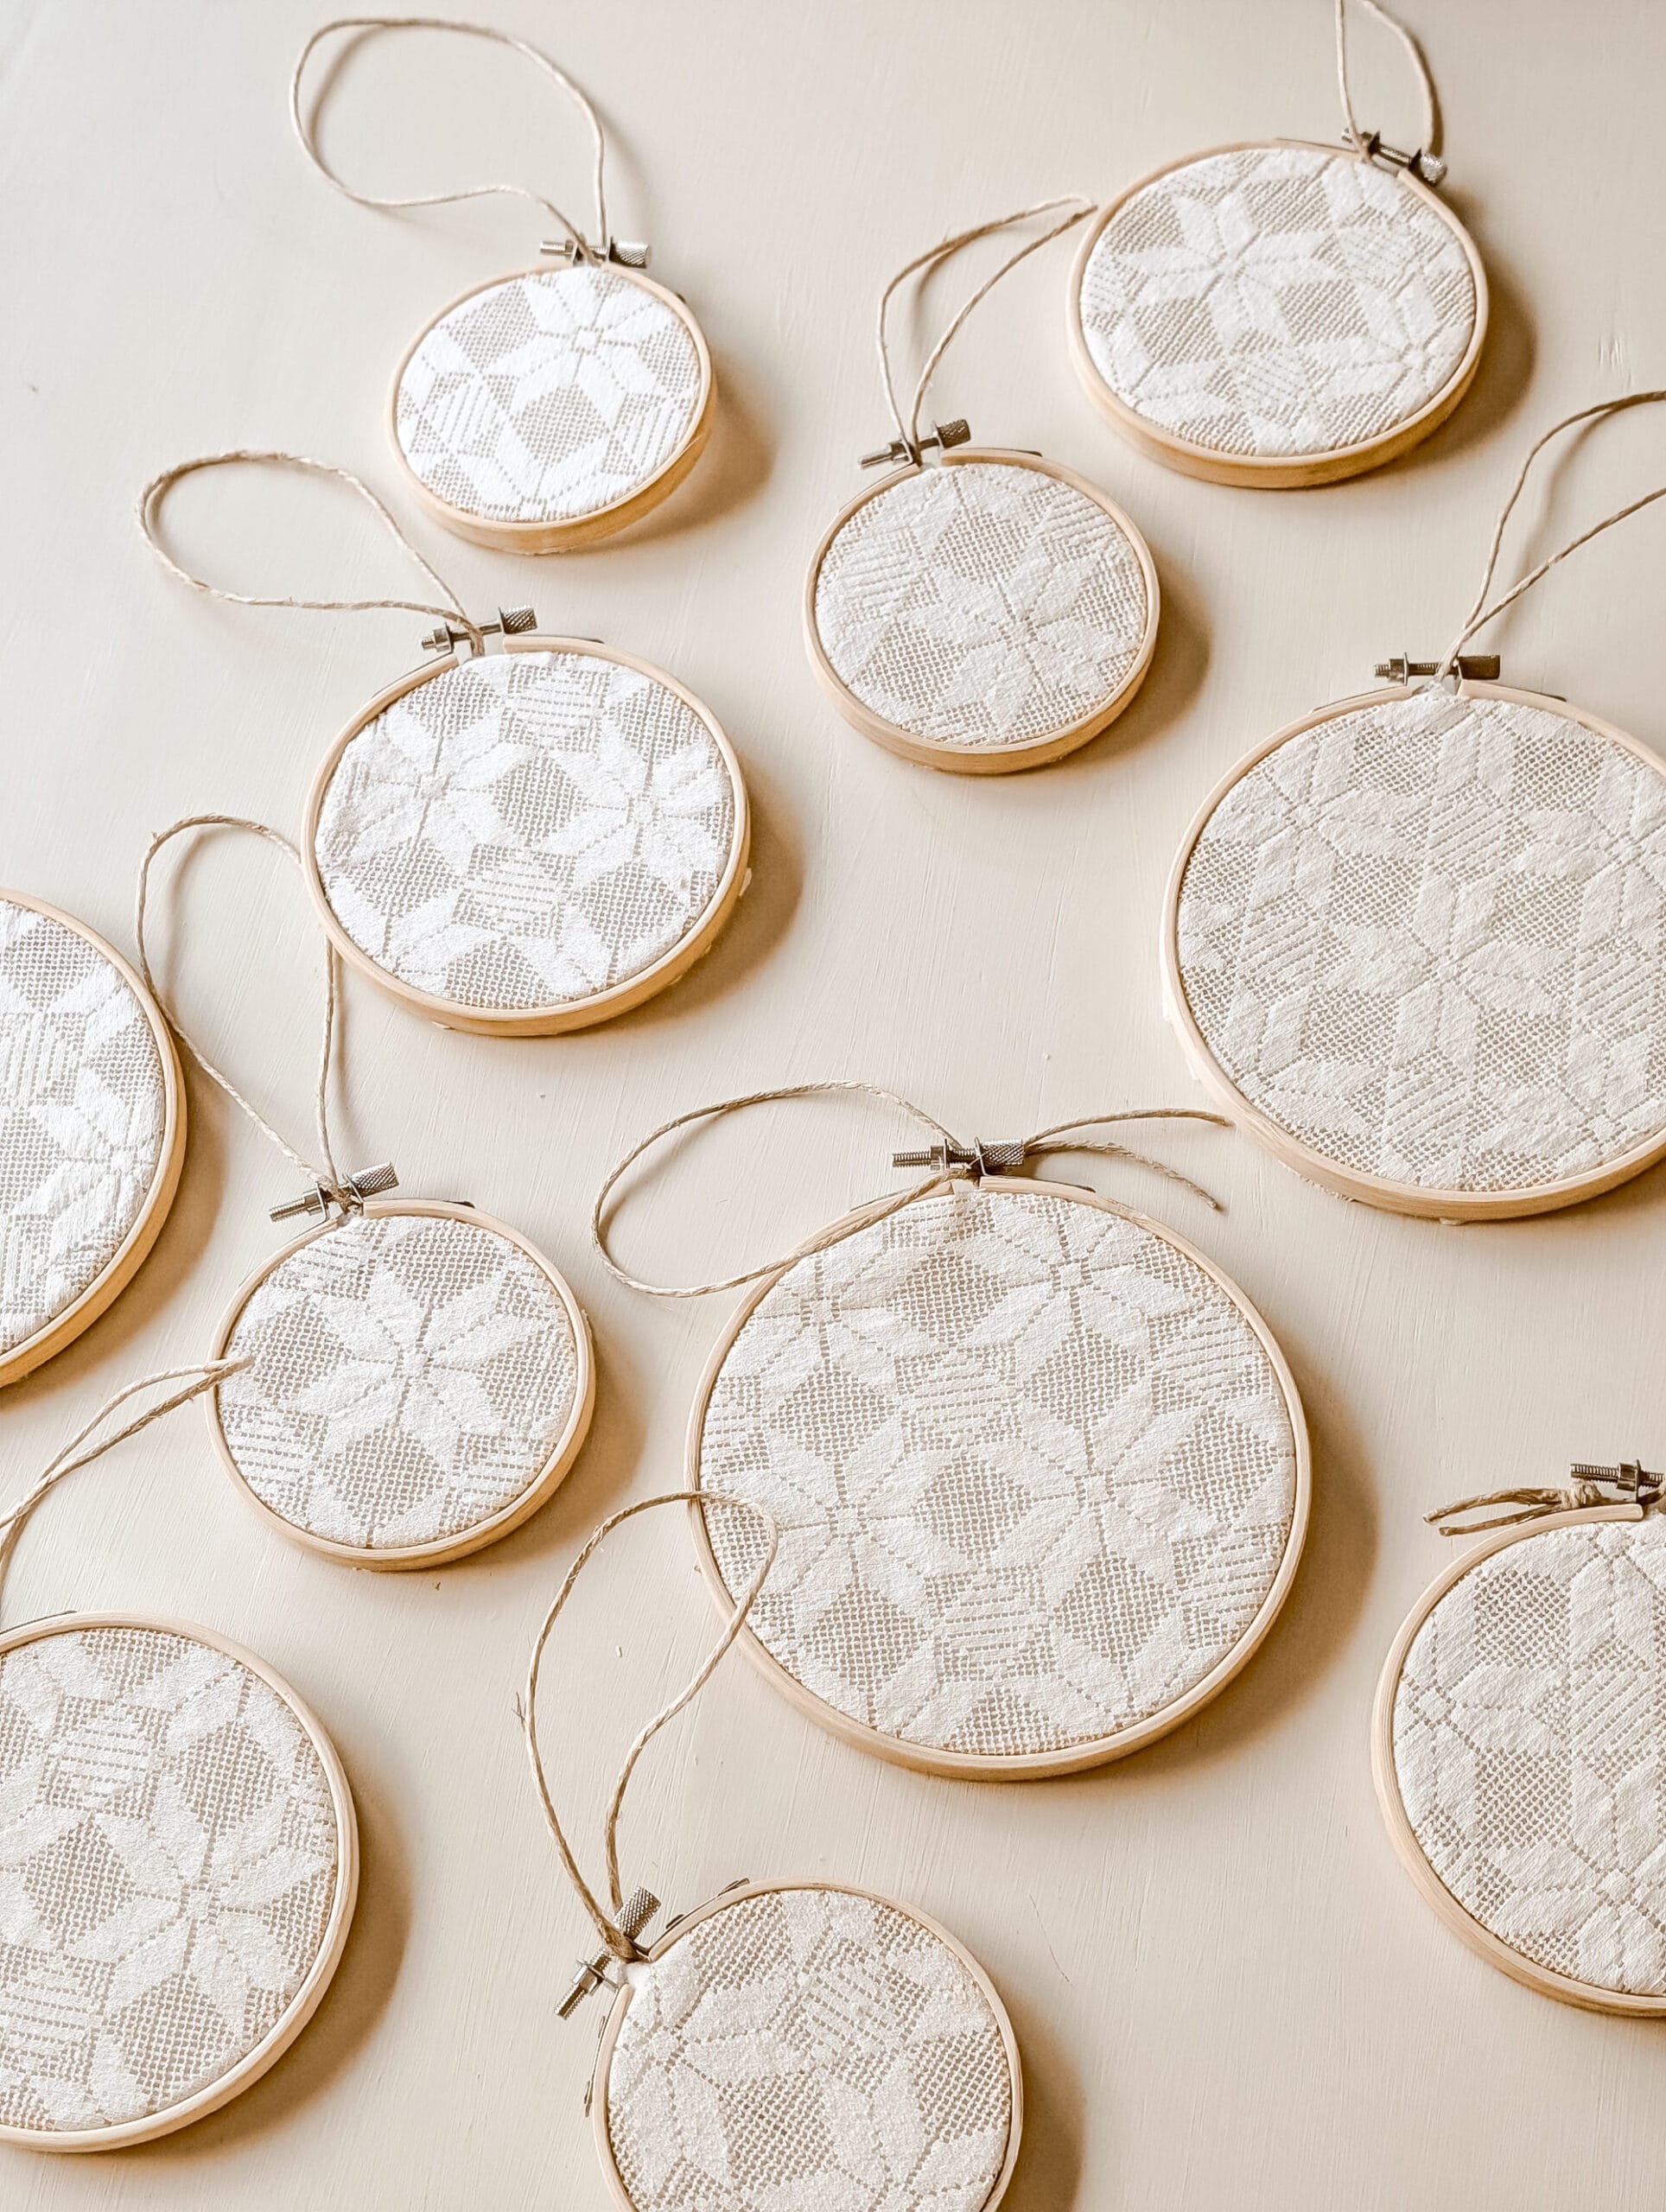
Step 6: hang your Embroidery hoop ornaments and enjoy!
You did it! Now all that’s left to do is hang your ornaments on the tree and enjoy!

I love how my DIY embroidery hoop Christmas ornaments turned out!
I seriously wish I grabbed a few more embroidery hoops so I could make more.
Don’t forget to pin this for later!

I have another doily, an actual doily, that would be just perfect for this project!! So maybe I’ll run back out to the craft store soon…

When you make these DIY embroidery hoop ornaments, I’d love to see em. Please share, send a pic or tag me on Instagram @whiteandwoodgrain so I can see!
Also, if you’re not already, I’d like to invite you to join my email list!
My email list is where I share behind the scenes content, projects I’m working on, and links to new blog posts like this one as soon as they go live.
I hope you enjoyed this post, and I hope it brought a little Christmas joy to your scroll today!
Head to this post next to see more photos of this tree, and all three of this year’s Christmas trees!

And thanks for stopping by the blog today! I love getting to hang out with you here as I share fun little projects like this. Until next time…


These are so beautiful, simple enough that I might be able to attempt to make my own. I don’t put ornaments on my tree, only white lights. Where else might I use these ornaments. Thanks