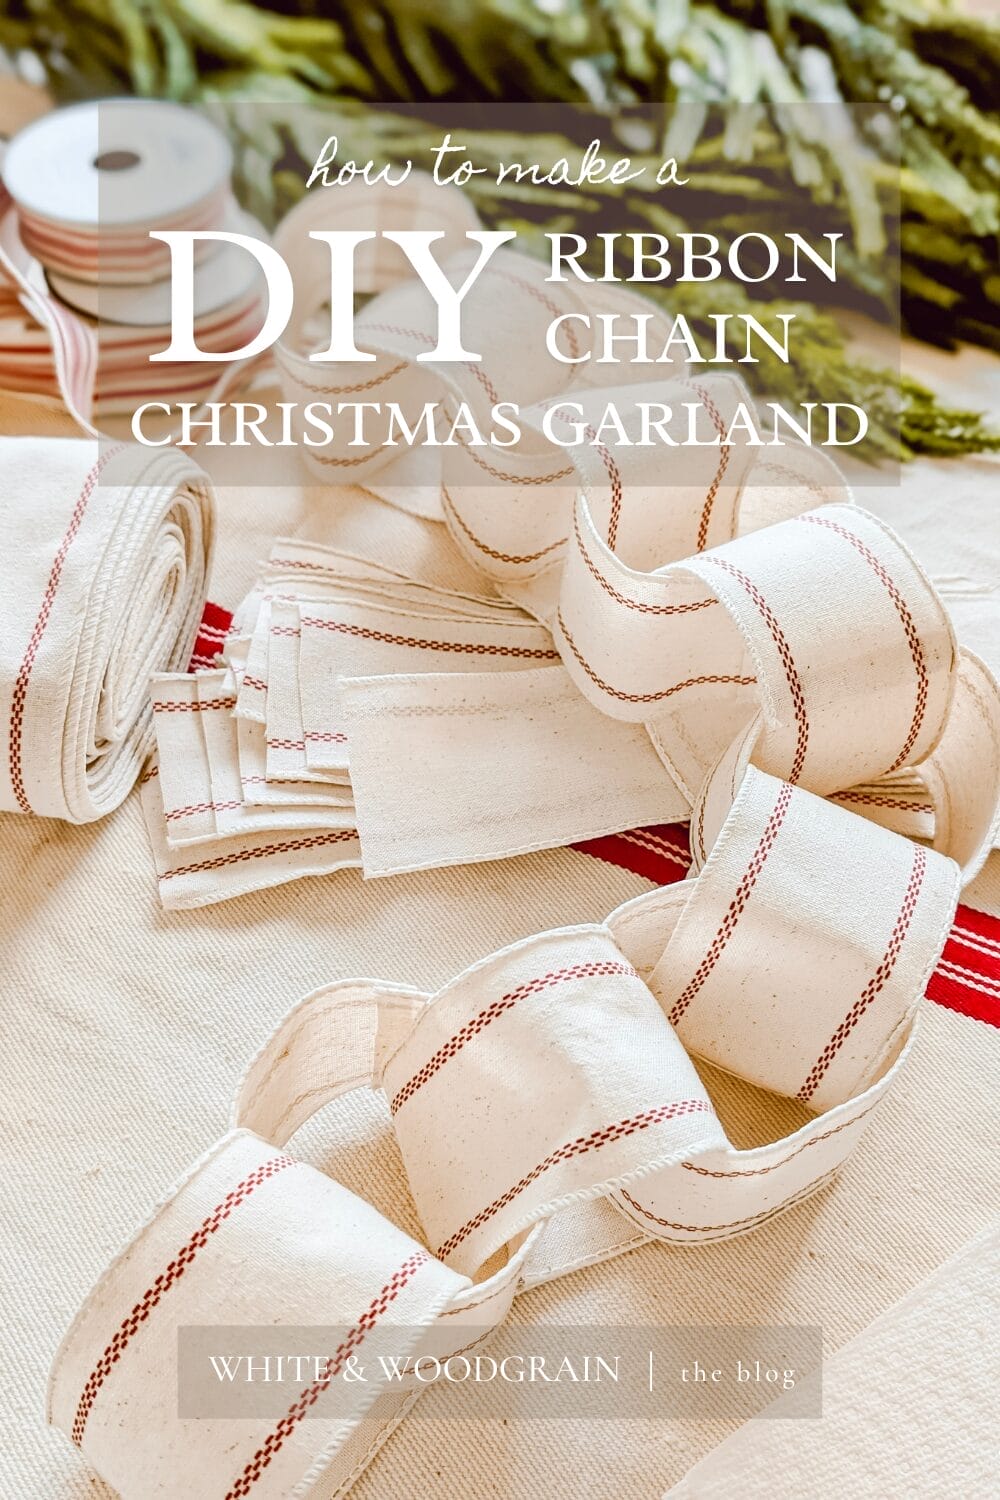
DIY Ribbon Chain Christmas Garland
This post may contain affiliate links. For more information, you can read my full disclaimer here.
You know those paper chains we all used to make in grade school with cut up strips of construction paper and glue sticks? Well I made one today, but not with paper. I used ribbon!

I made a DIY ribbon chain Christmas garland, and it turned out so cute, I had to share it with you here on the blog!
What do you think?!
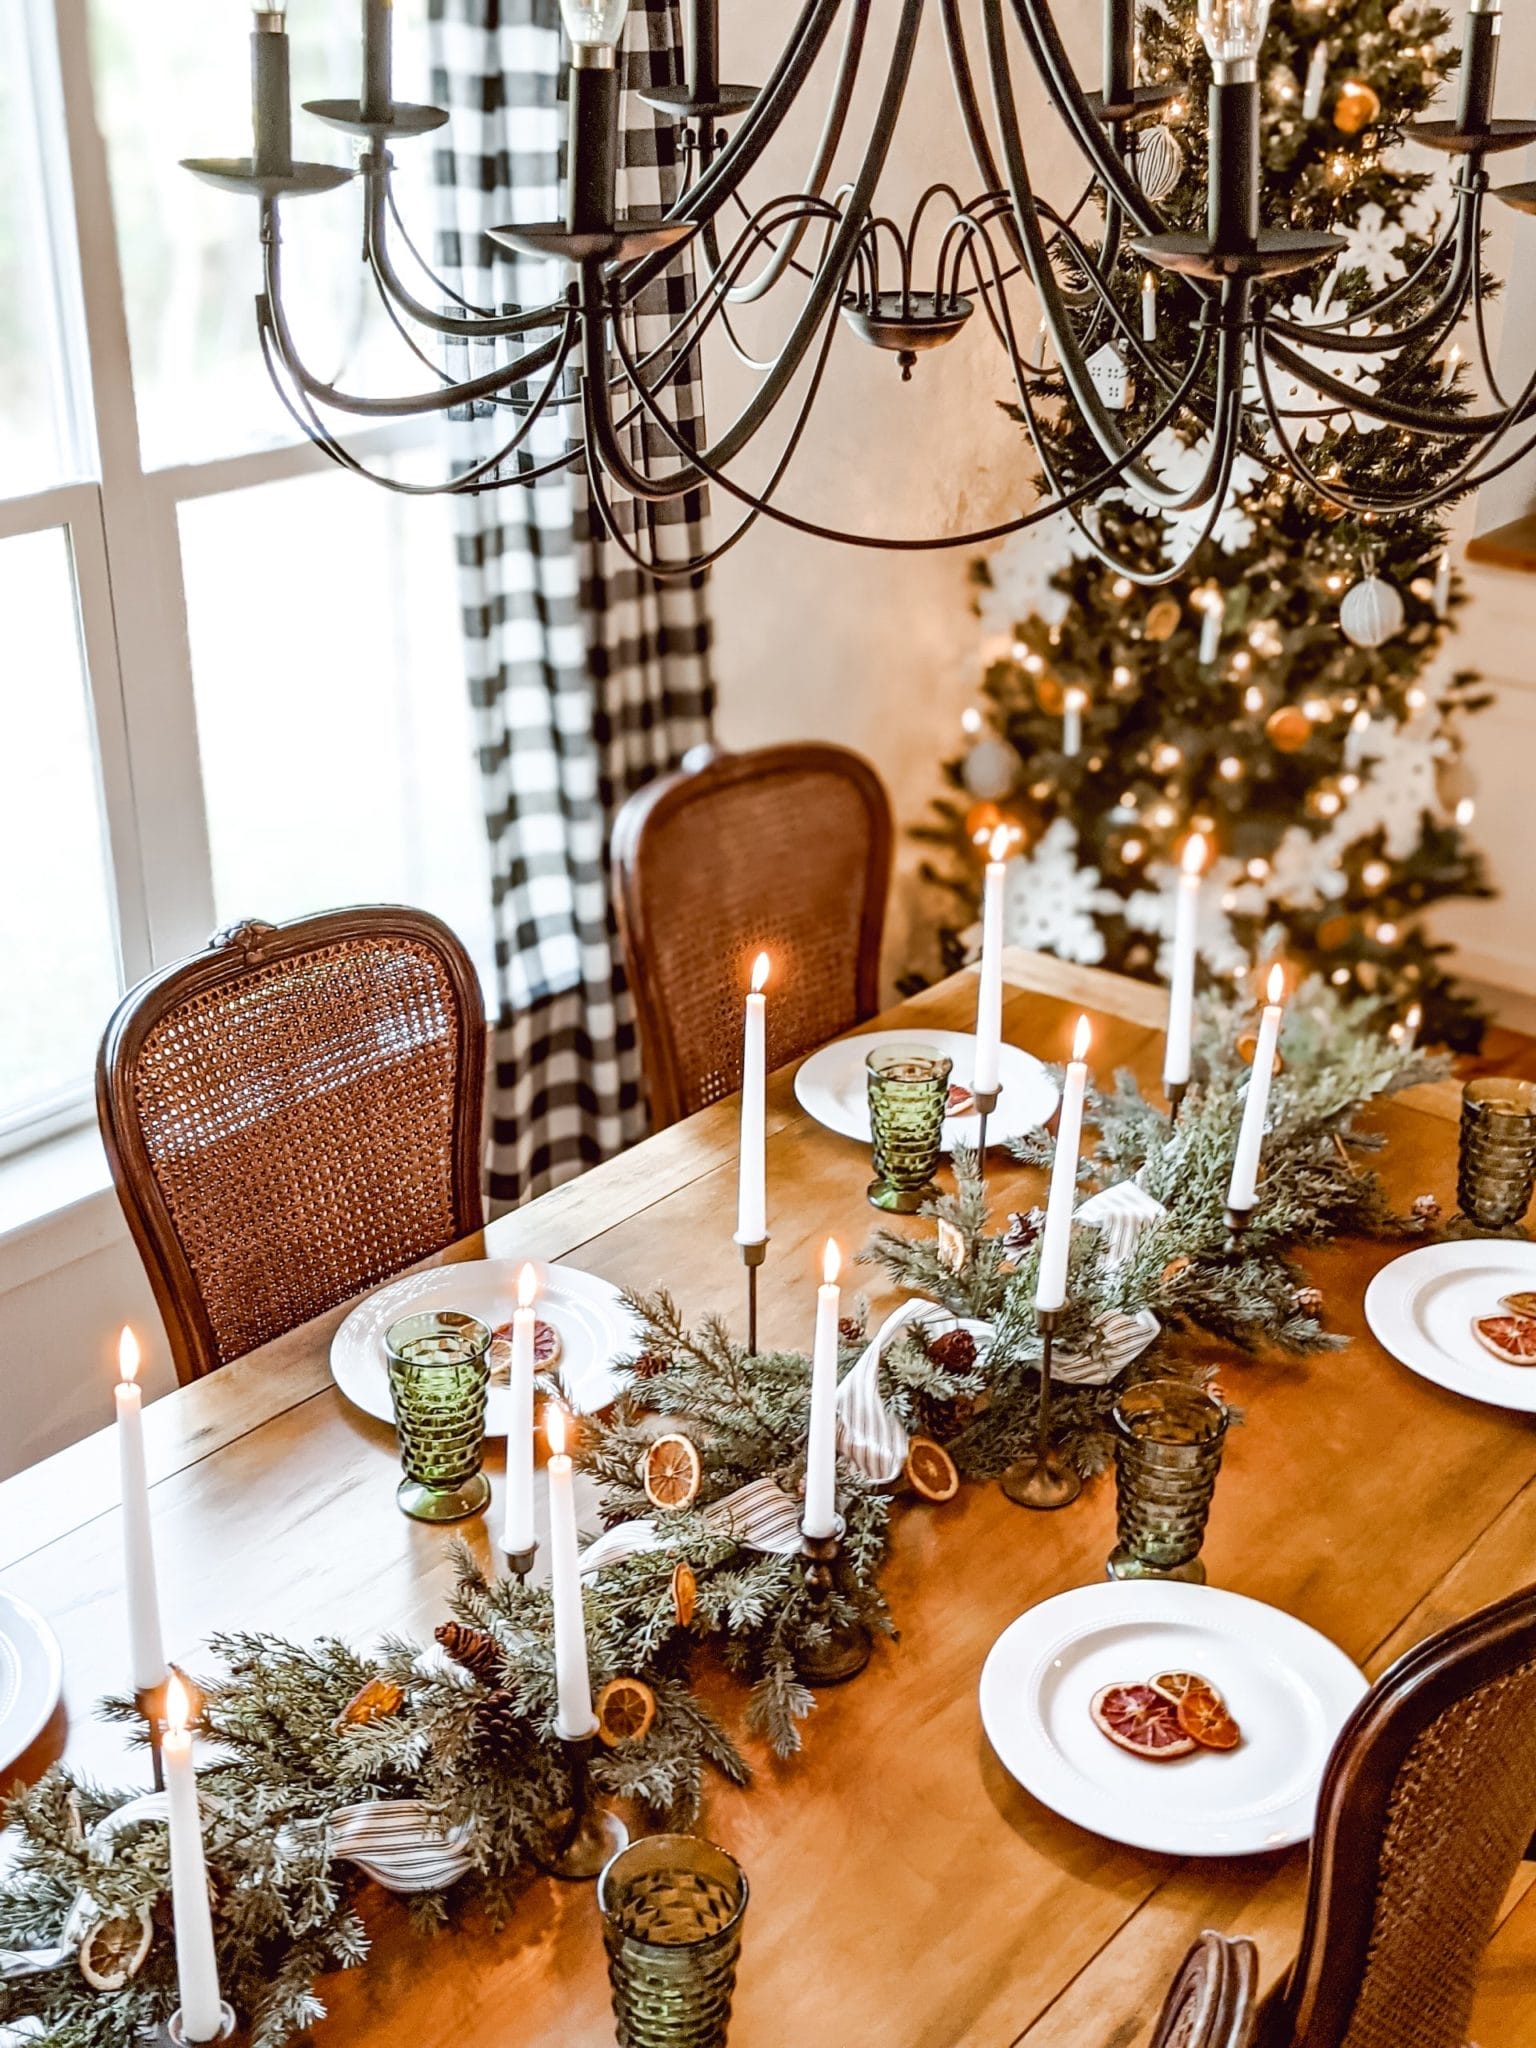
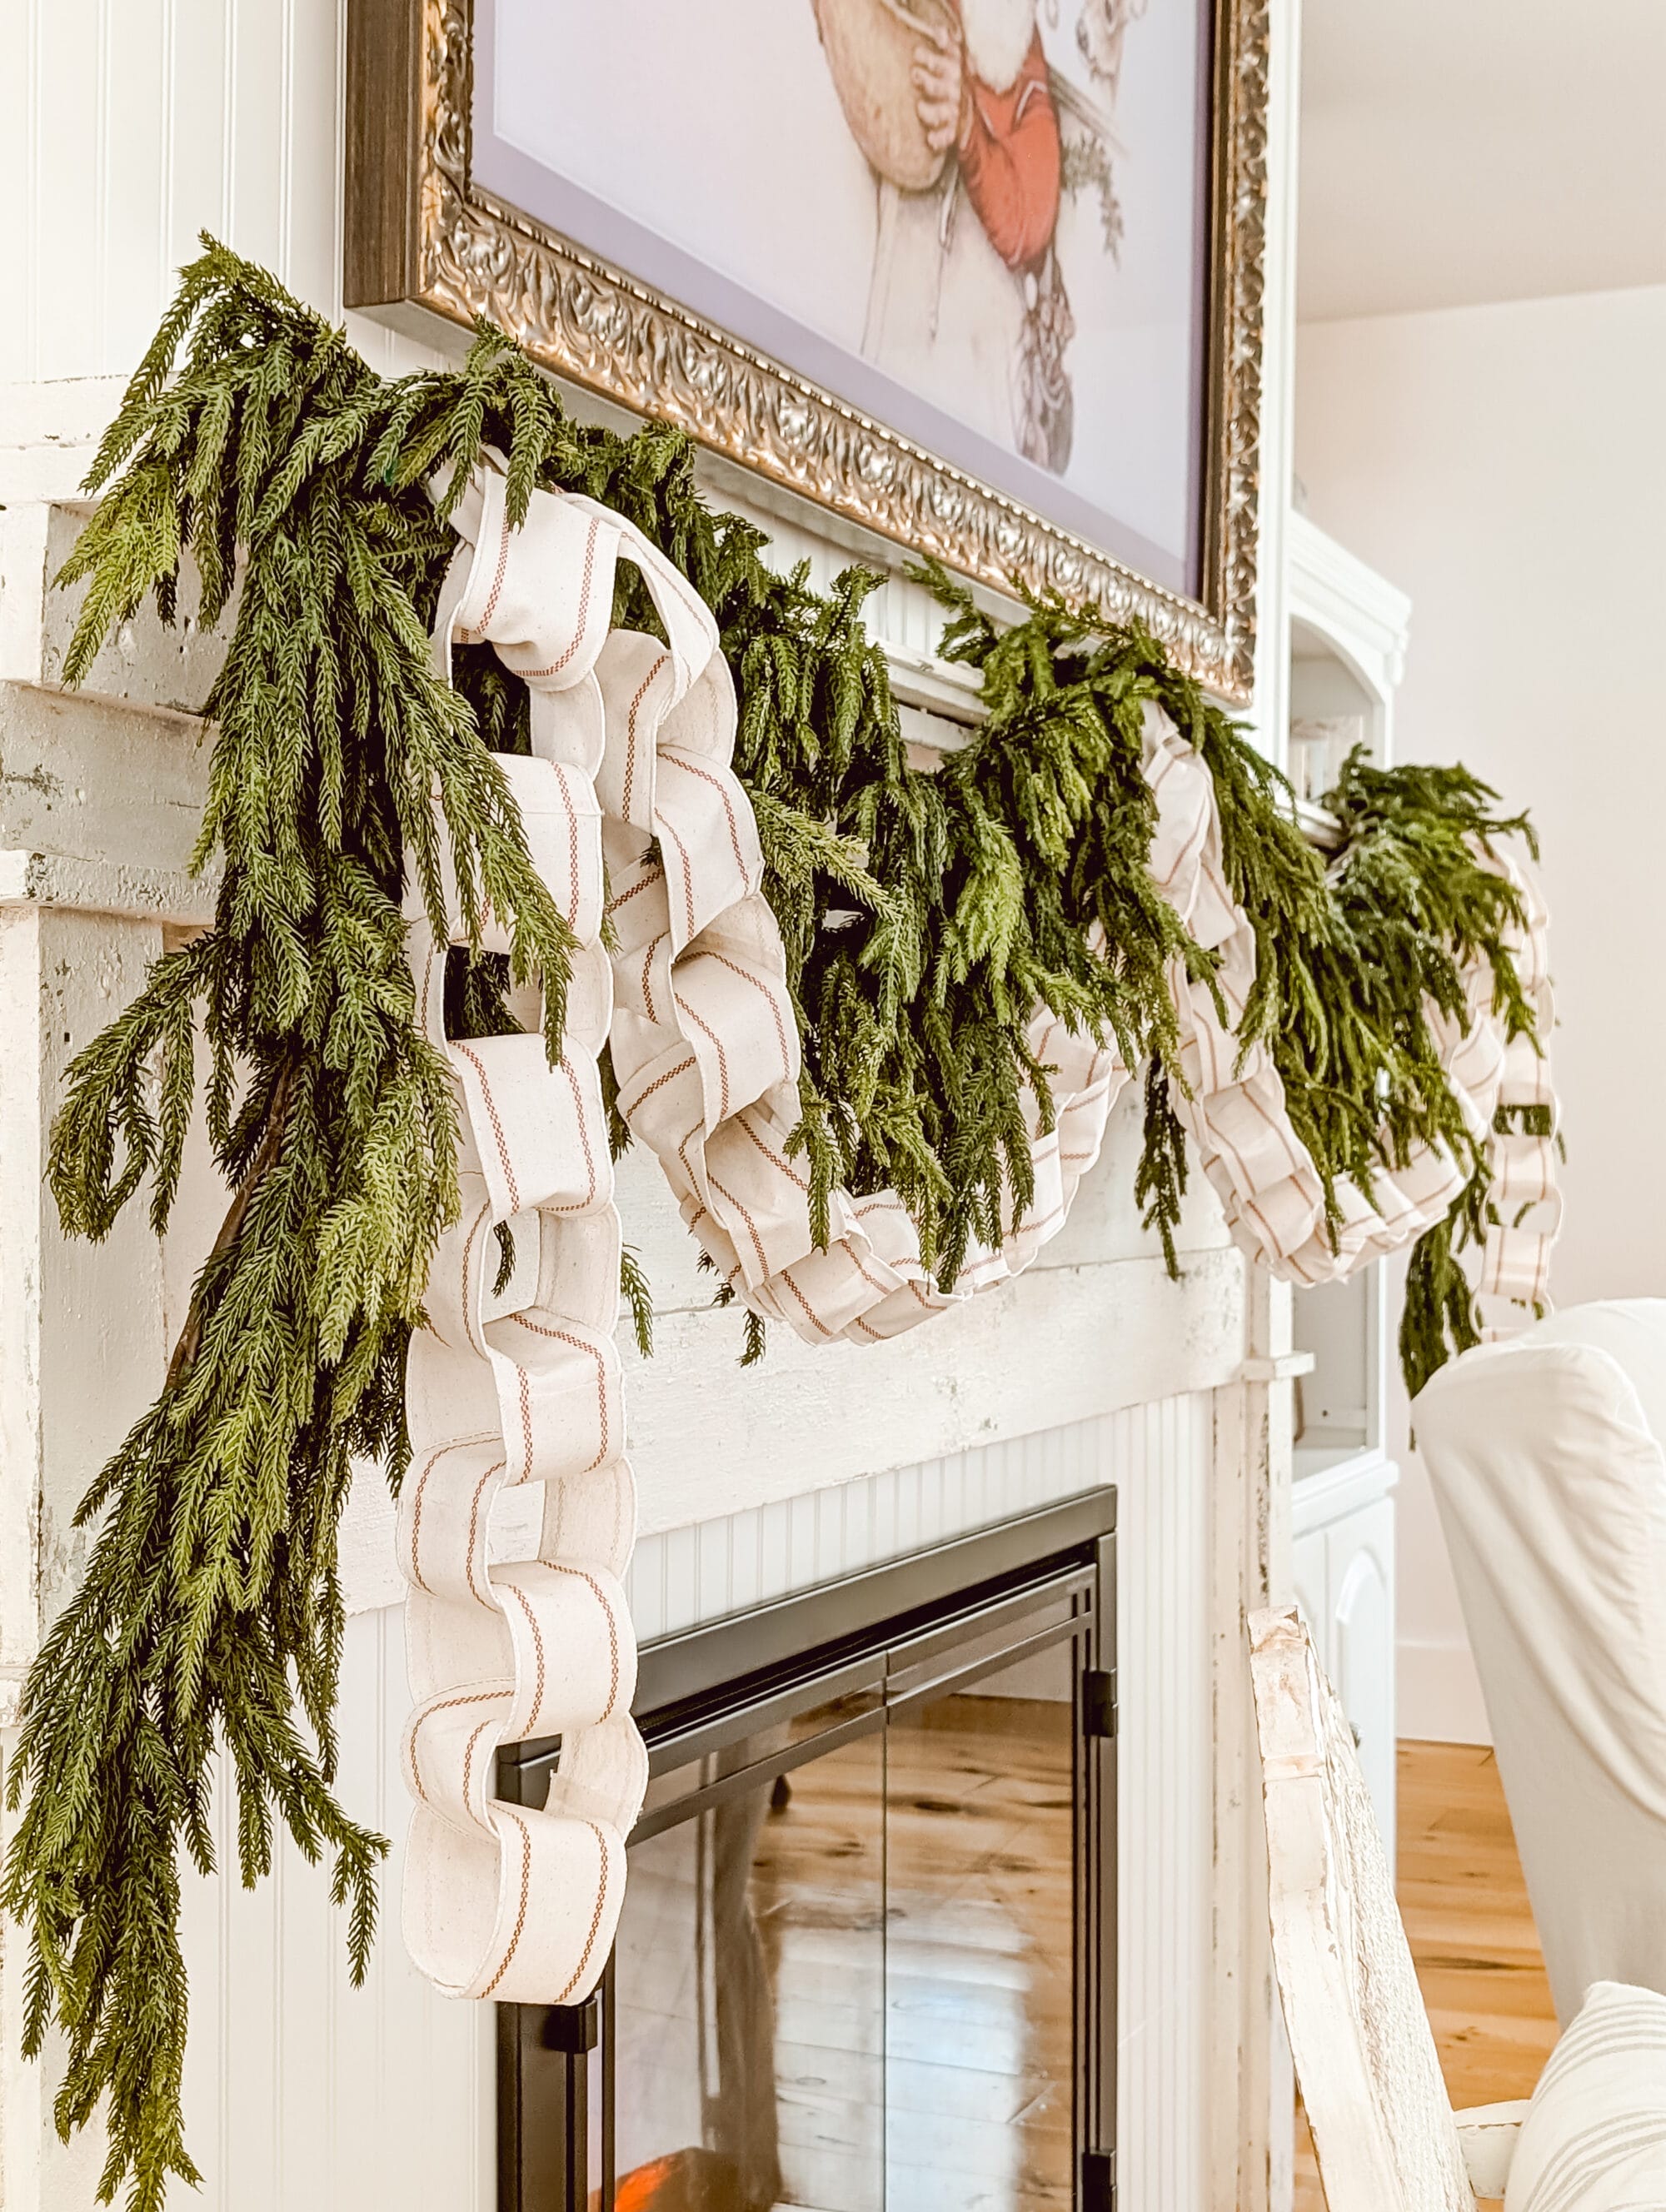
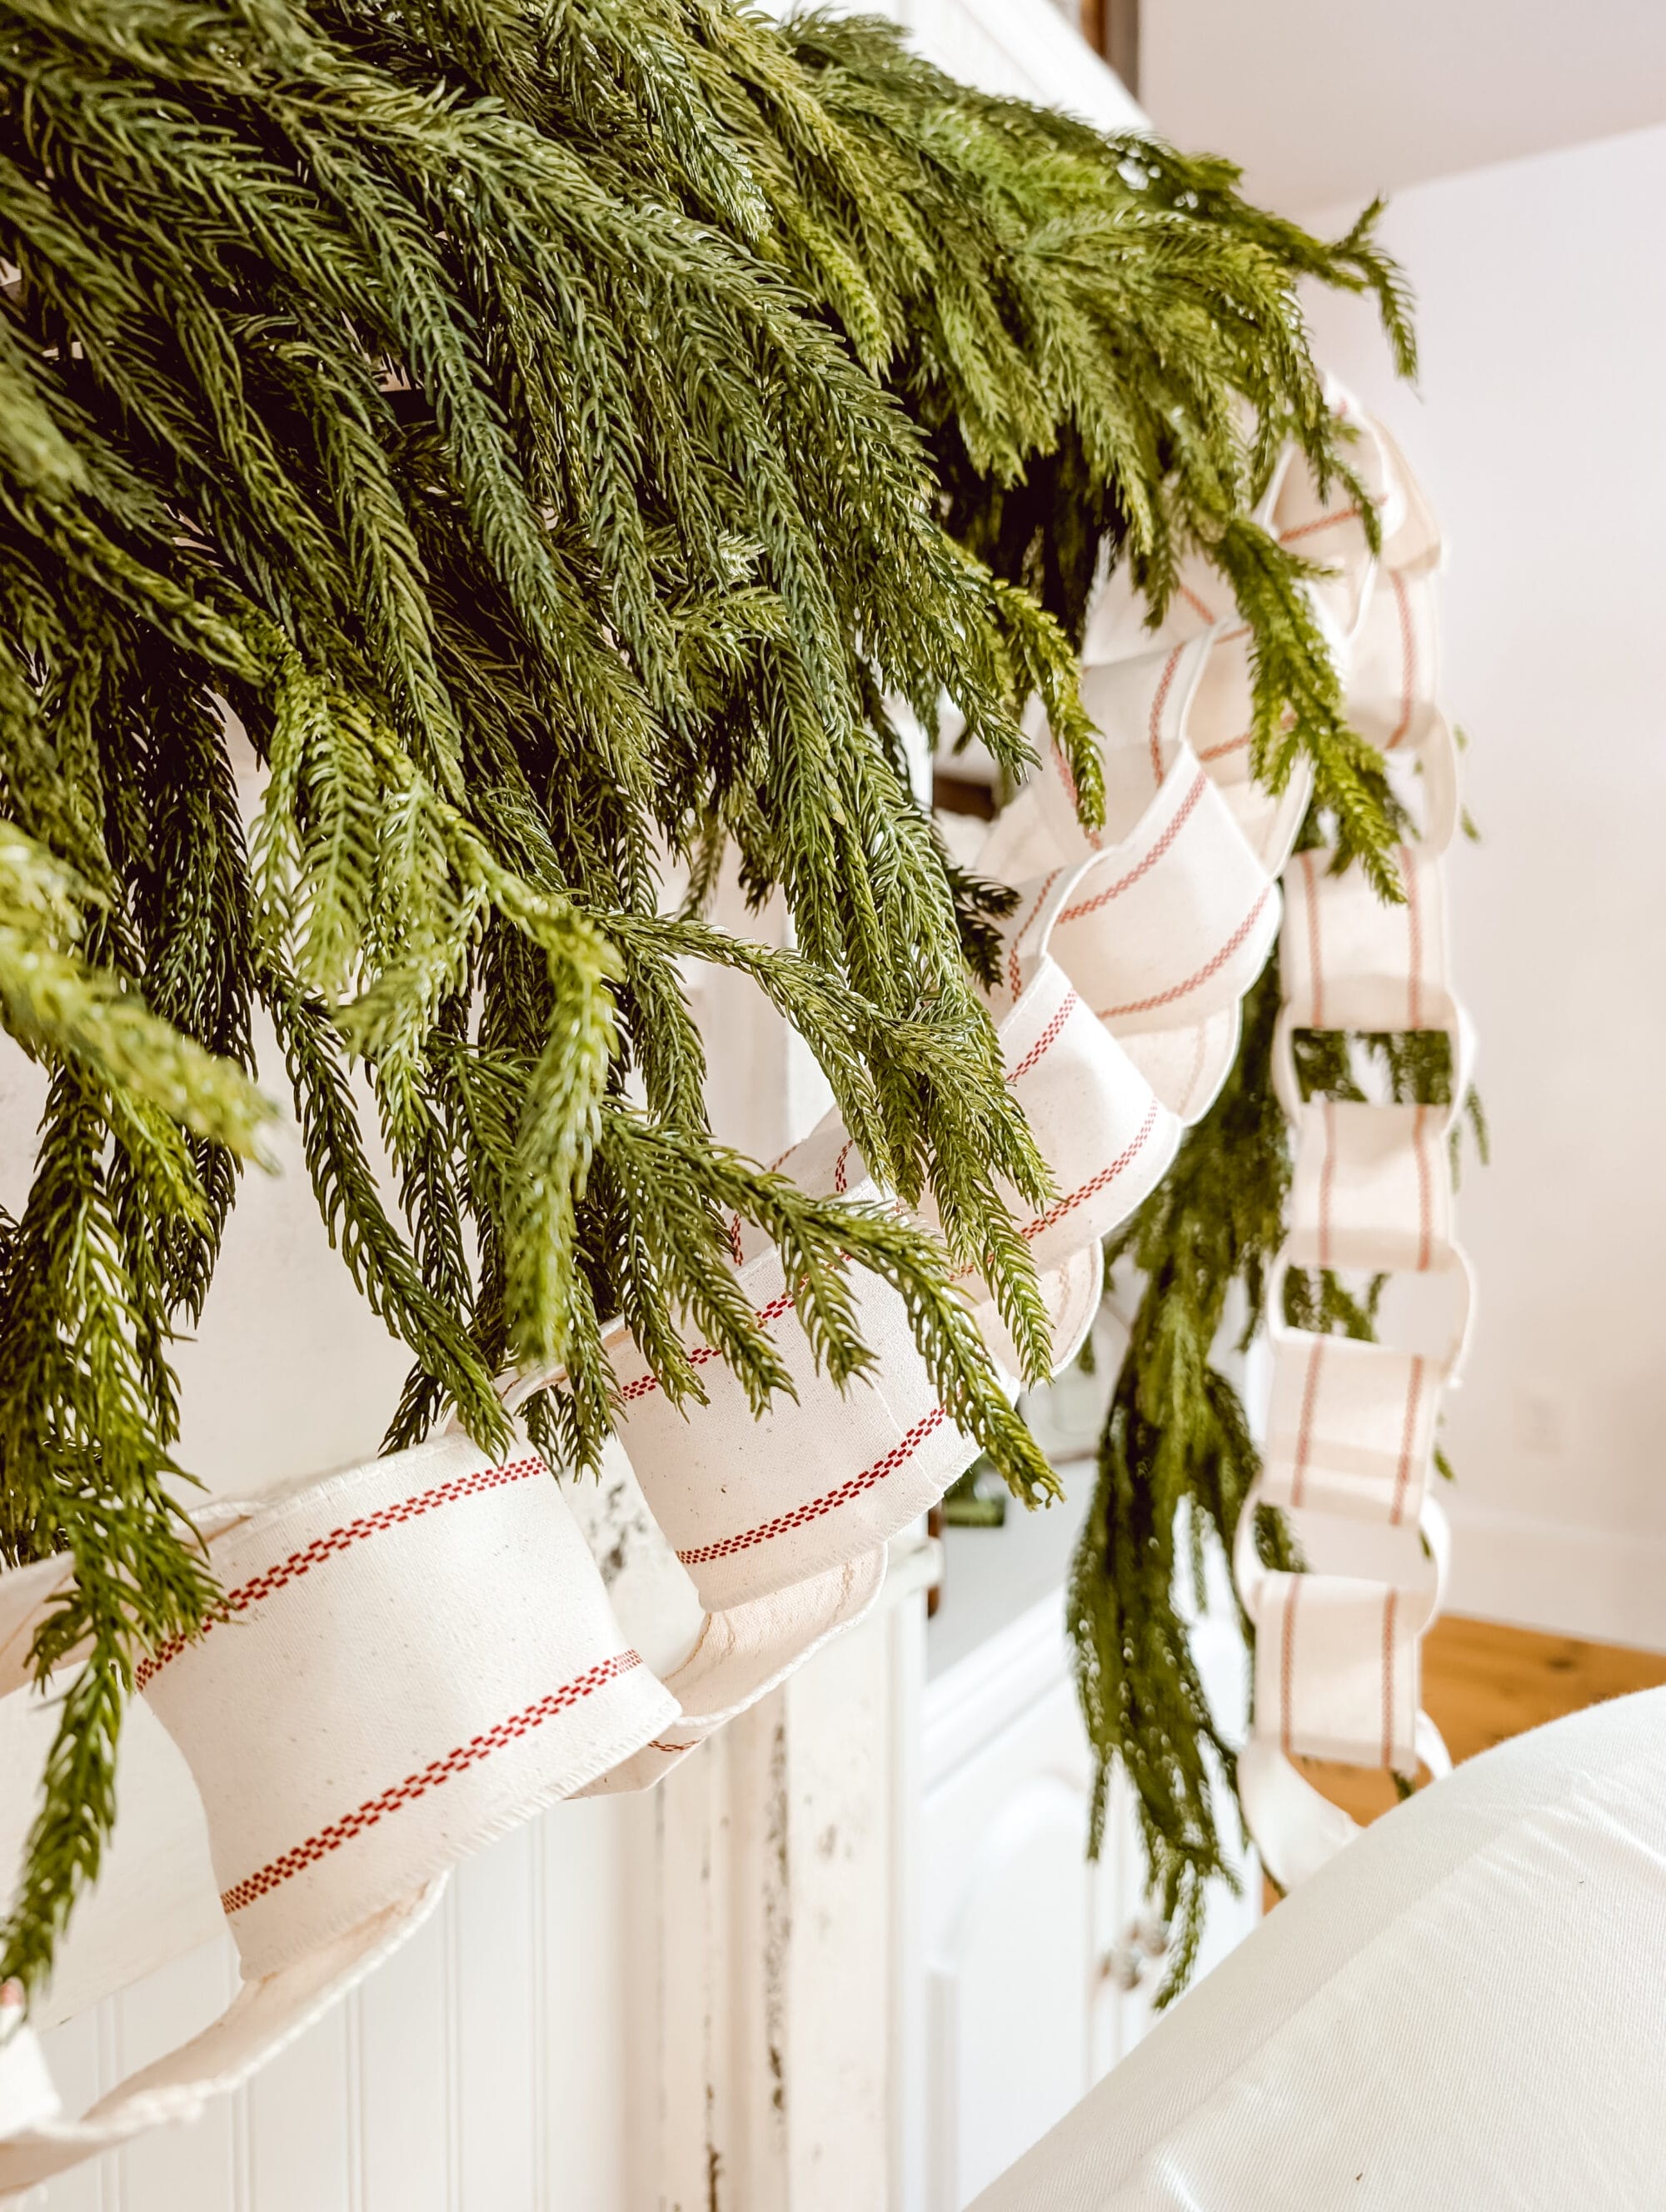
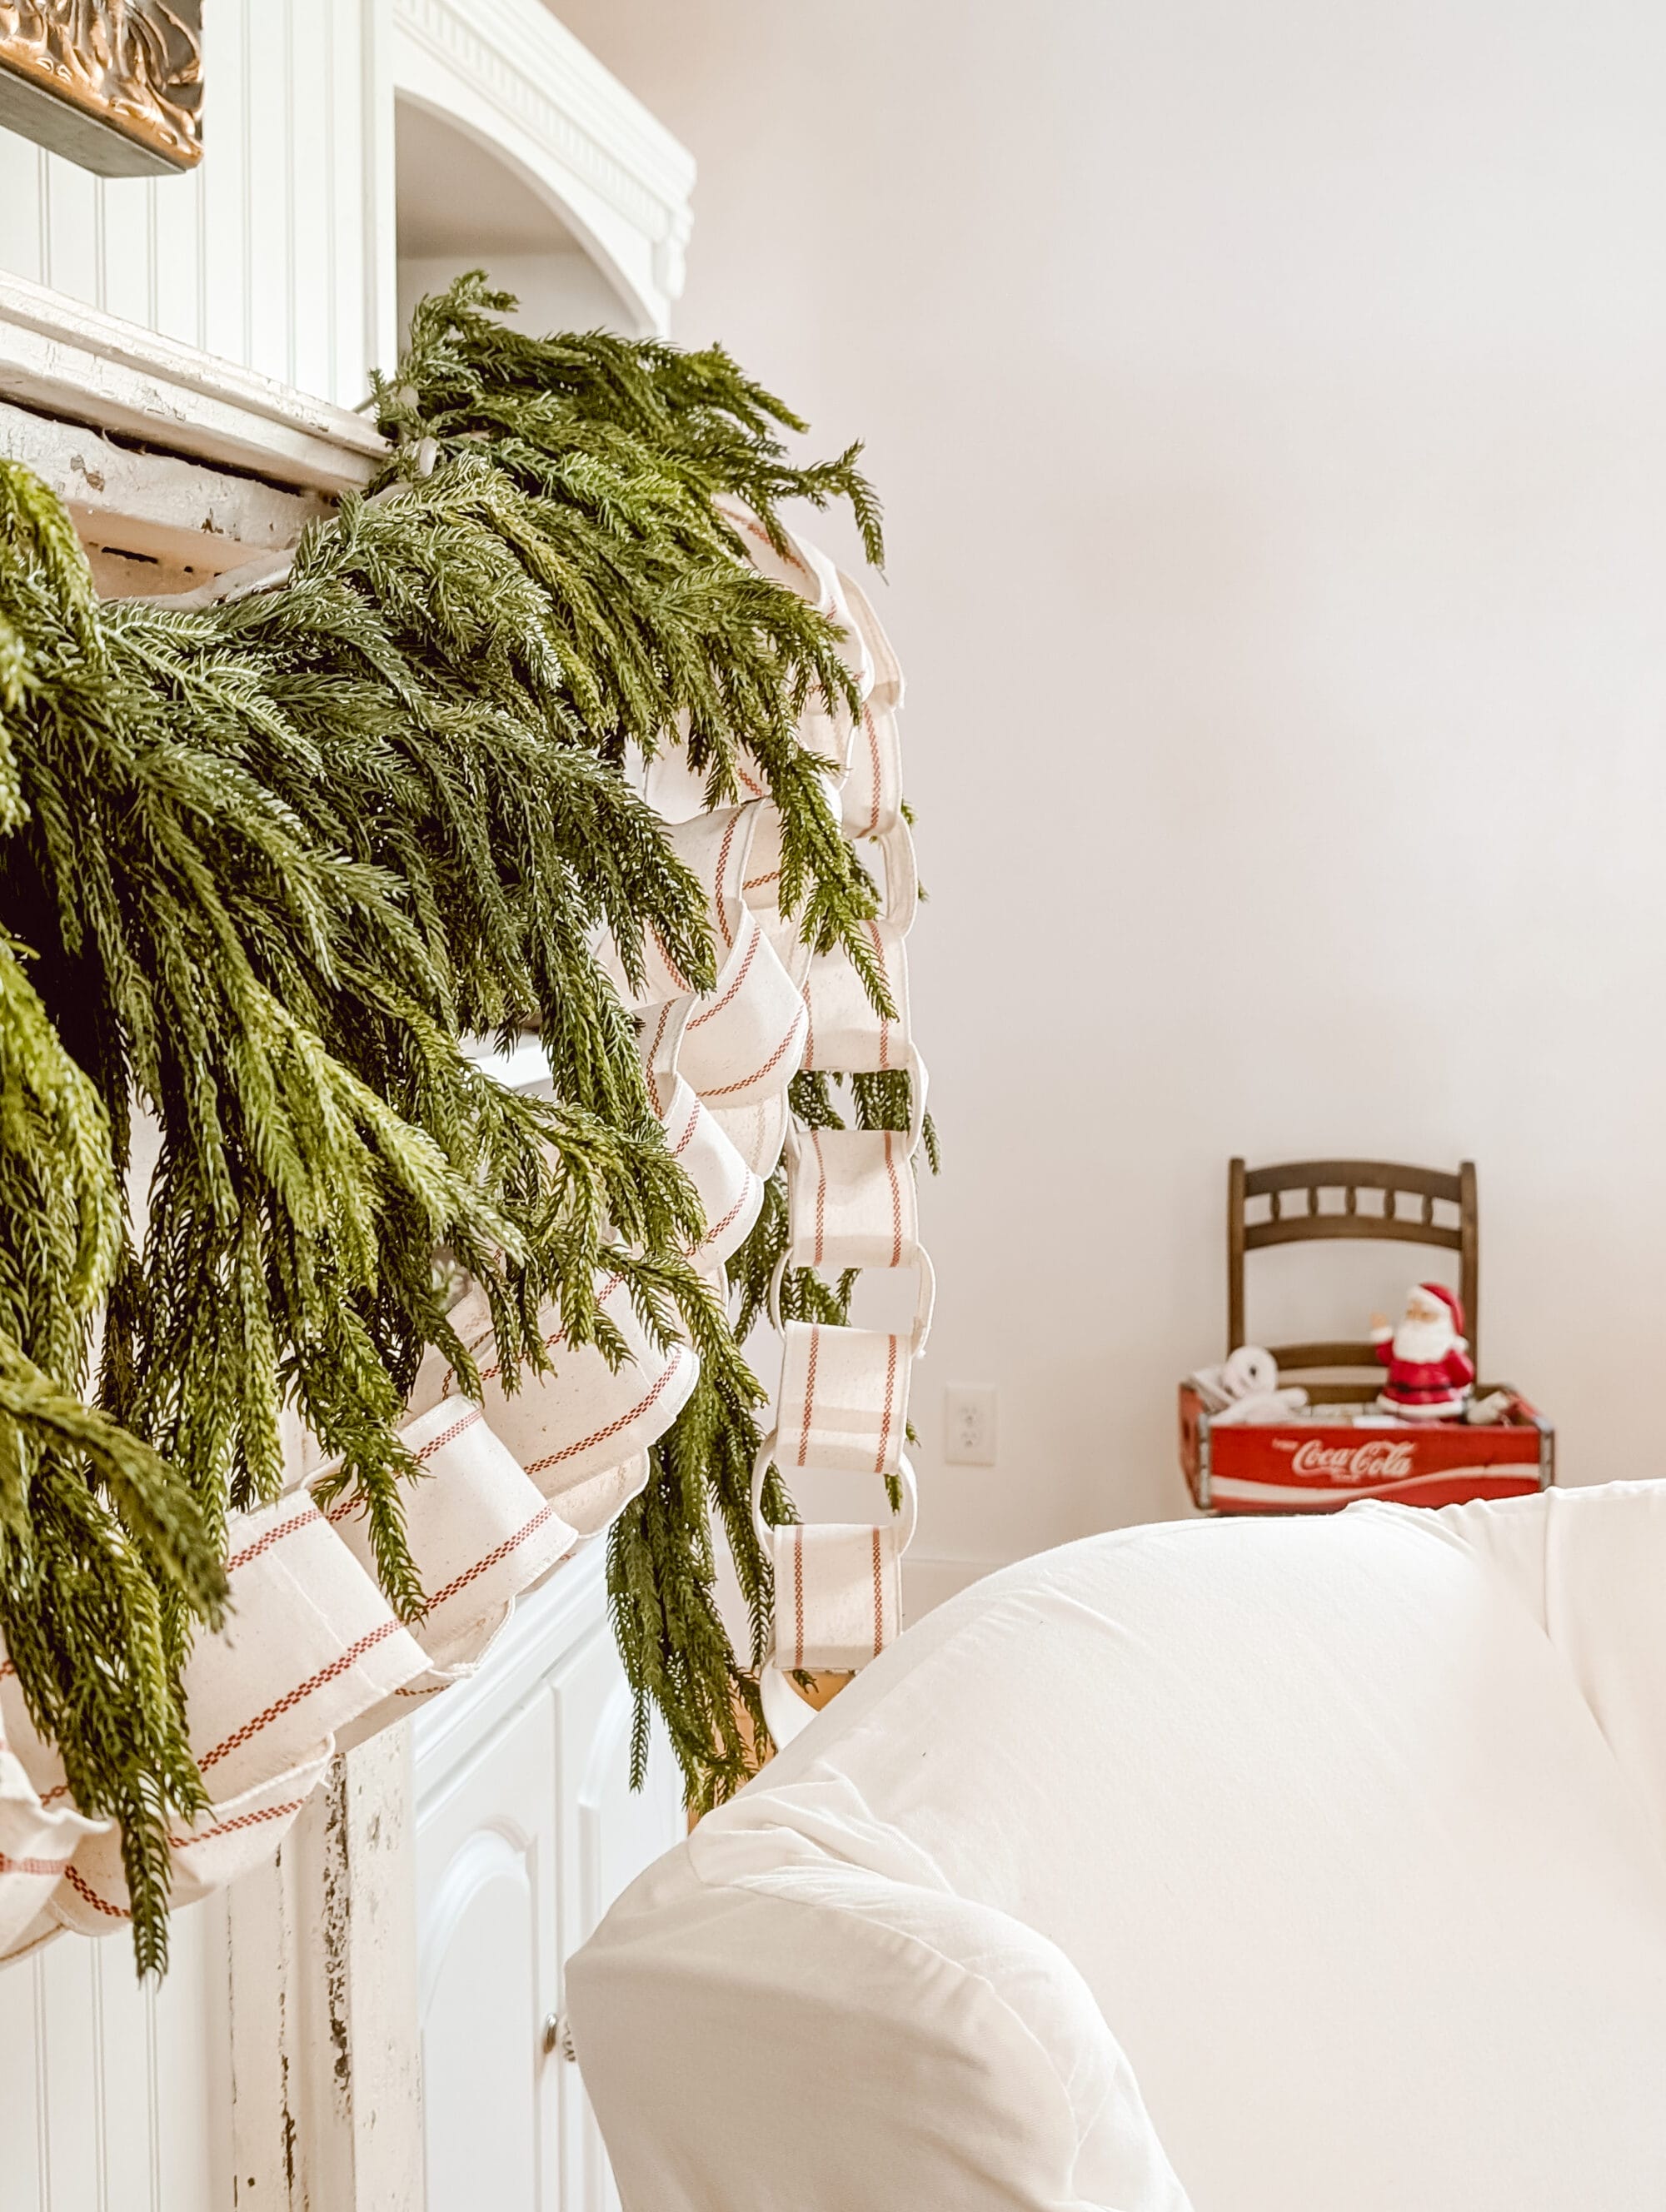
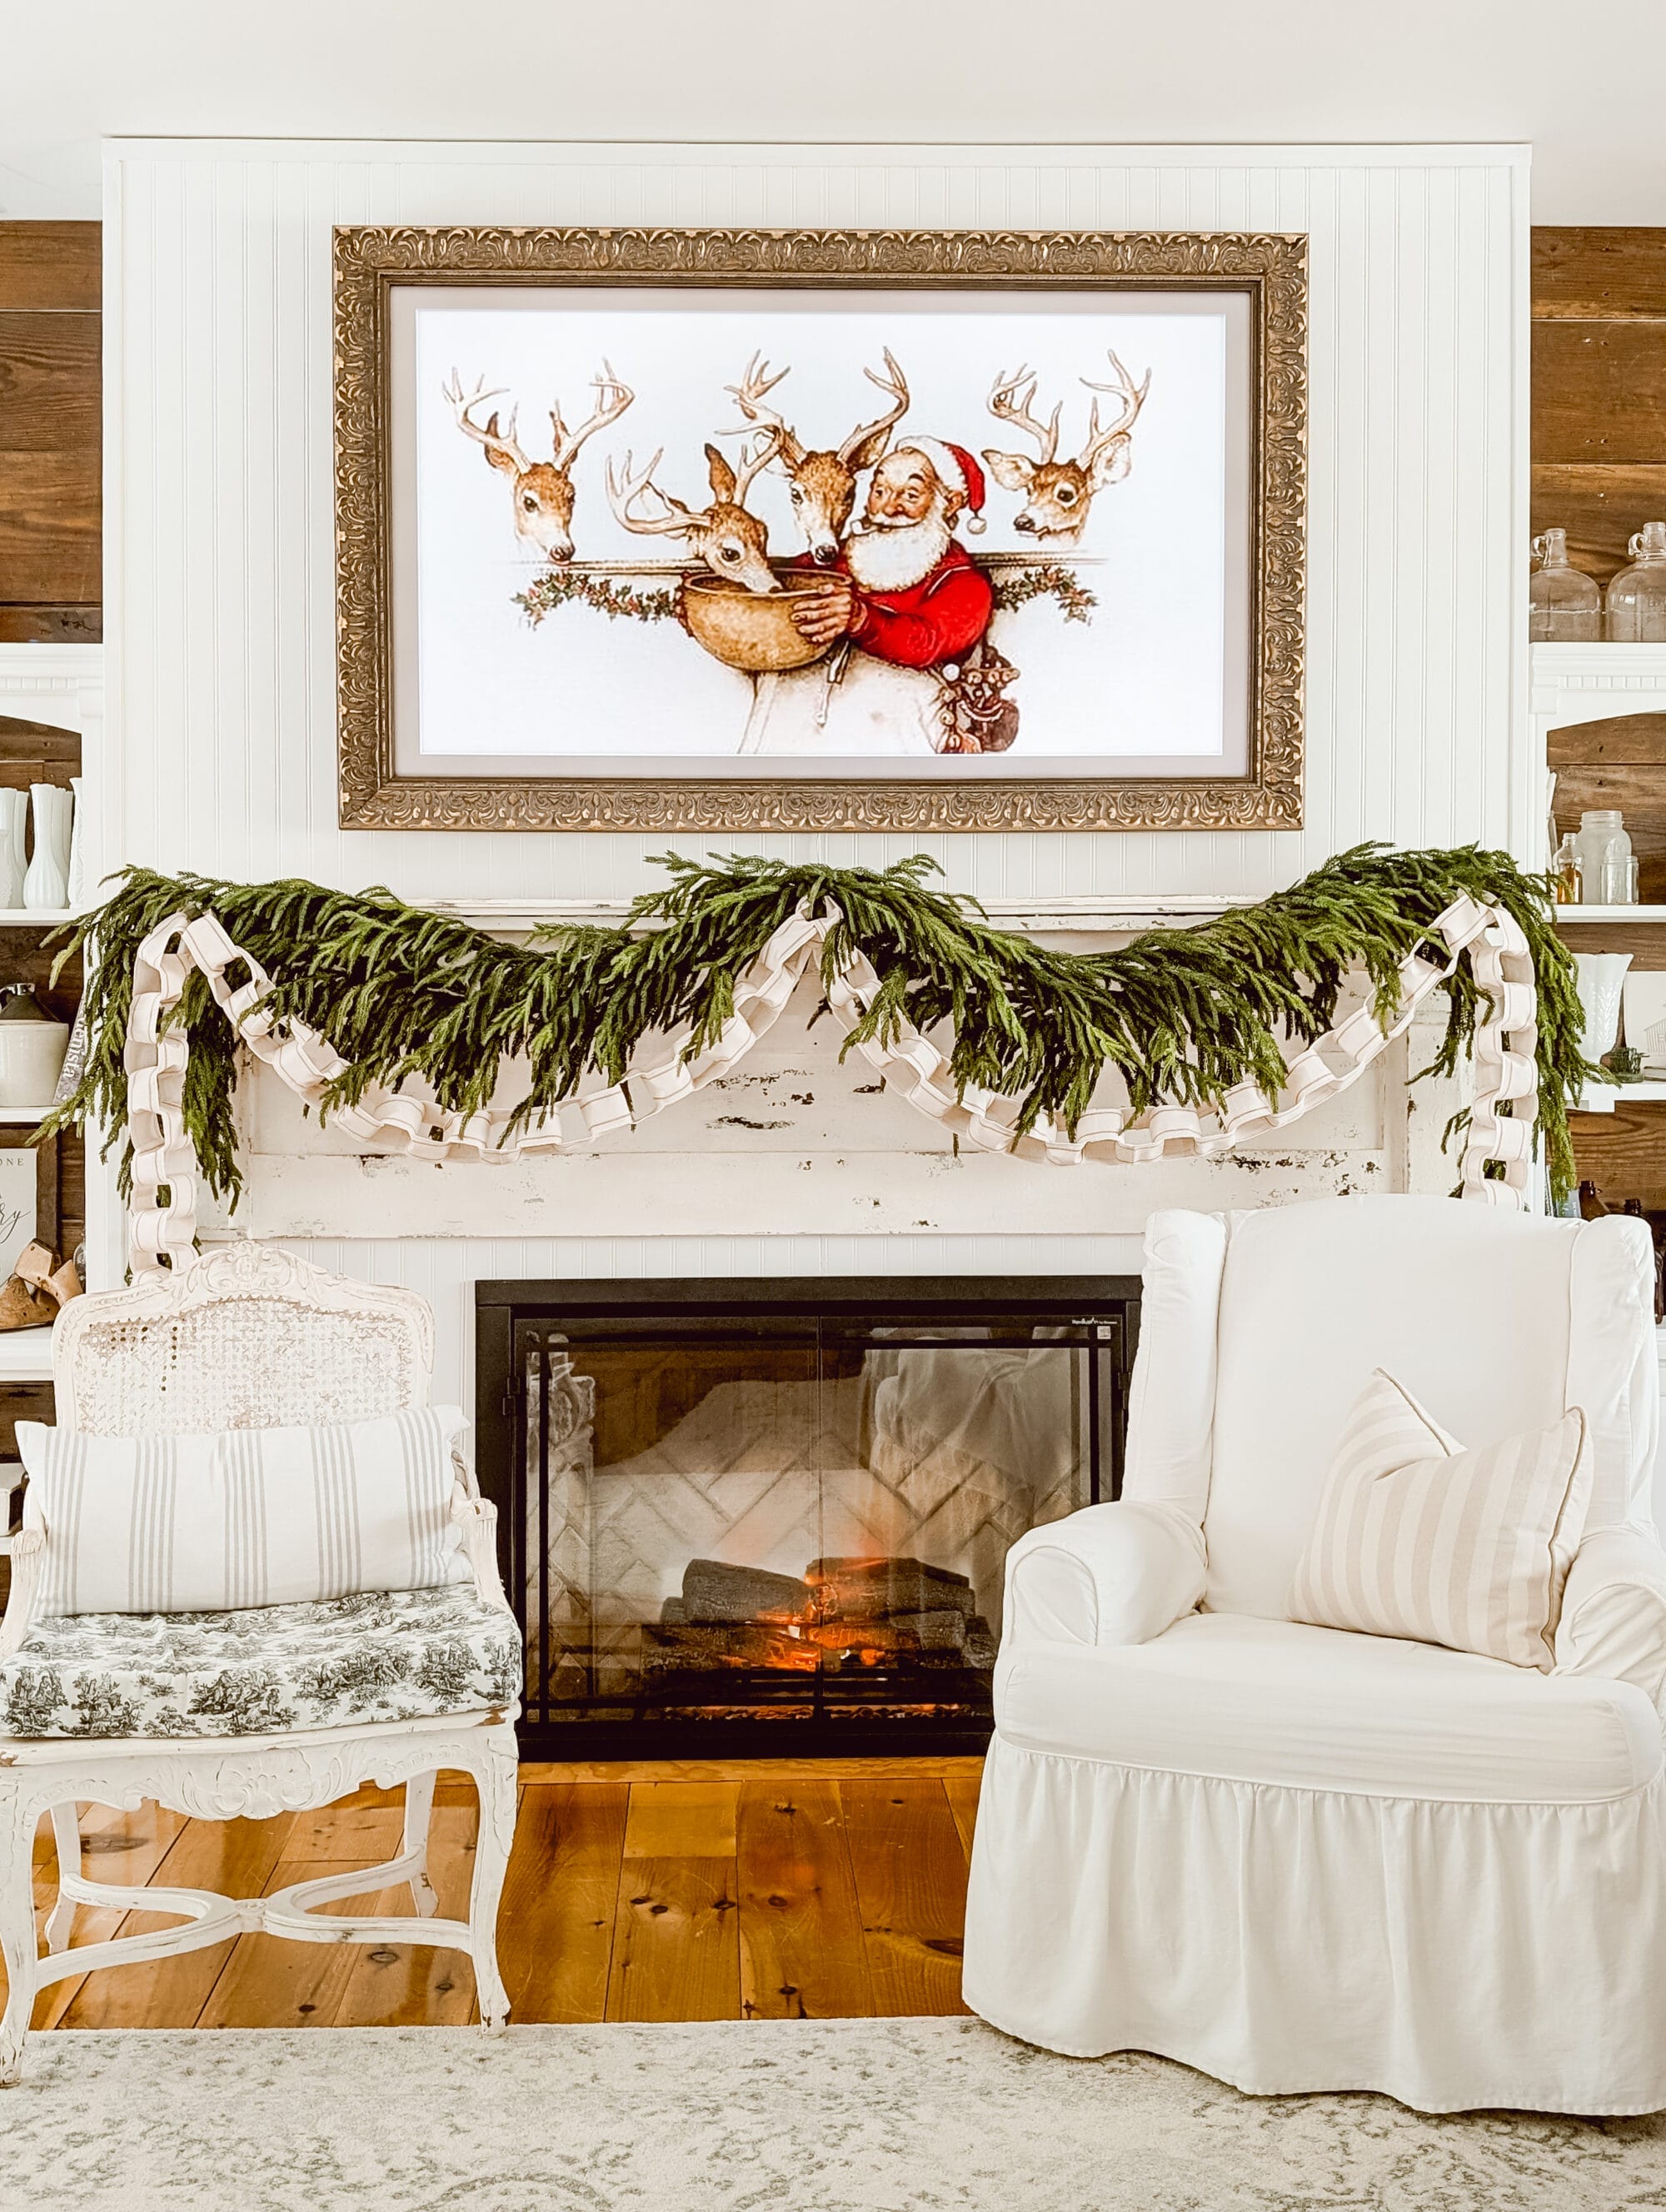
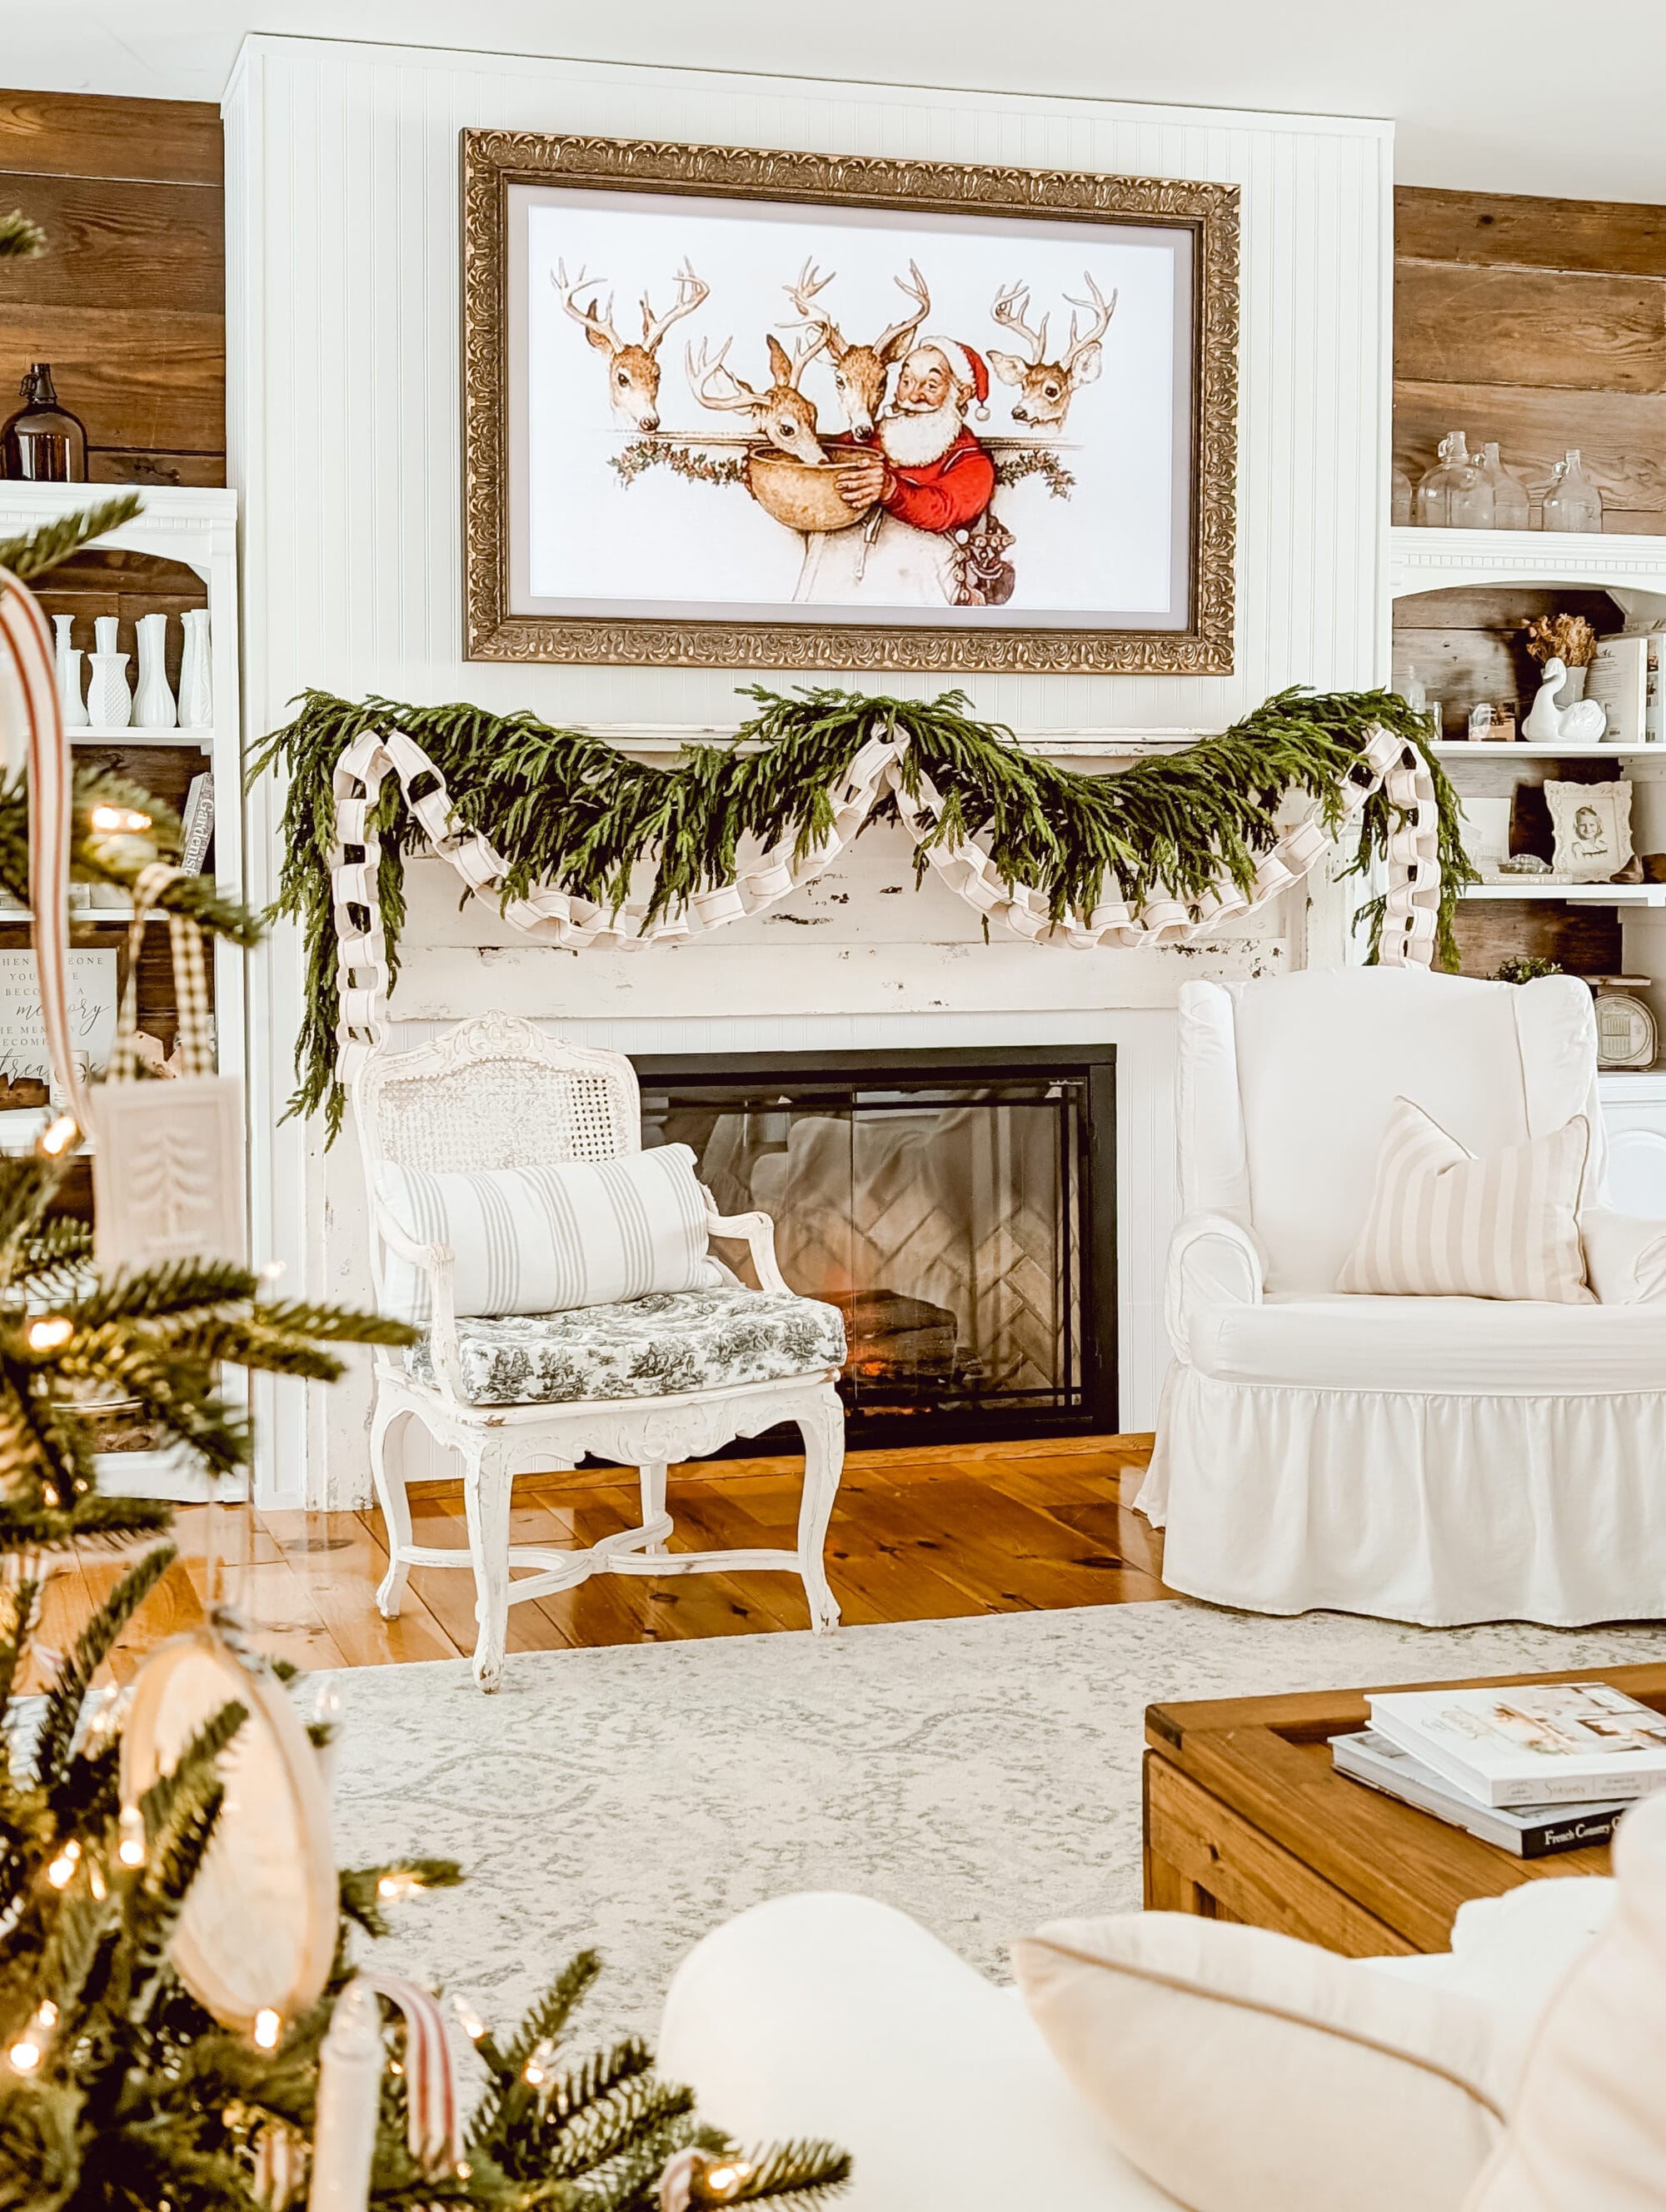
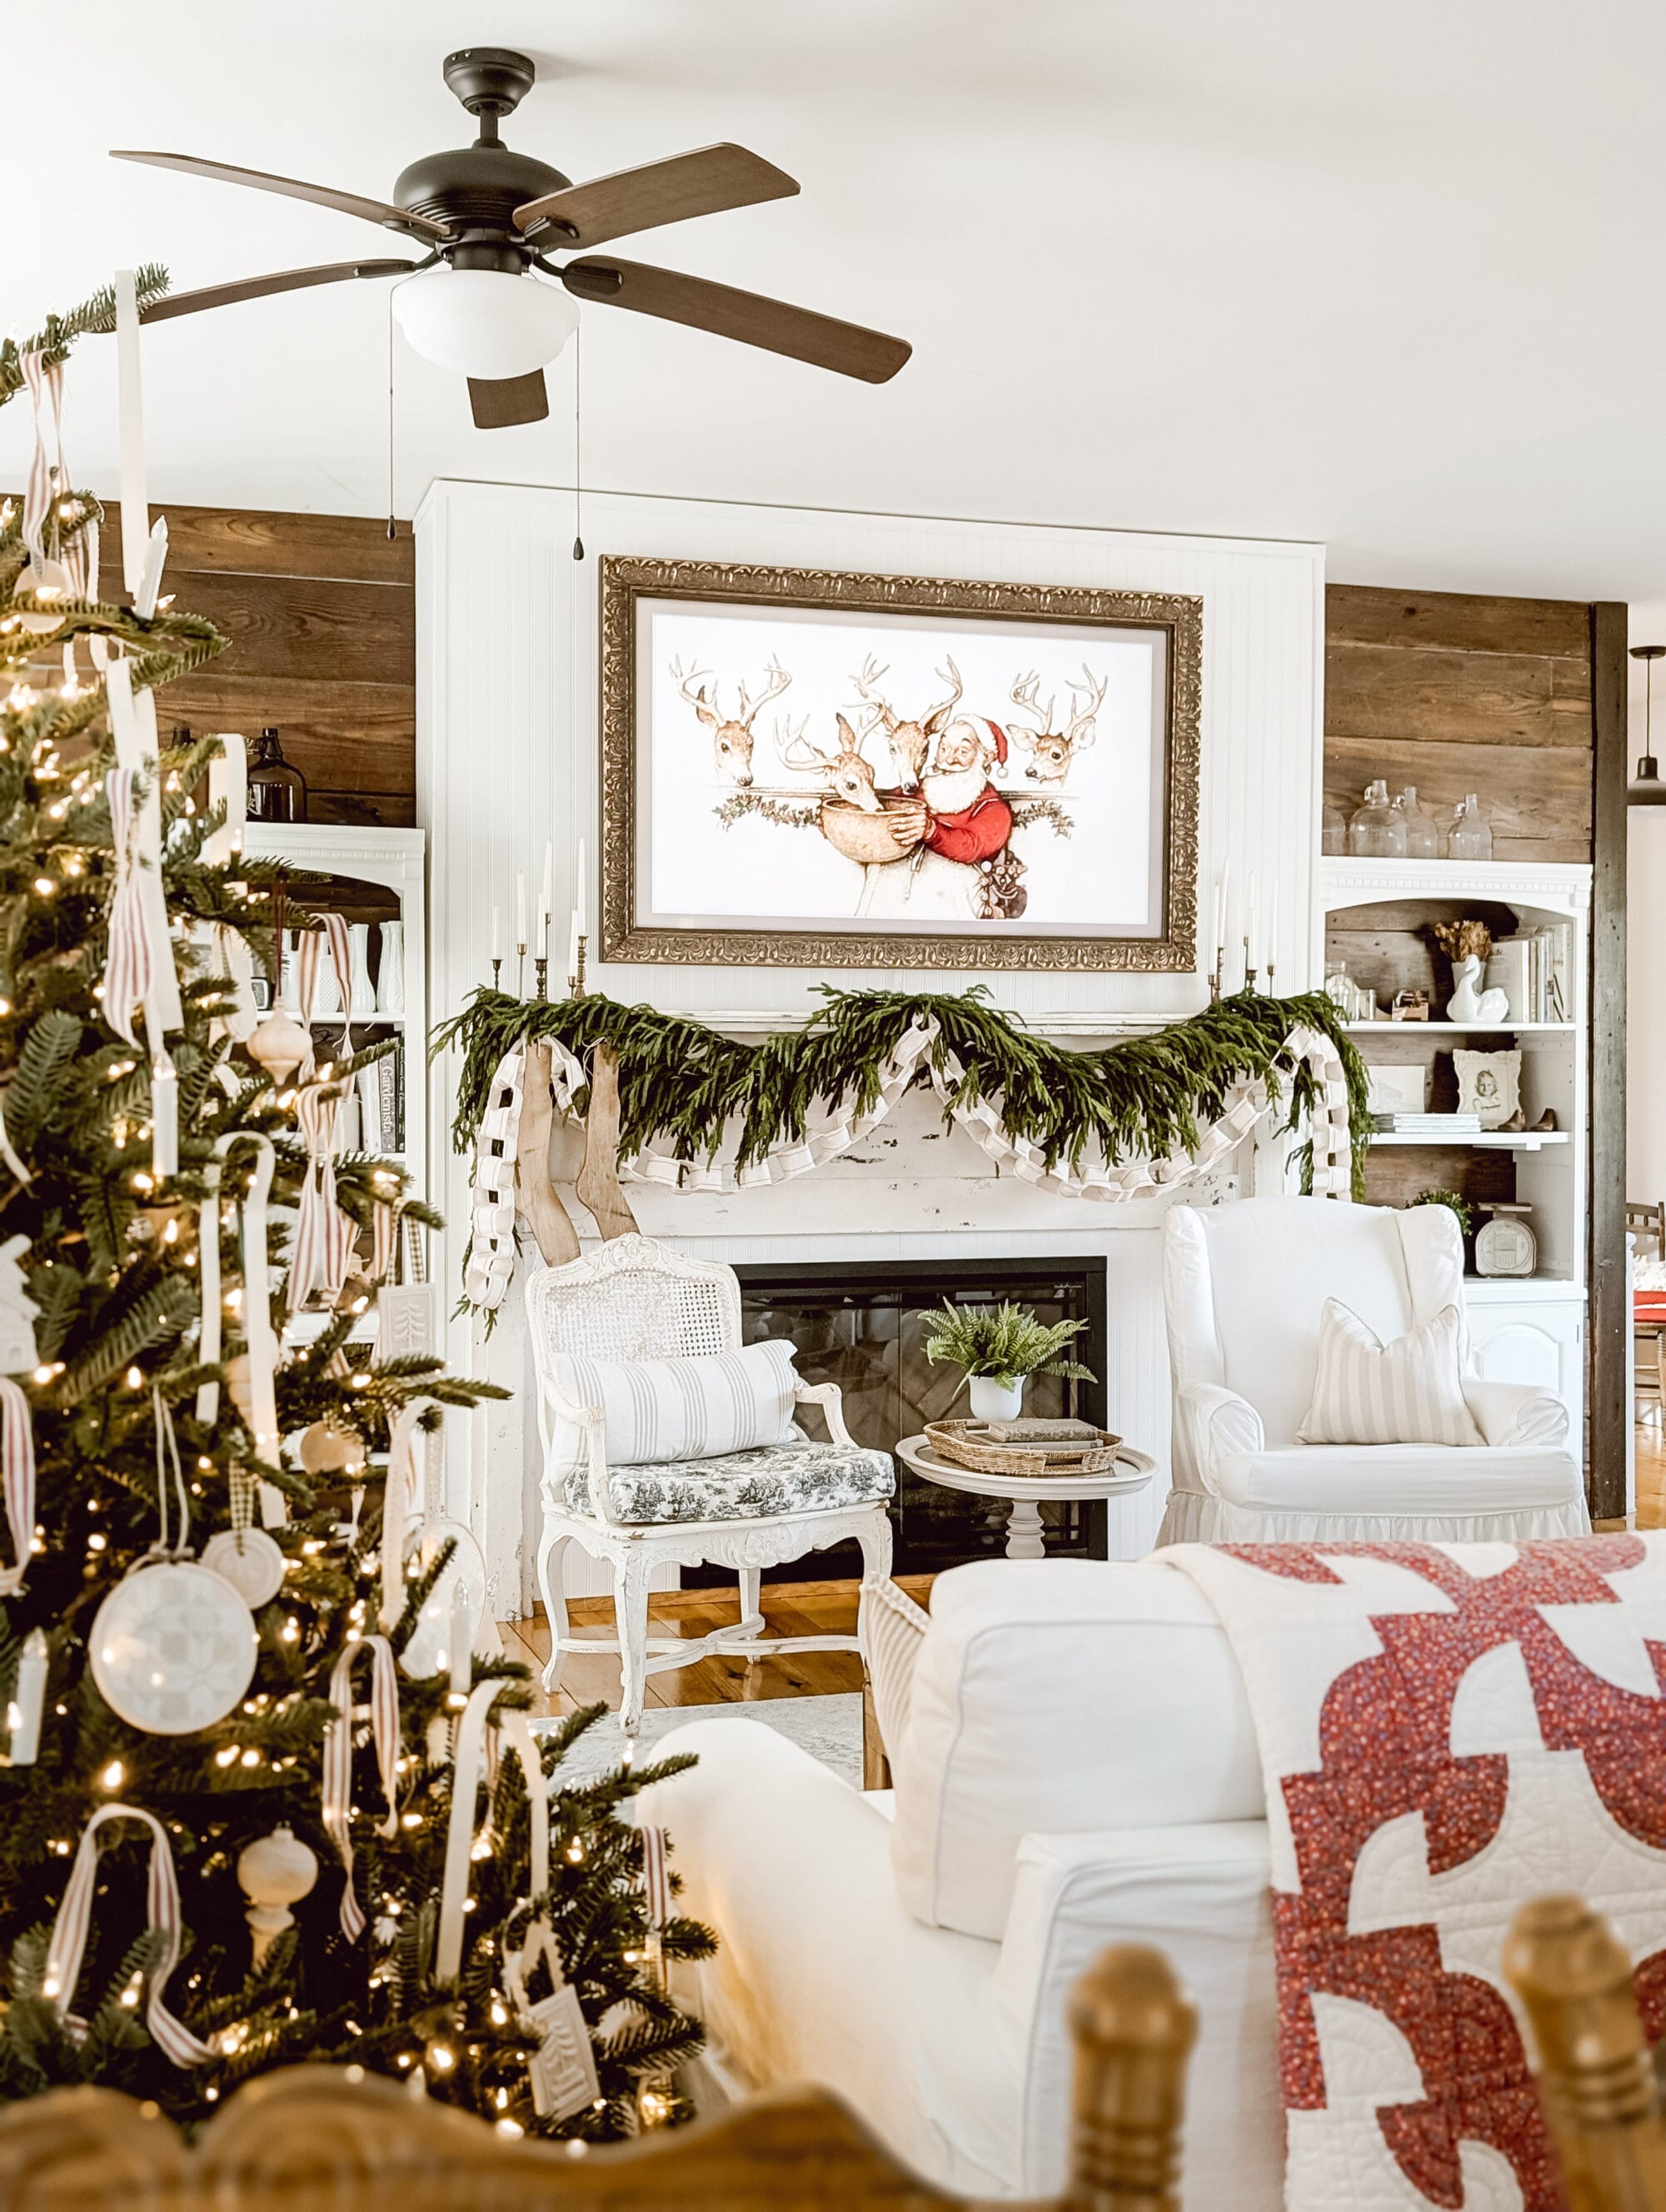
I hung up my ribbon chain garland on the fireplace mantle, and I just love the way it looks layered with my favorite Norfolk Pine Garlands!
Now when I started this DIY, I had Christmas on my mind.
But you can make a DIY ribbon chain for any holiday, or even for a birthday party. Just switch up the ribbon colors for a custom look that fits the moment you’re celebrating!
Let me show ya how I made our ribbon chain…
How to Make a DIY Ribbon Chain Garland
Making a DIY ribbon chain garland is such an easy Christmas craft project! I watched one of my favorite reality TV shows while I worked on it, and it came together in no time.
But I’ll tell ya this, you probably need more ribbon than you would think to make a super long chain.
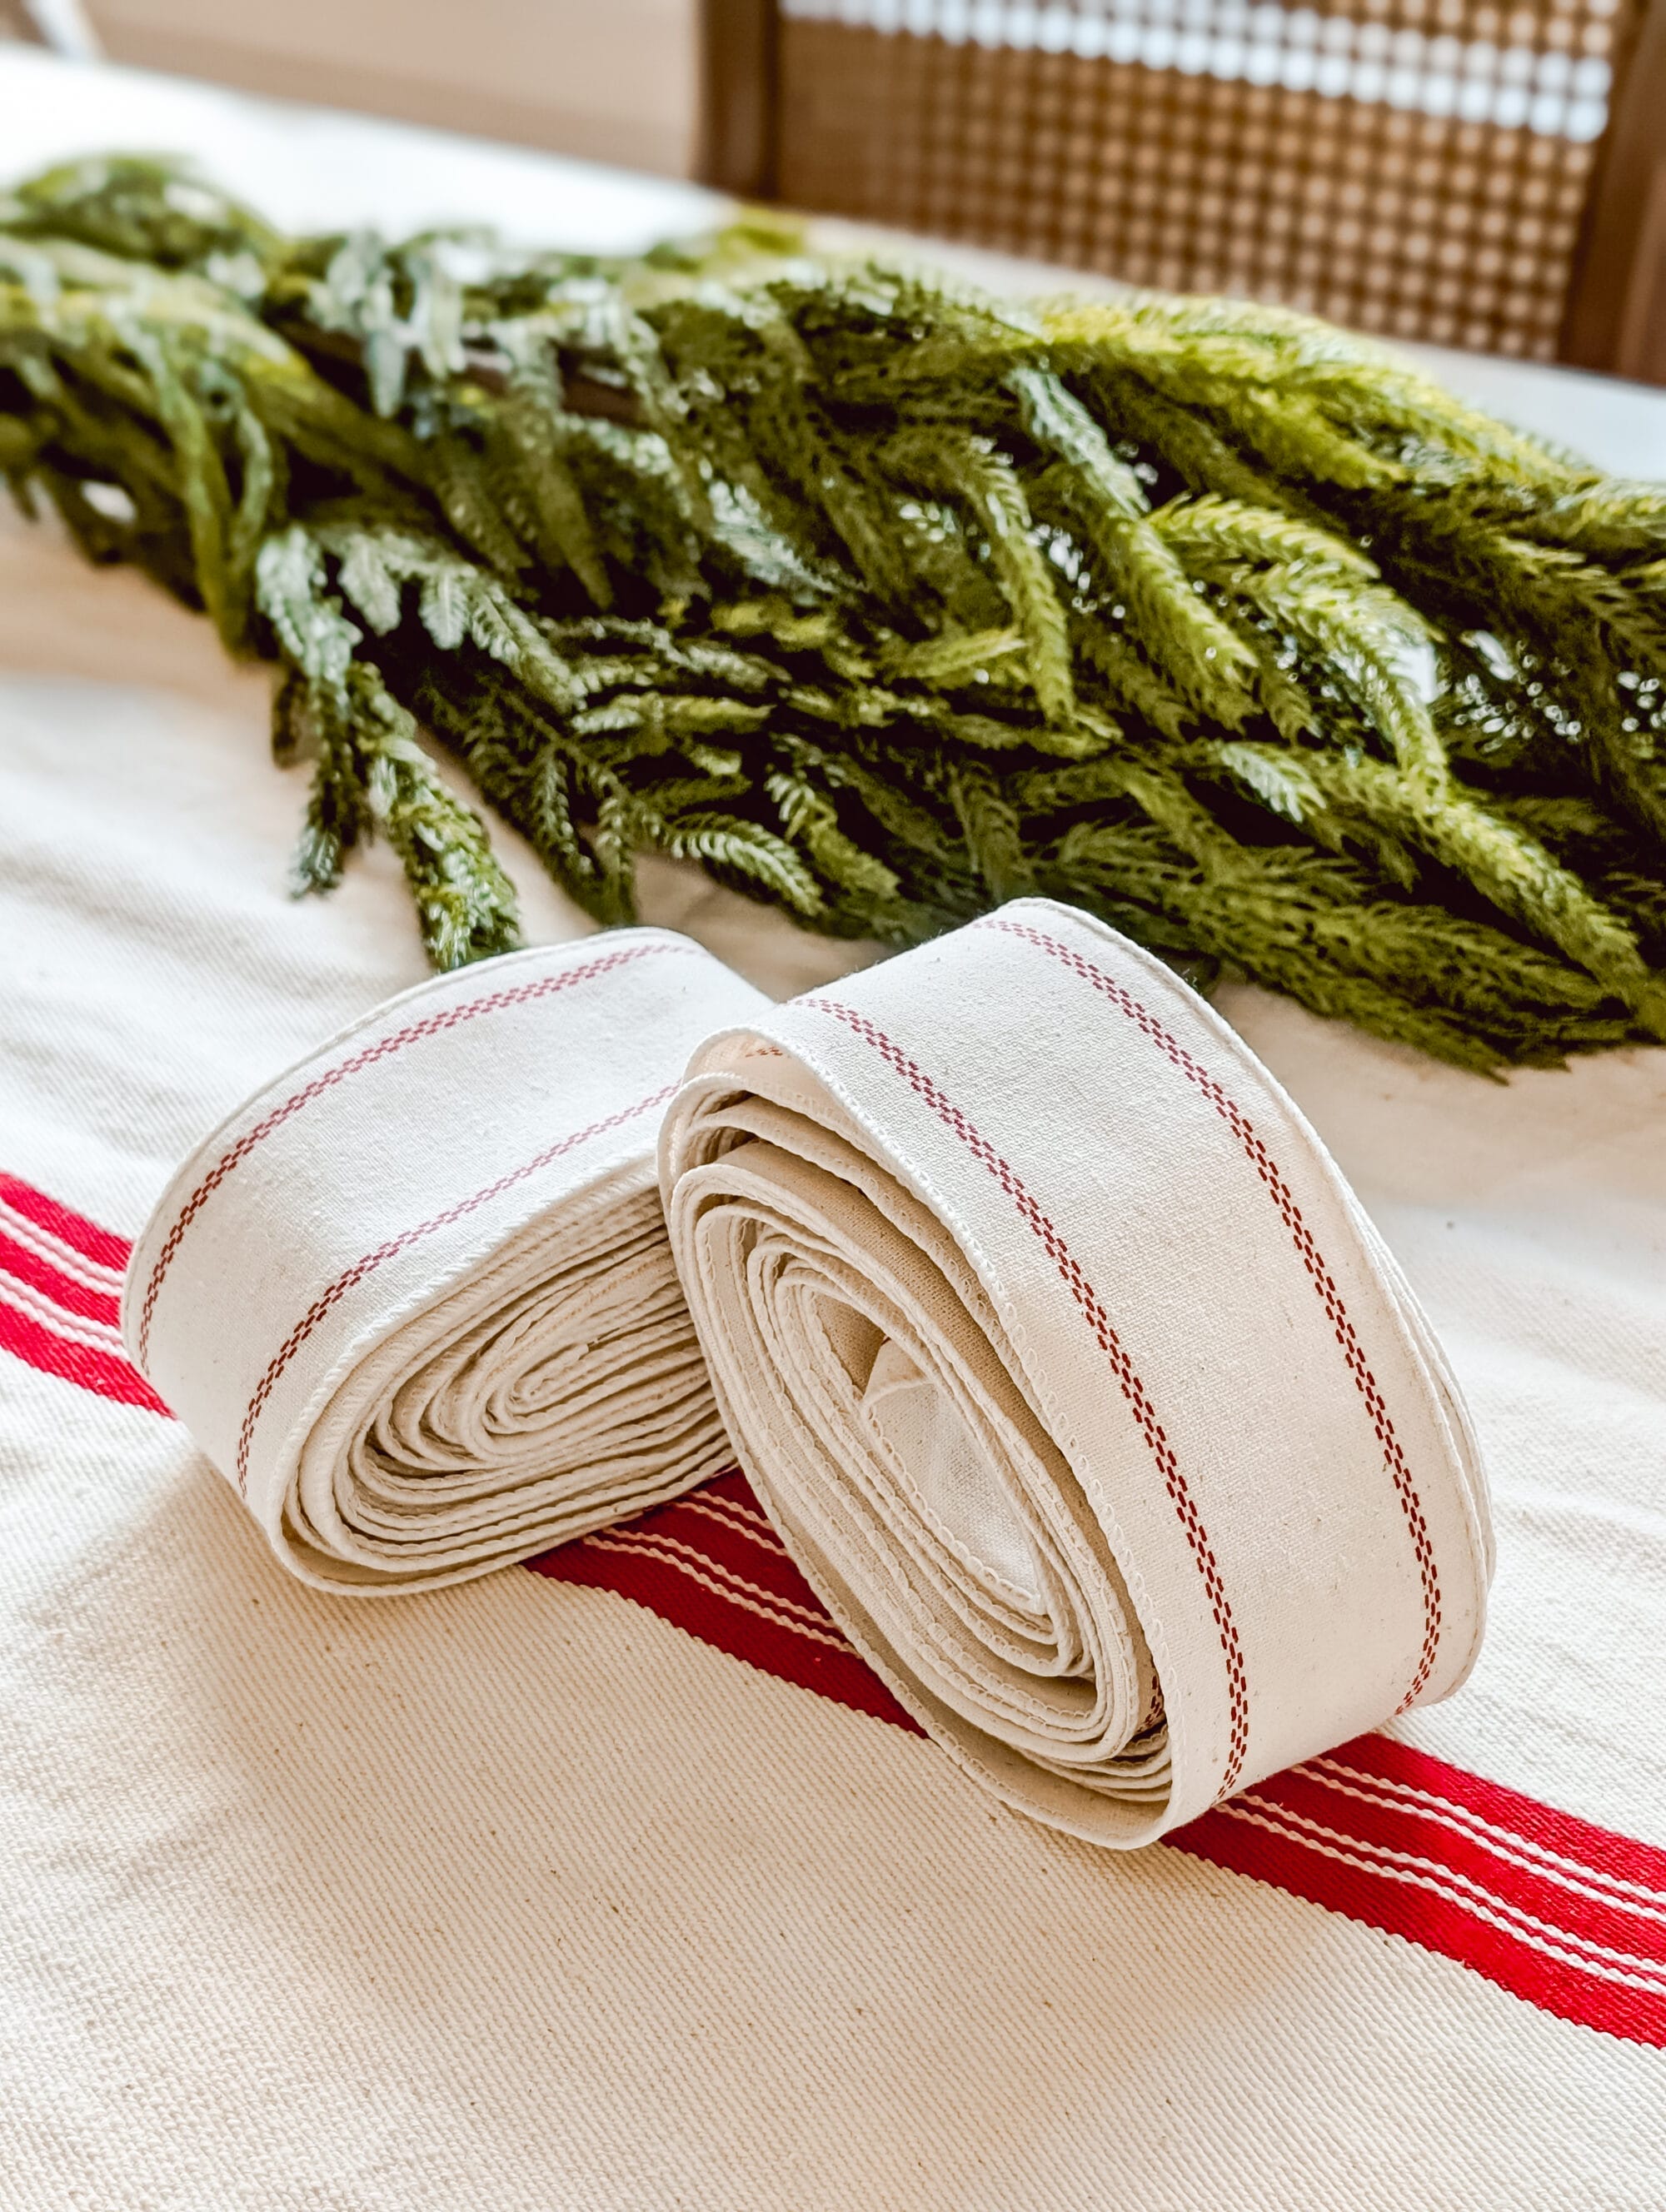
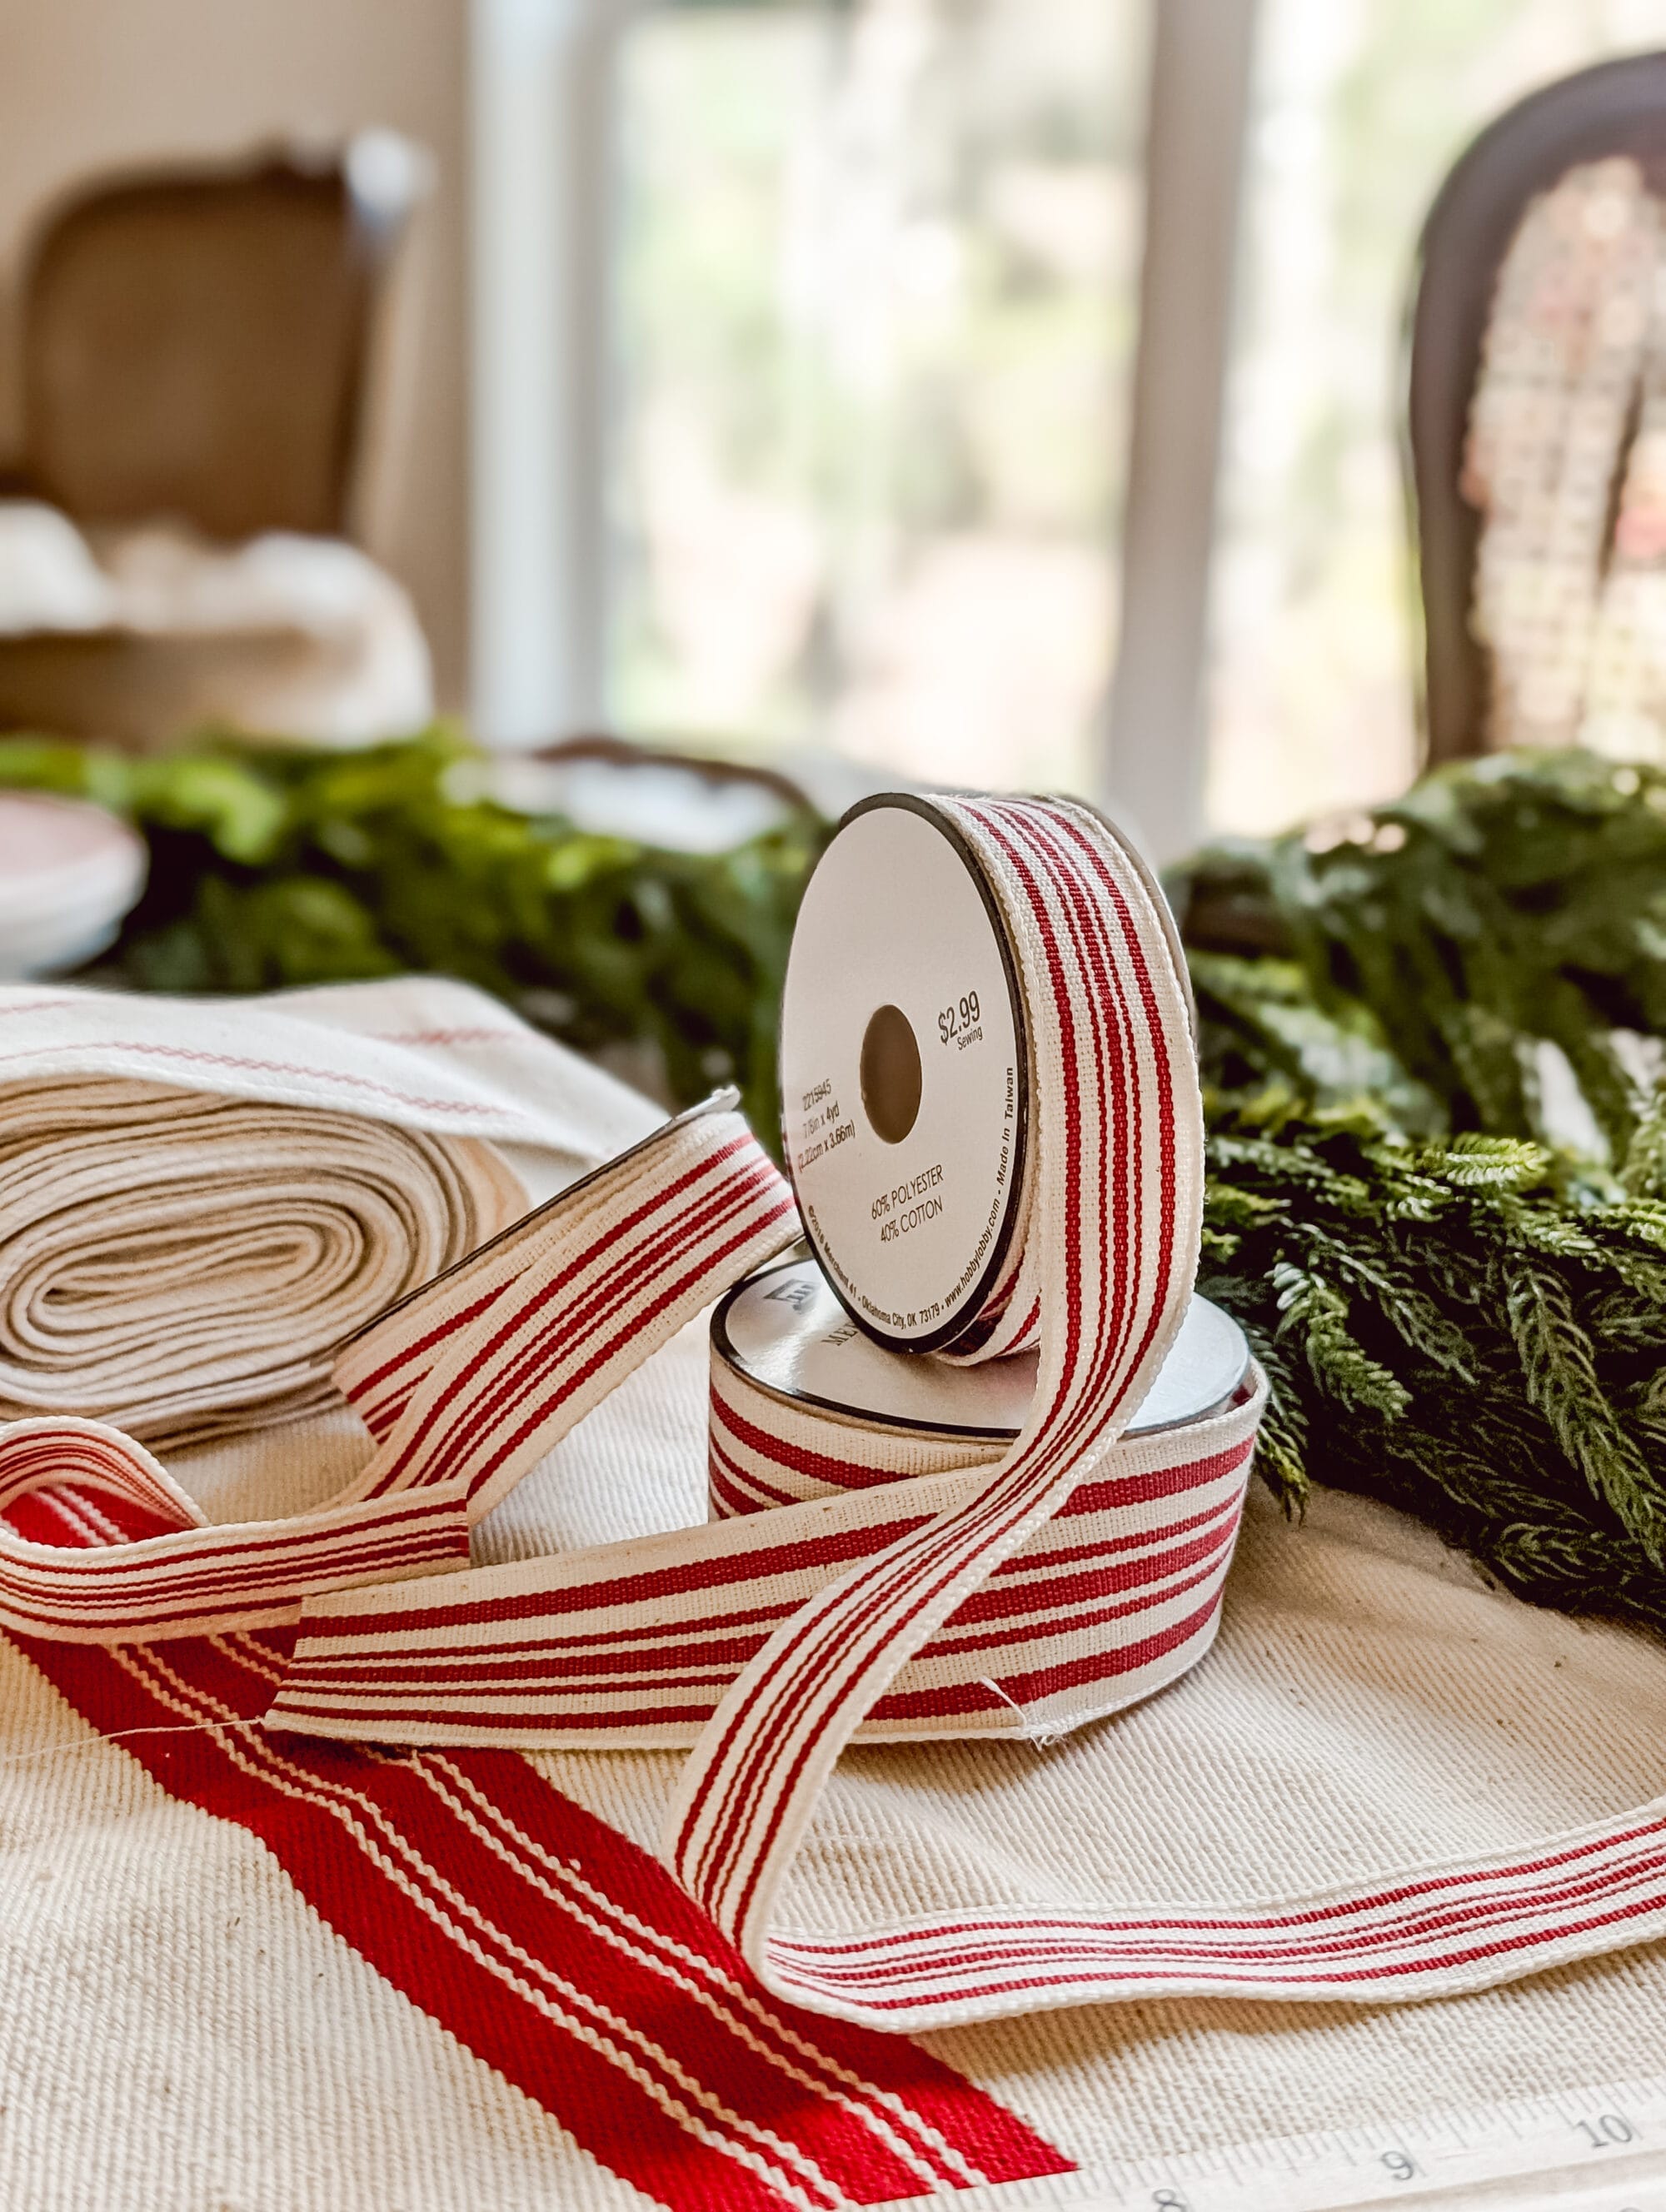
I bought 2 – 30 ft. rolls of wired ribbon from a local shop a couple years back. I’ve been saving this ribbon ever since, because I couldn’t decide what to make with it.
It’s so pretty, I didn’t want to cut it up until I found just the right project idea.
And I’m so glad I saved it till now because I think it made the perfect ribbon chain ribbon!
I used the entire 60 feet of ribbon for my DIY ribbon chain, and my finished garland ended up being roughly 14 feet long.
Supplies You’ll Need for this DIY:
- pretty ribbon (I used 2.5 inch wide wired ribbon)
- scissors
- a ruler
- a hot glue gun
Step by Step Instructions for a DIY Ribbon Chain
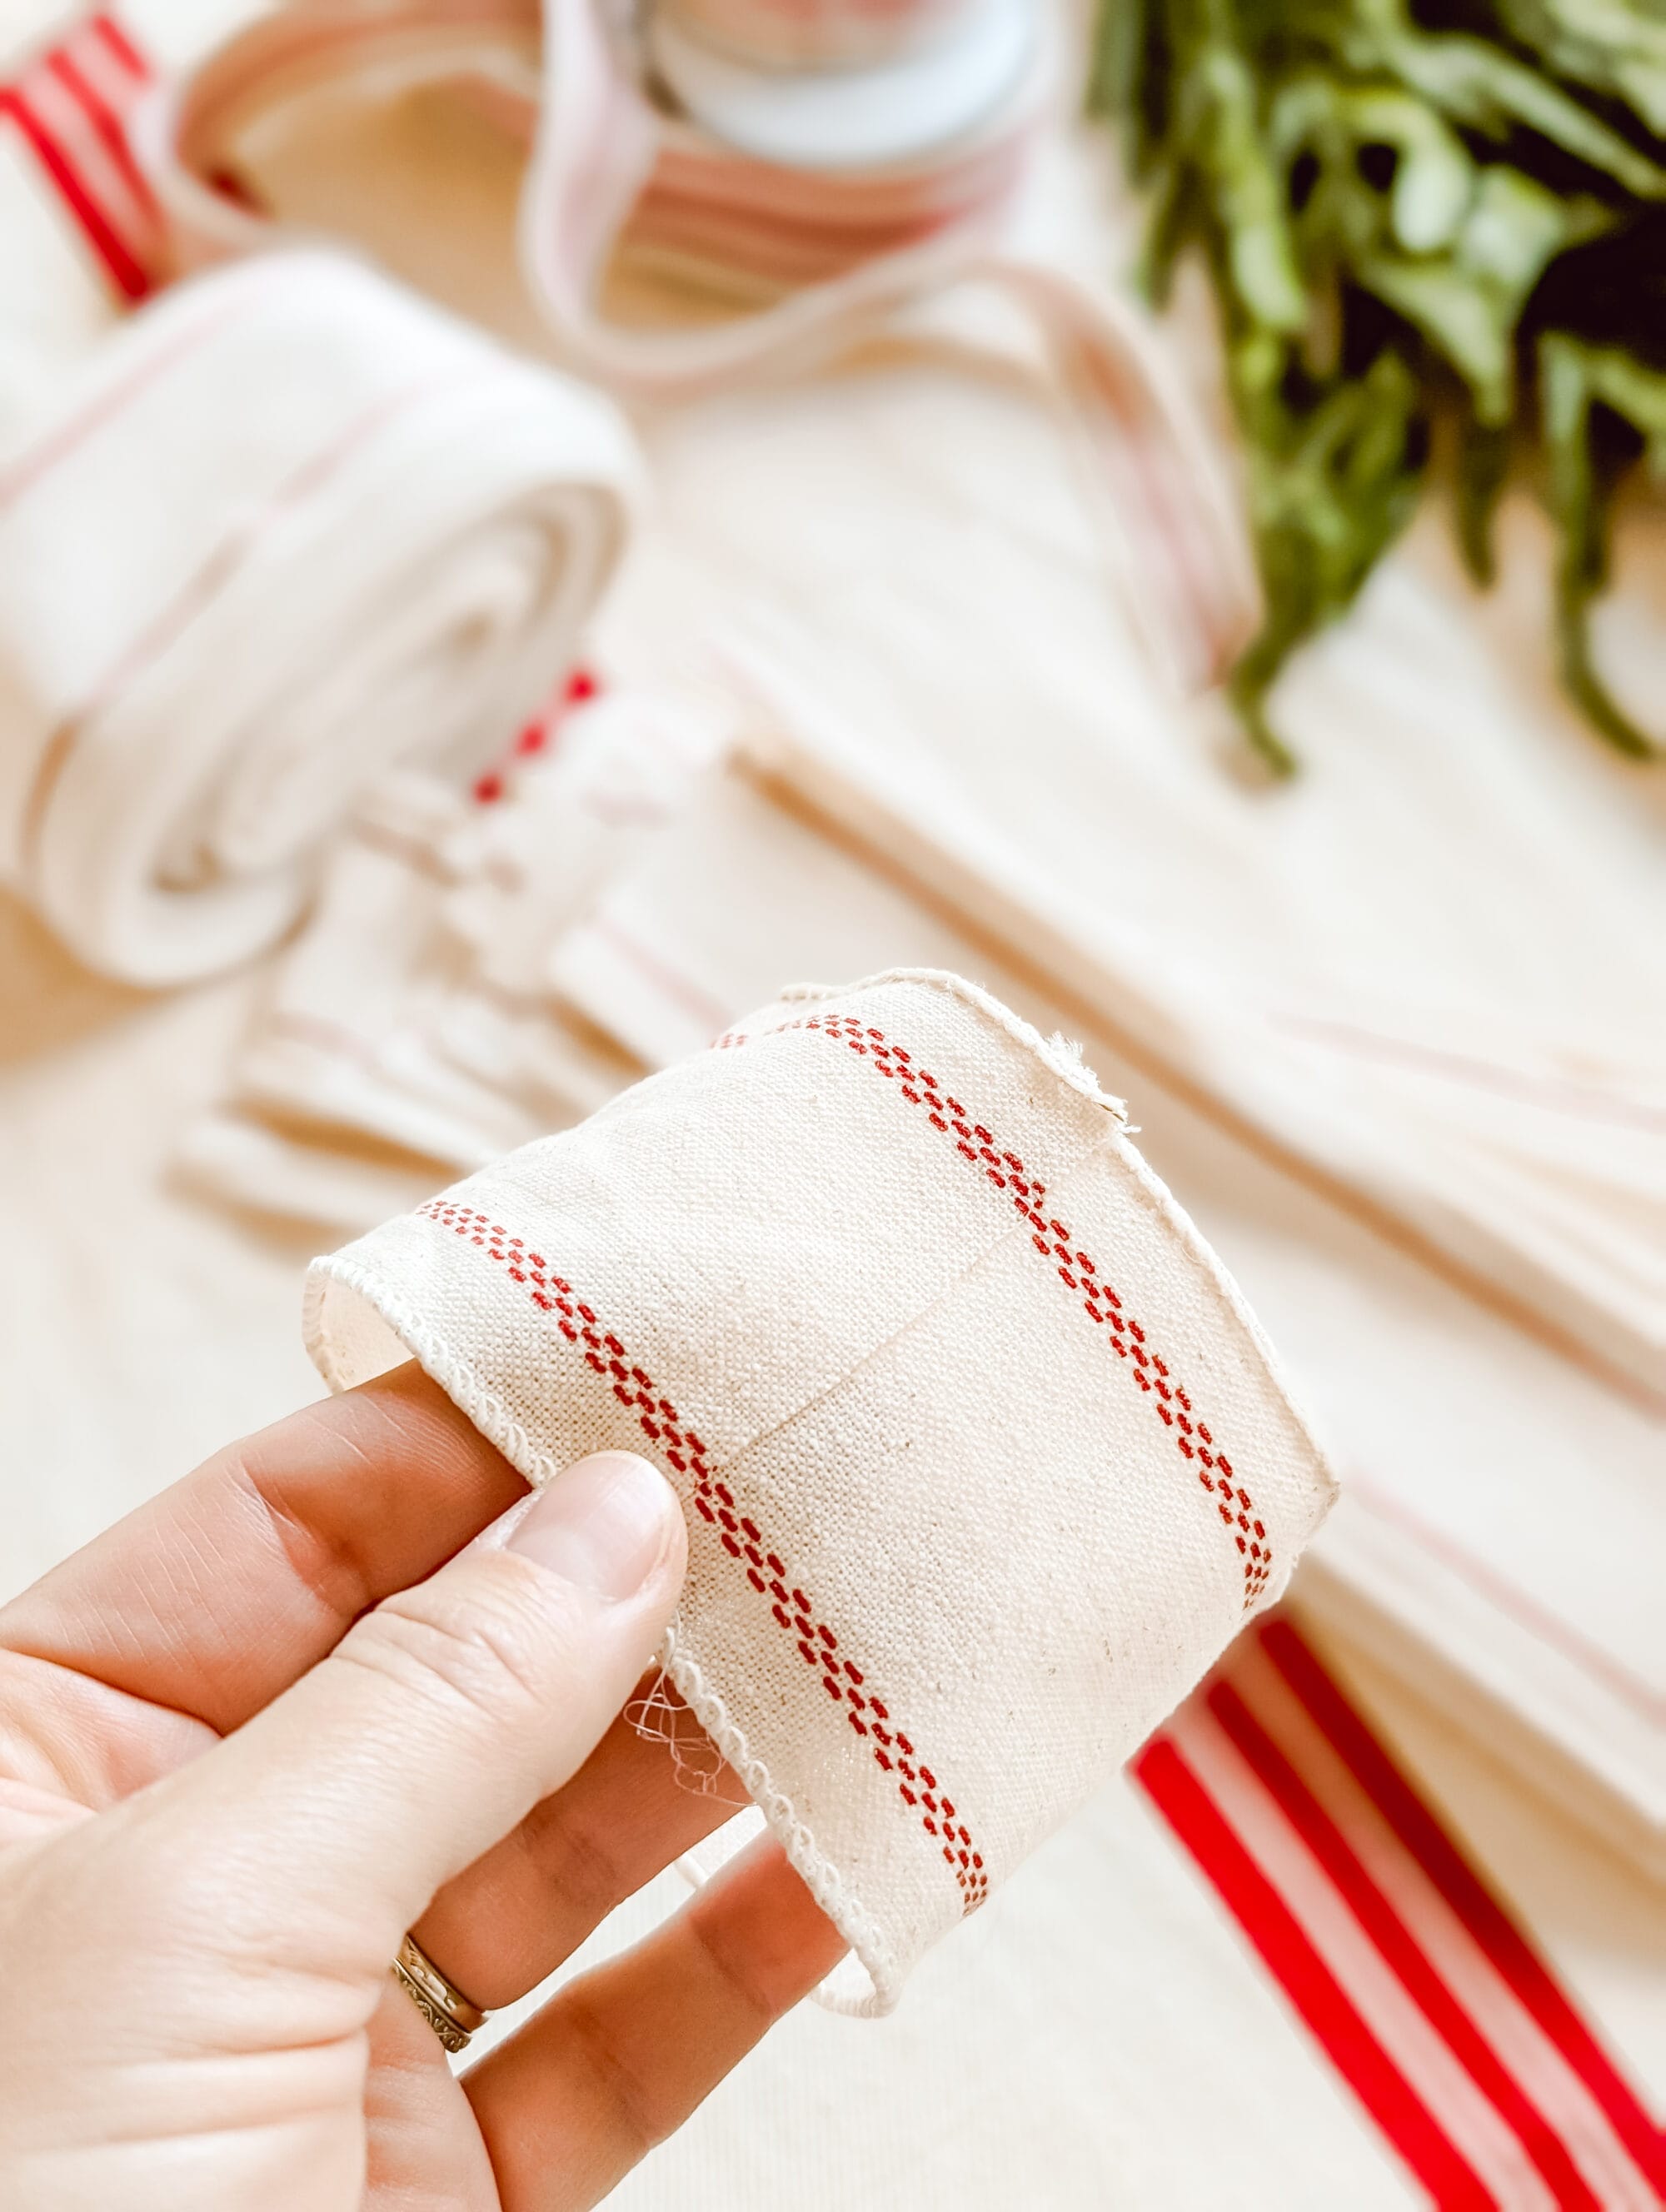
Step 1: Measure and Cut your ribbon
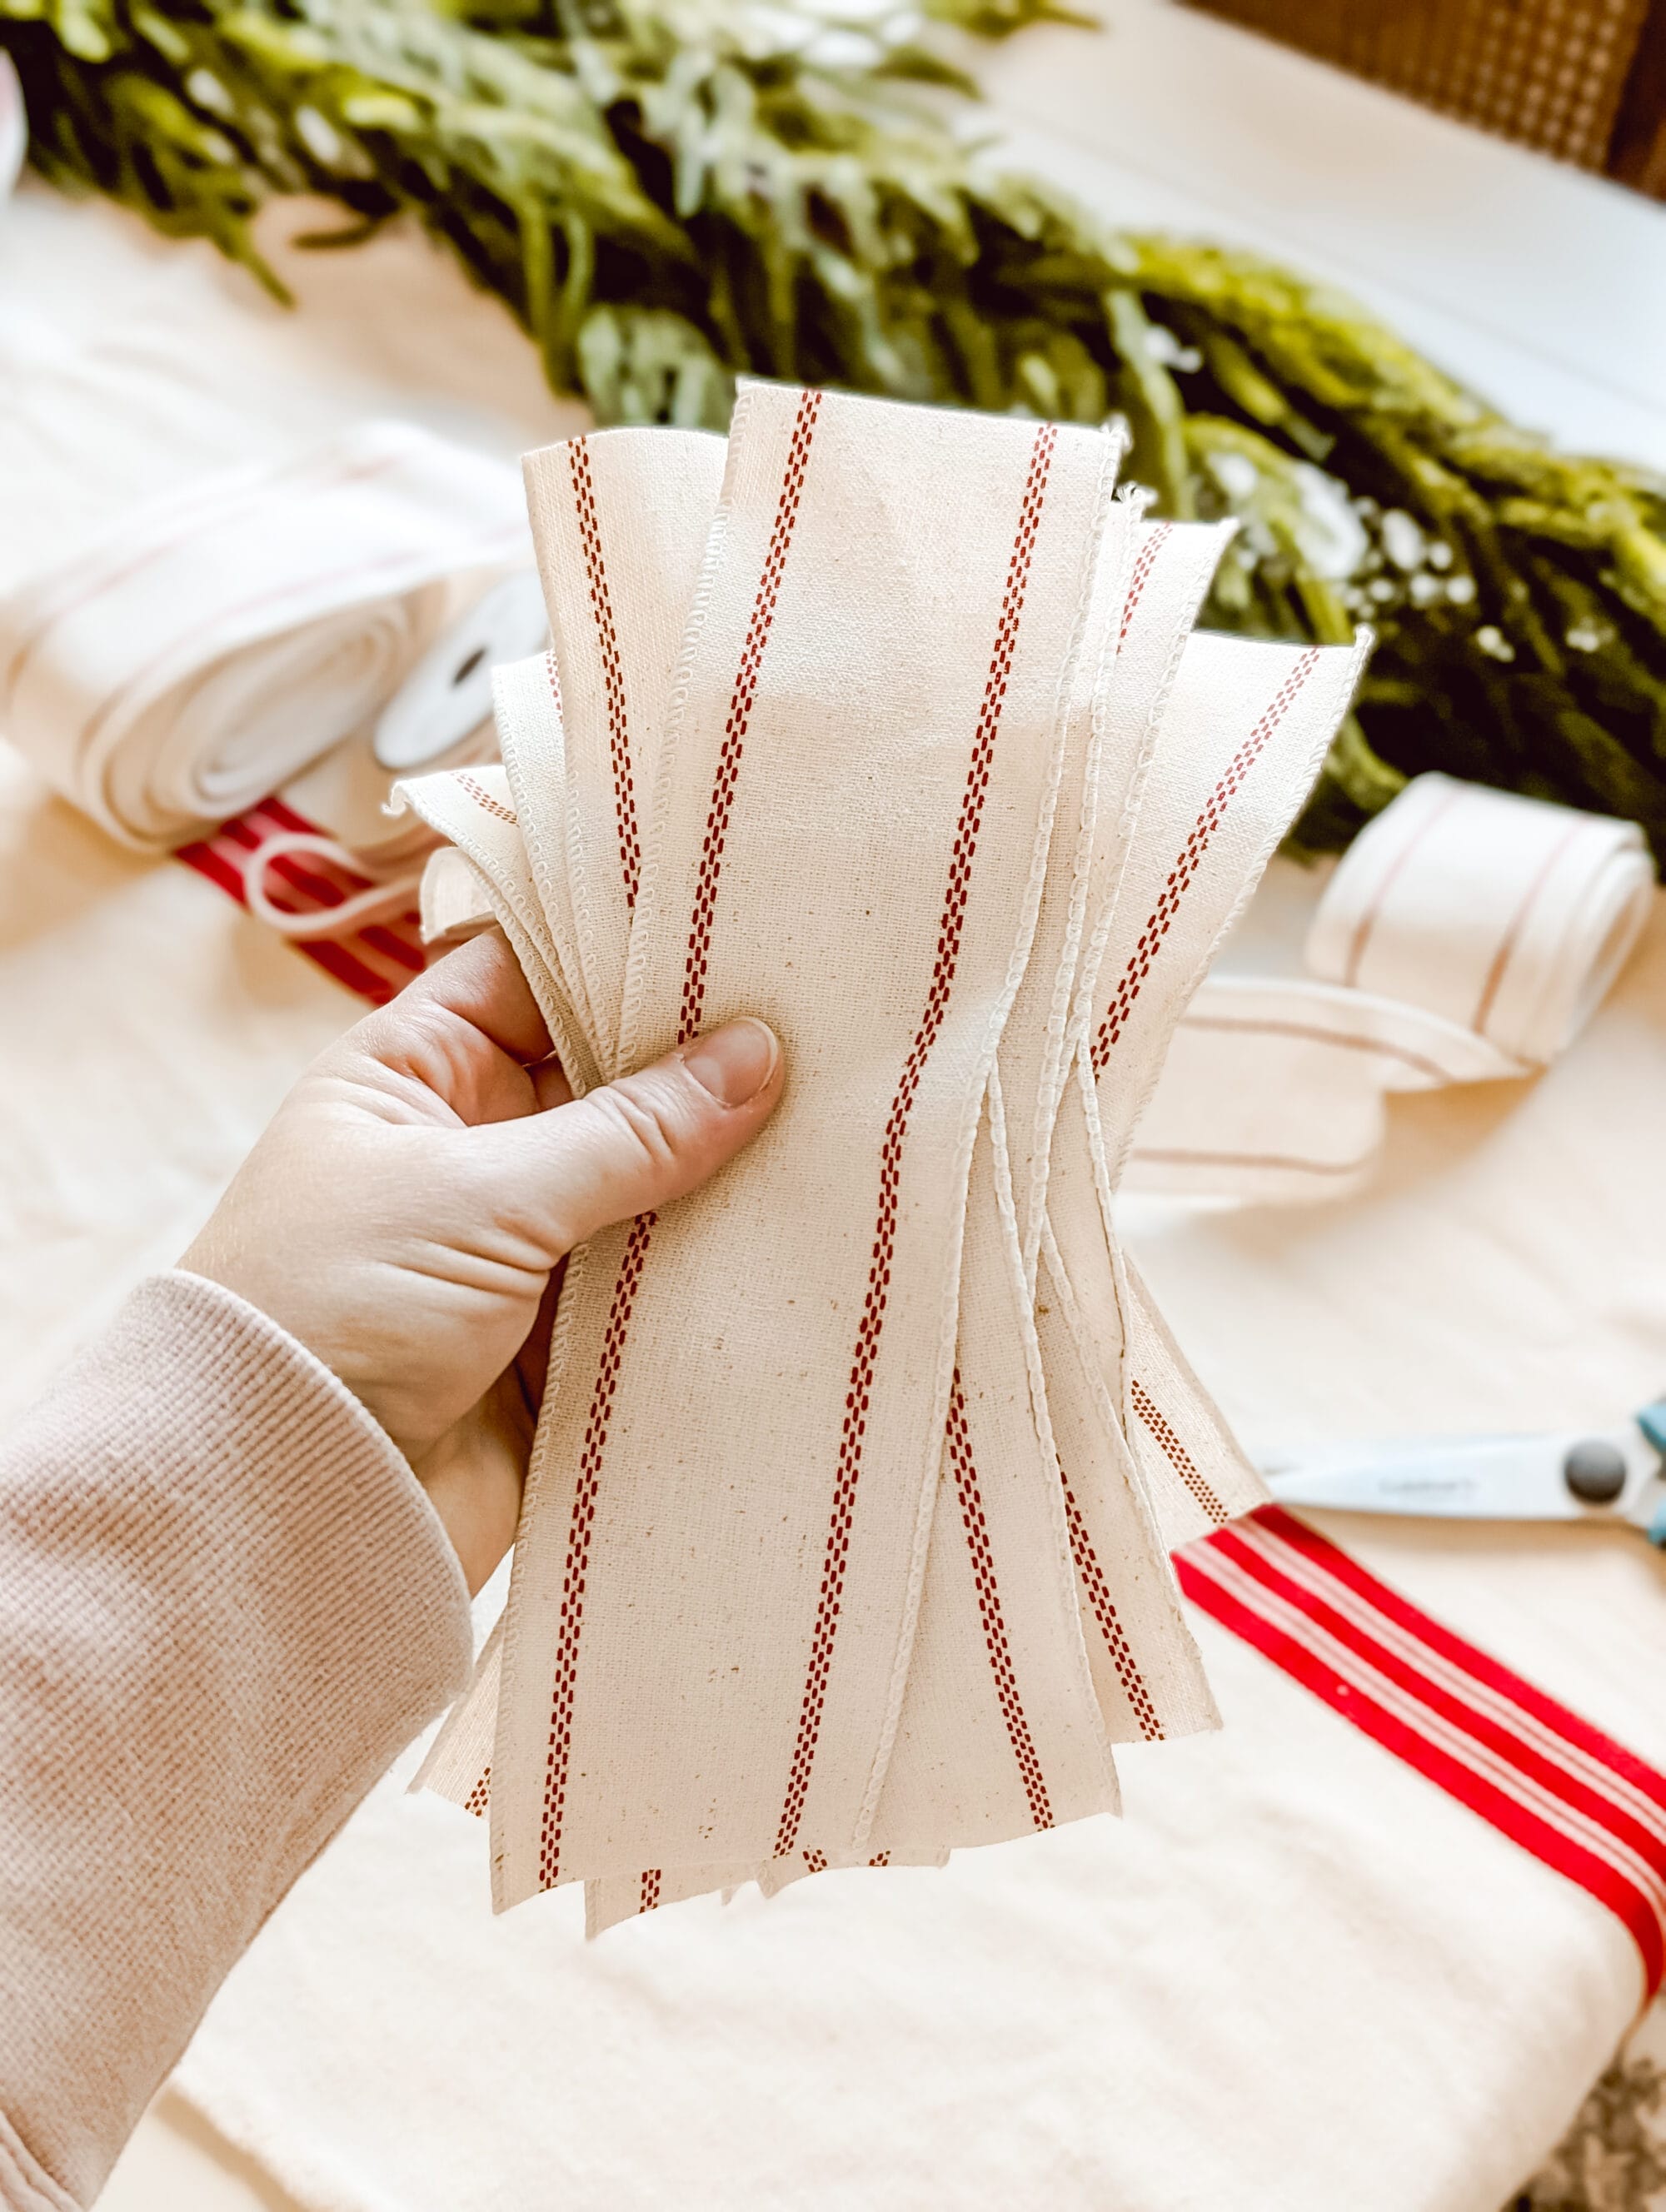
I’ve seen other crafters cut their ribbon into 8 inch strips for this project. But my ribbon was pretty wide!

I used 2.5 inch wide wired ribbon. So I cut my strips into 10 inch sections.
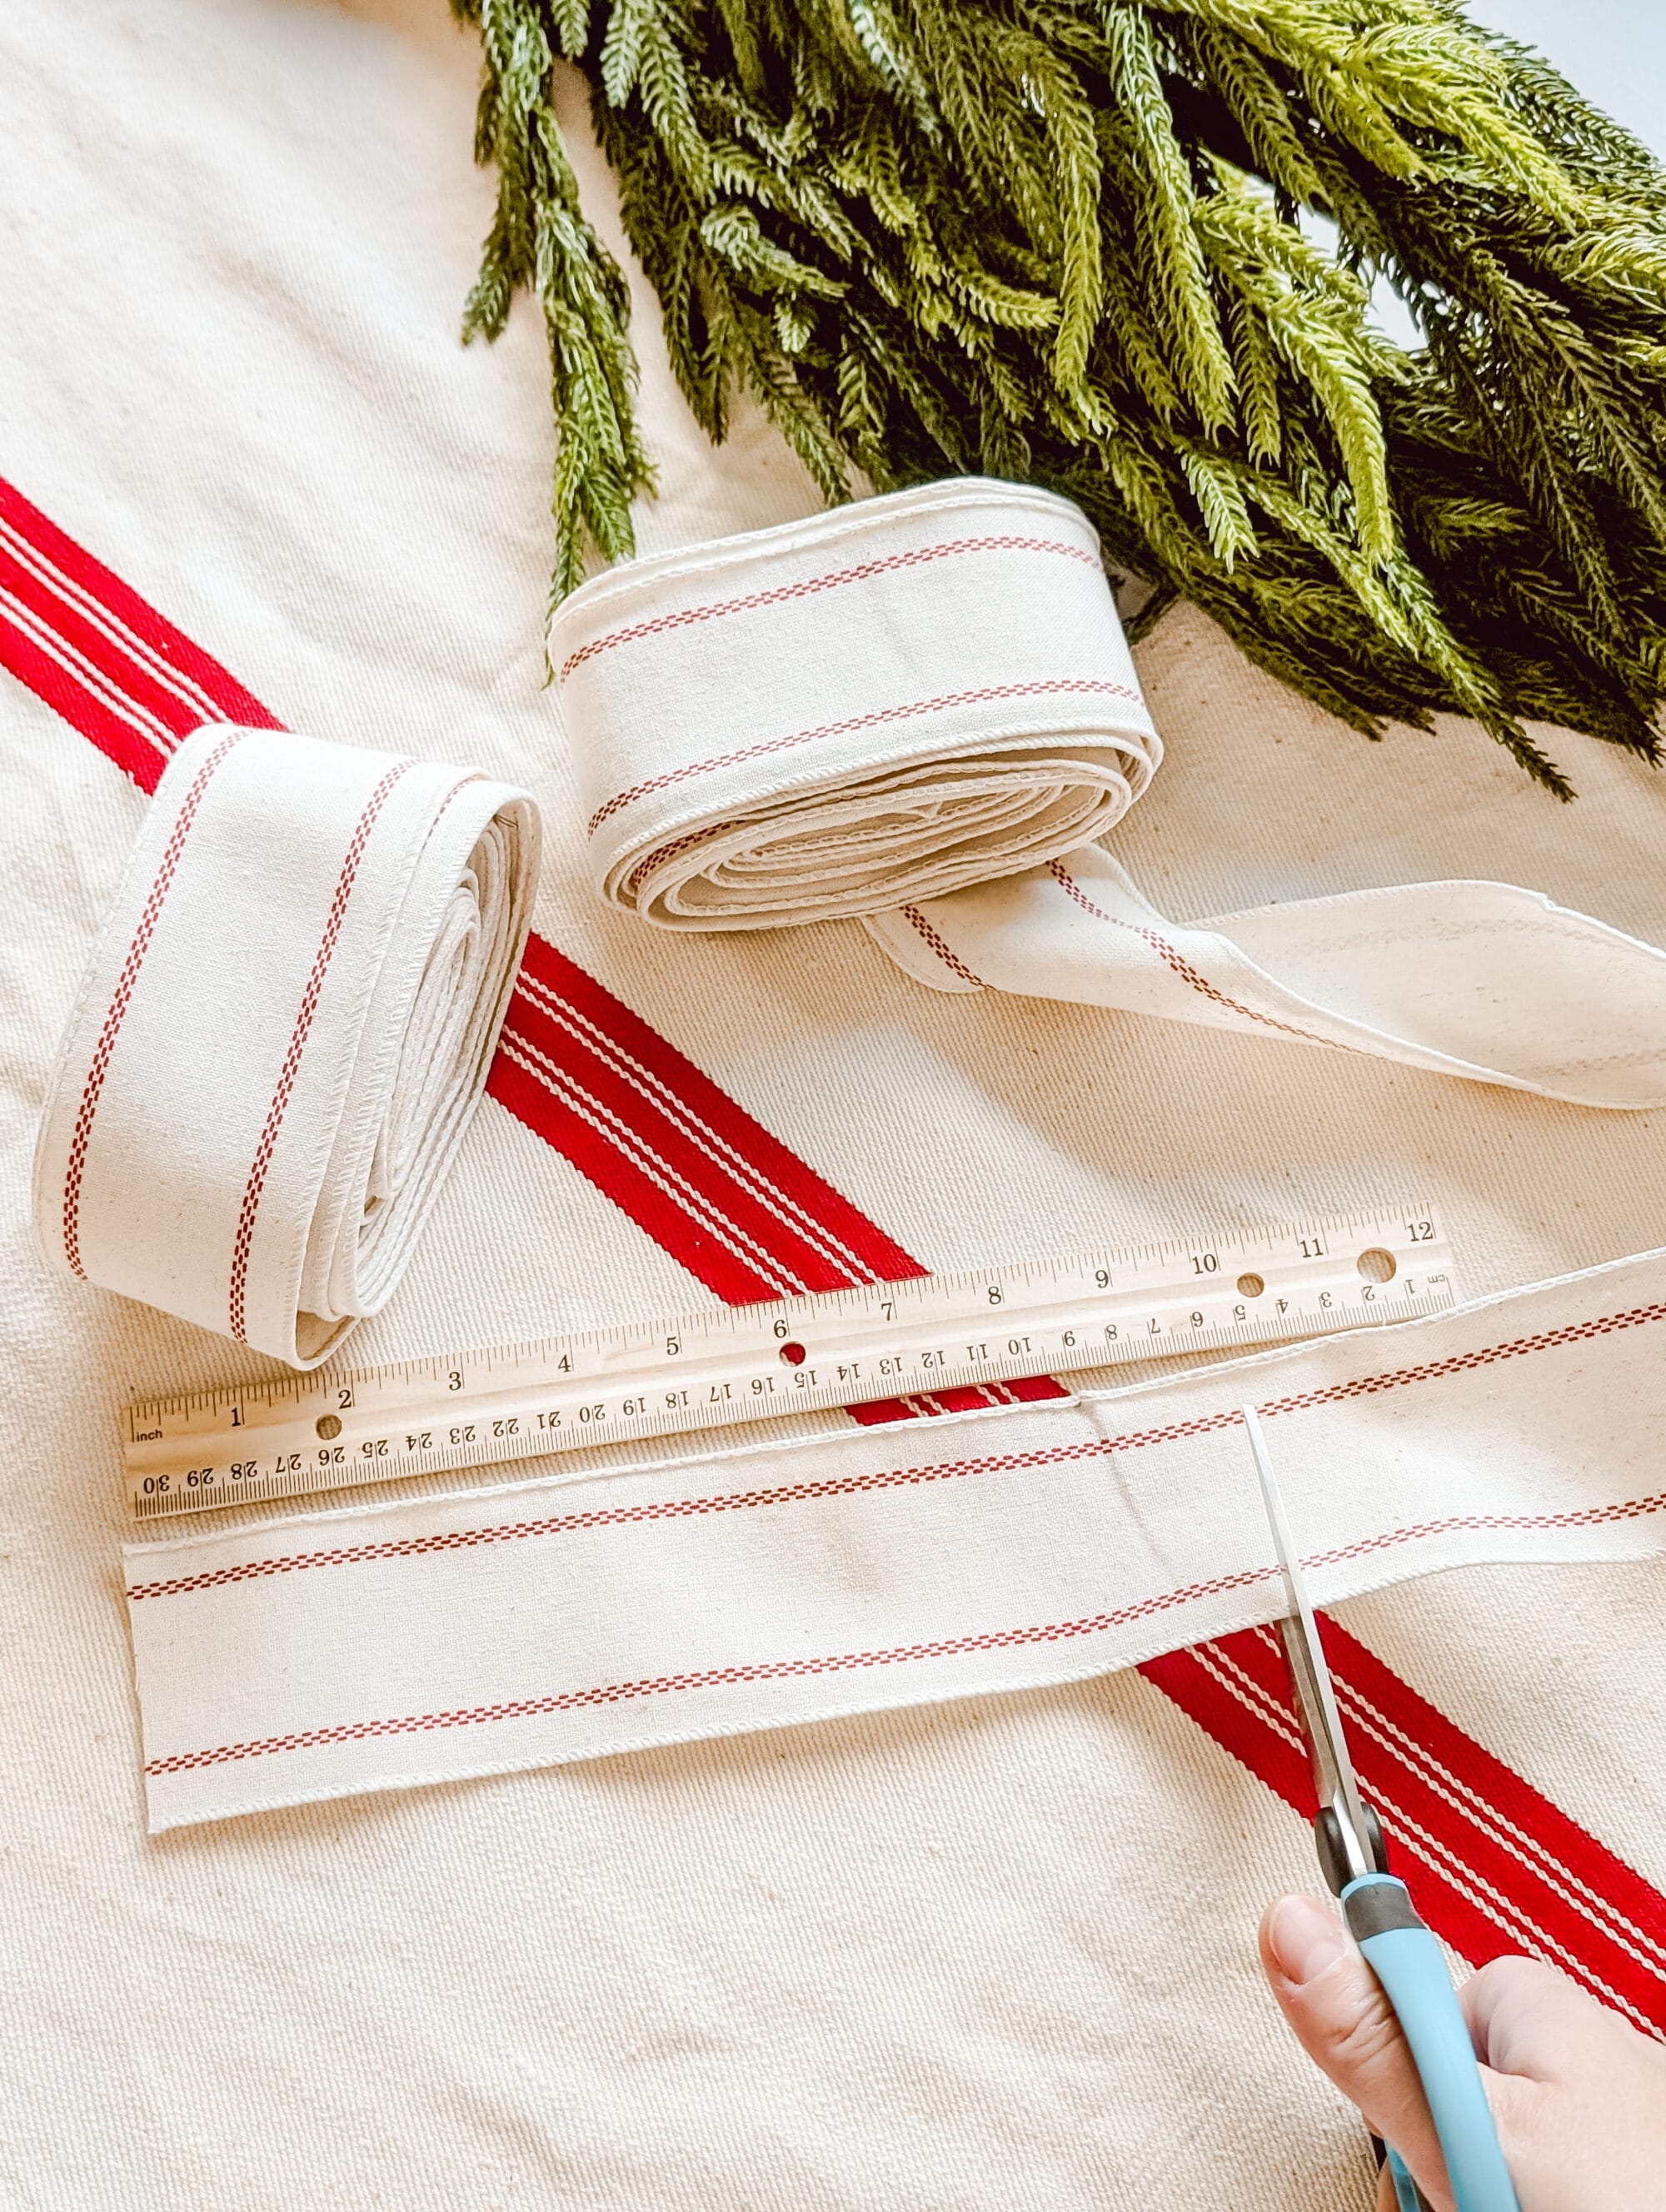
Use a ruler, or just use that first cut ribbon as a template / a guide. Then cut the rest of your ribbon into strips that are all the same length.
Step 2: form a circle and use hot glue to secure your first ring
After you have all your ribbon cut into strips, you’ll want to warm up your hot glue gun.
Form the first strip of ribbon into a circle. Make sure the pretty side of your ribbon is facing out!

If you’re using wired ribbon you can fold the ribbon so it lays flat while you work with the hot glue gun.

Use your hot glue gun to add a line of glue all the way across one end of the ribbon.
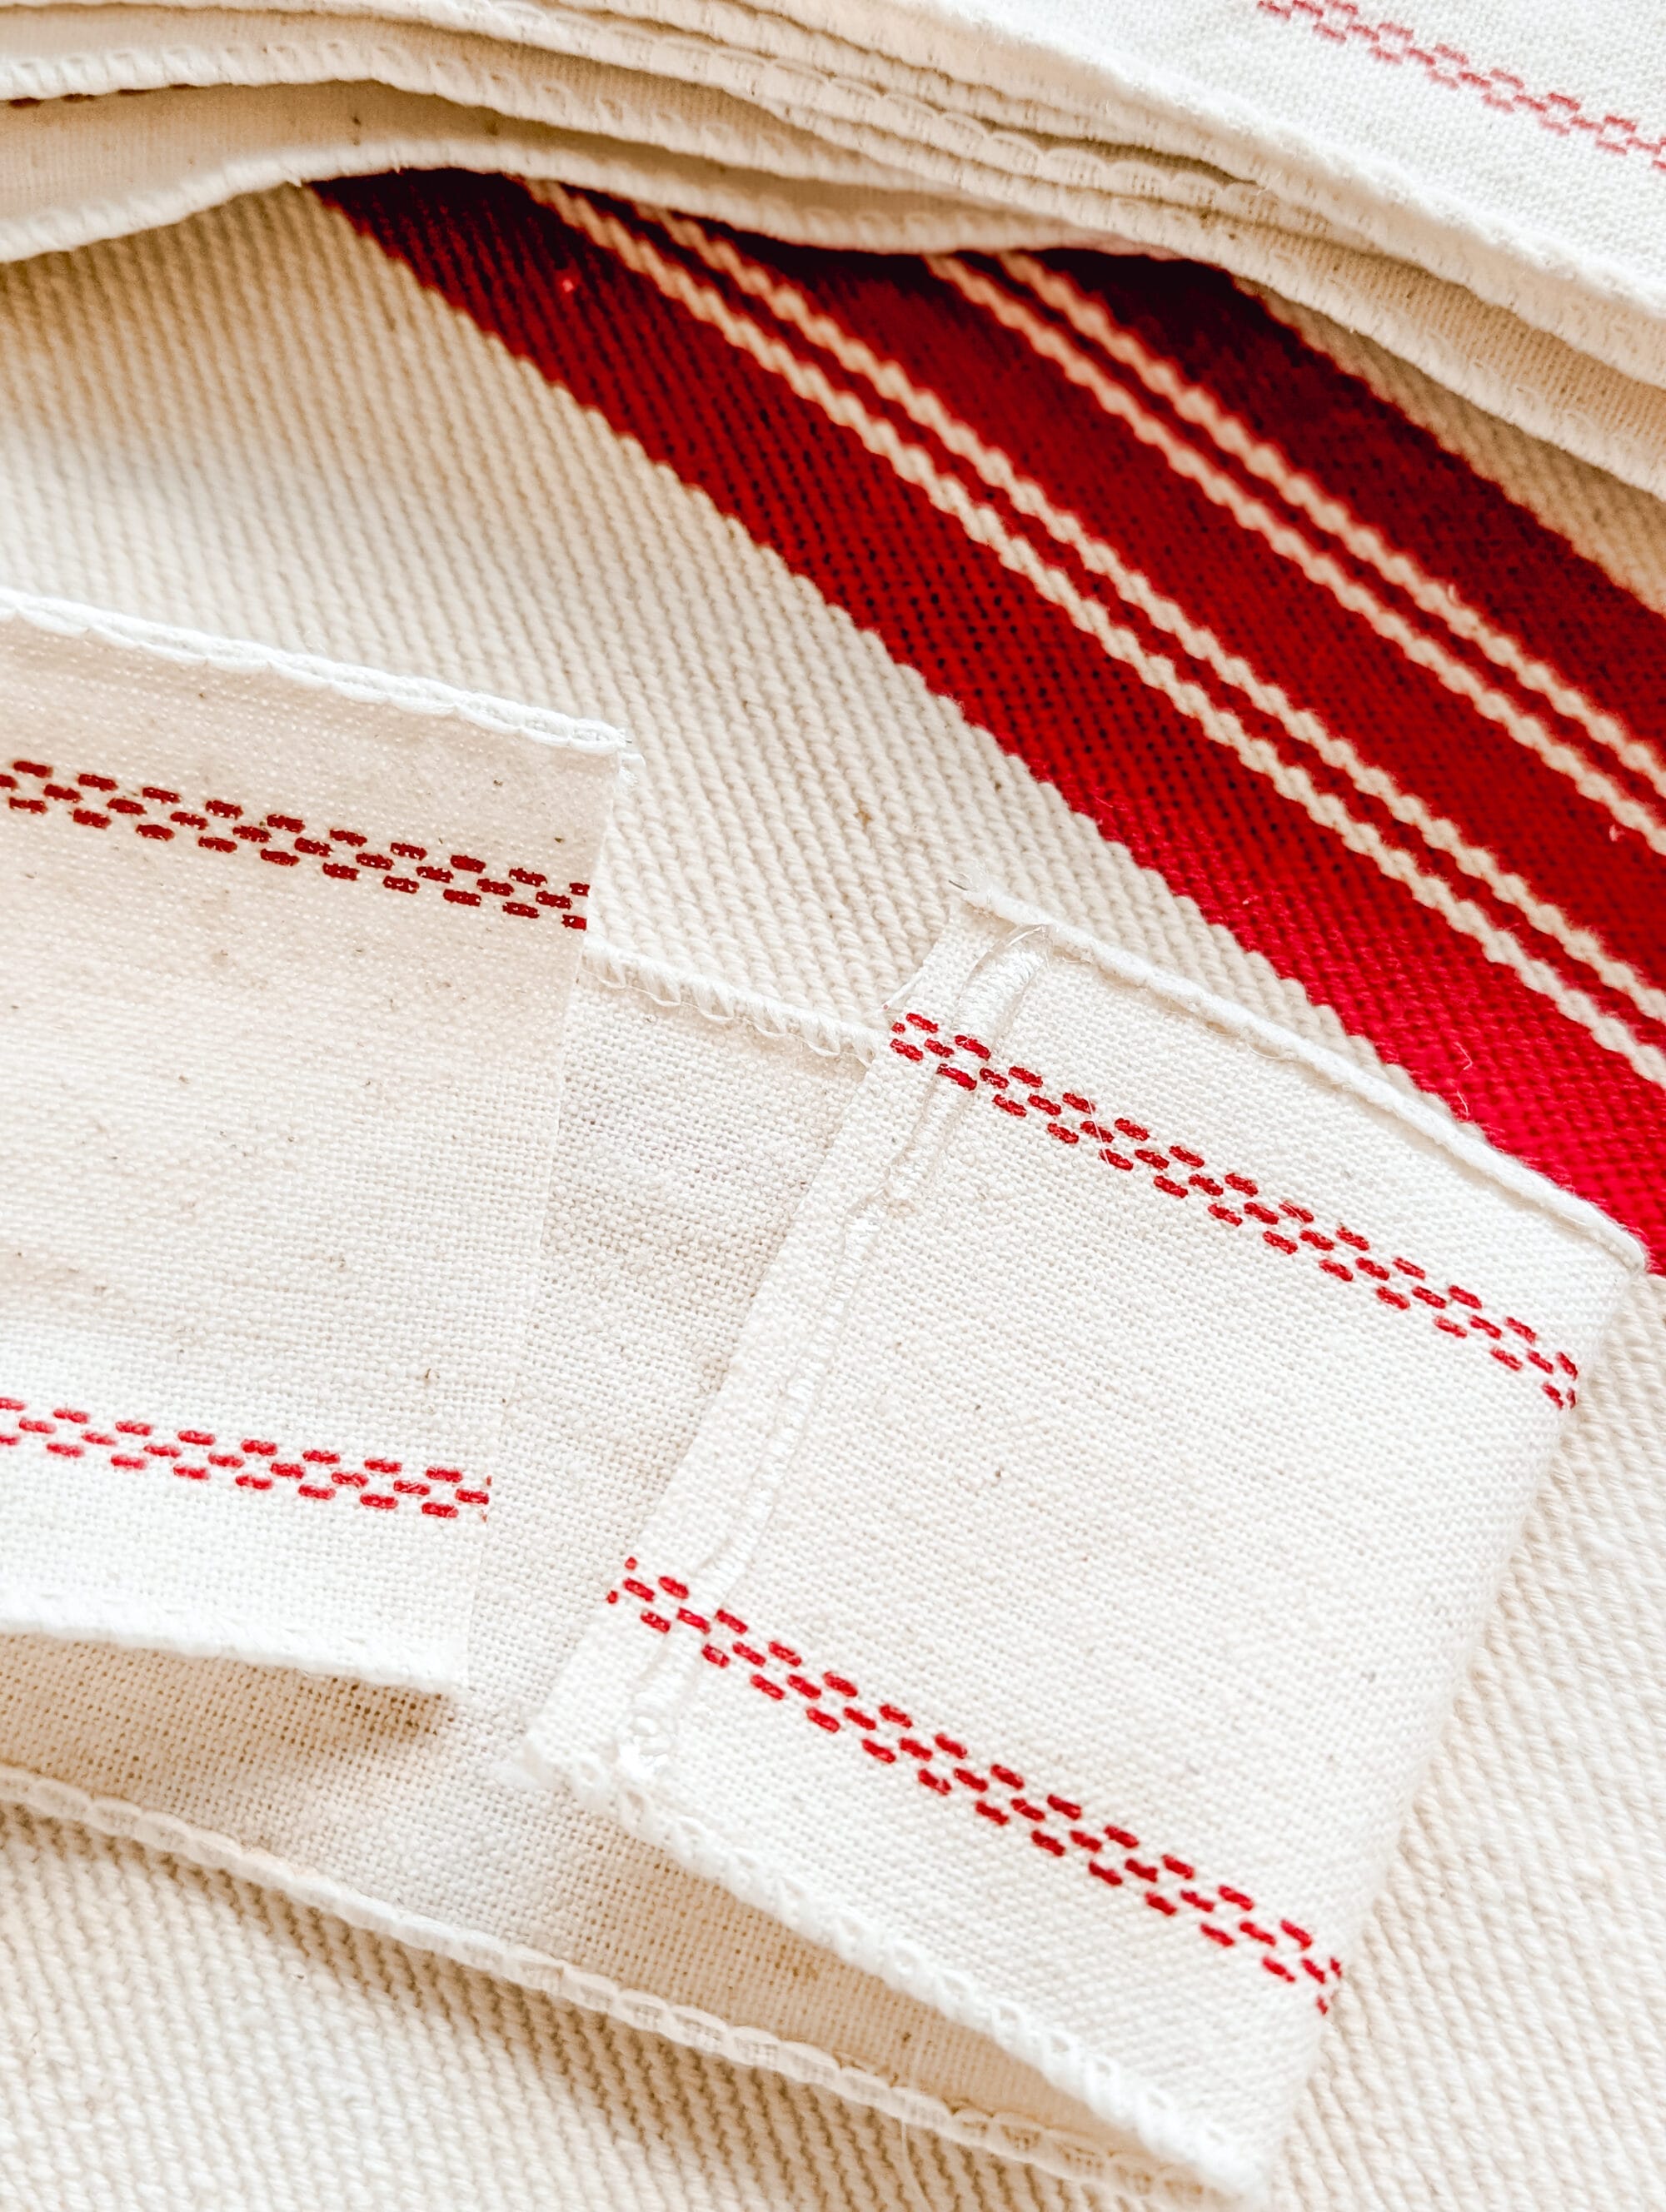
Then fold the other end of the ribbon over so that it overlaps, and press down so that the hot glue holds both ends of the ribbon in place.
This first circle / link will be the start of your chain!
Step 3: slip another strip of ribbon through the first ring, then secure with hot glue
Now that you have a starting point, and now that you know how each link is formed… the rest of this chain should be pretty straight forward.
But each time you make a new link, you’ll slip your ribbon strip through the last link you just created. That way they’ll all be connected to form the chain.
So go ahead an slip a ribbon through the ribbon circle / link.
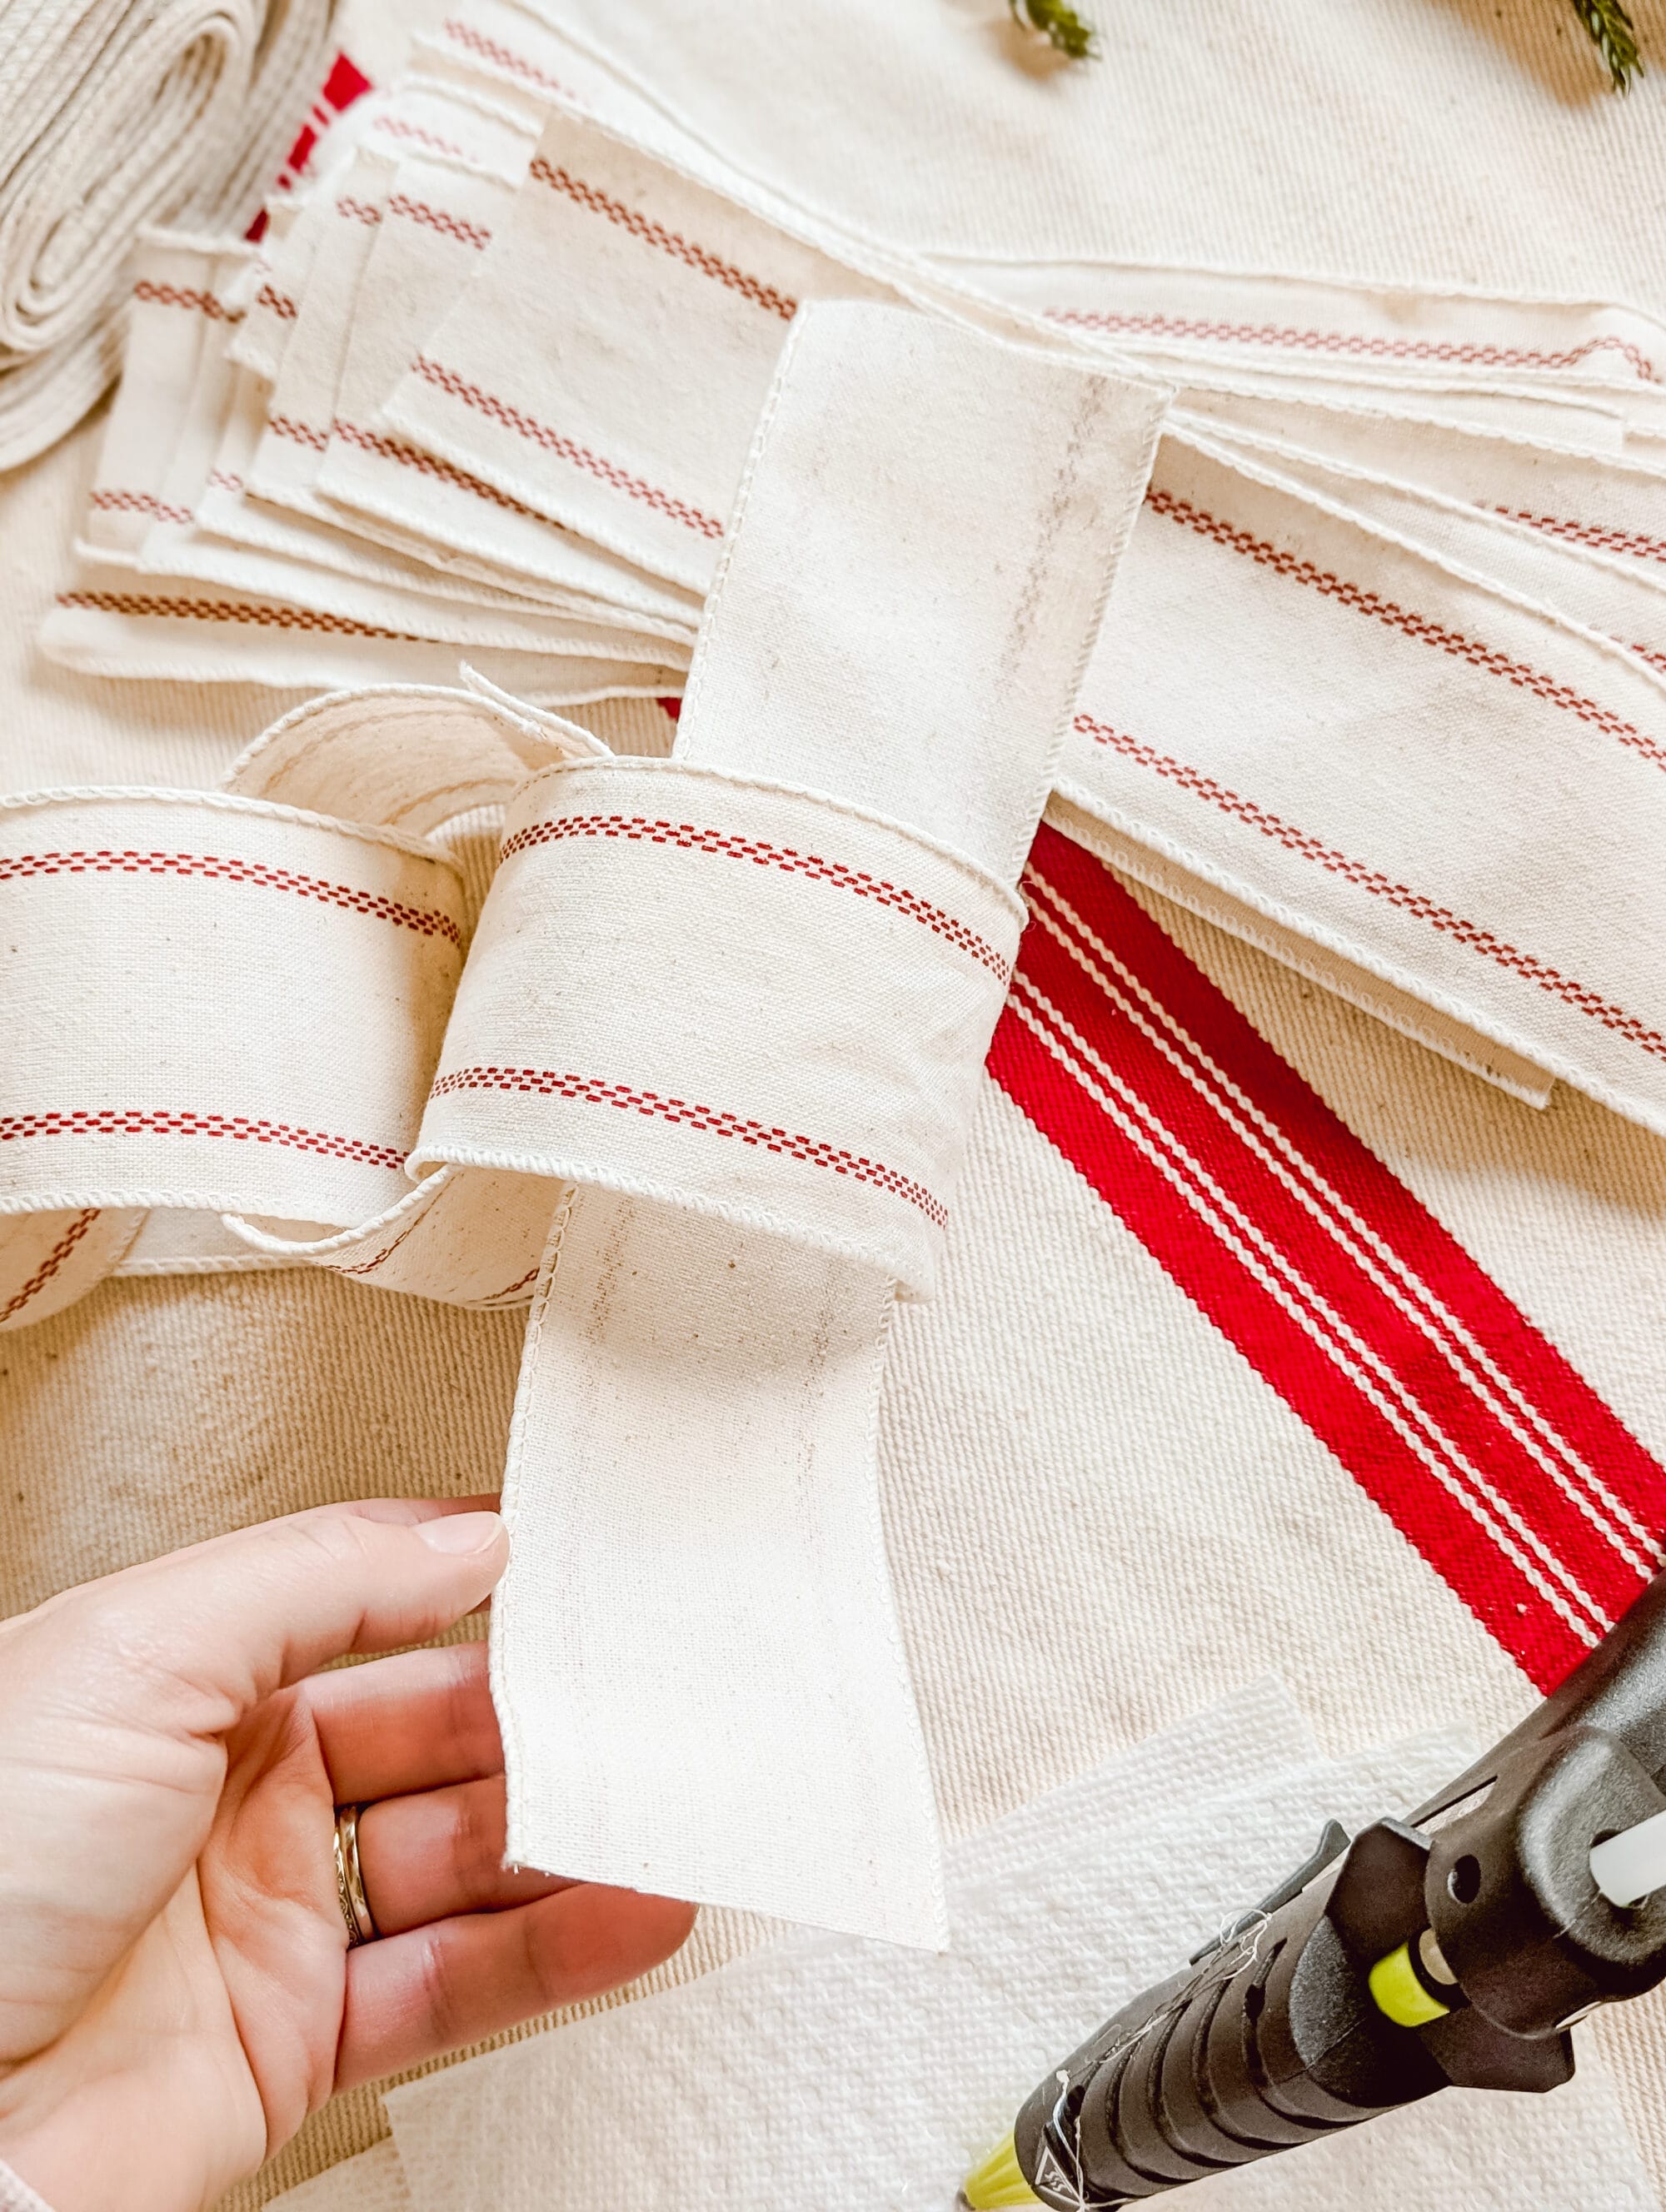
Then fold that strip of ribbon over, add a line of hot glue, and secure the ends of the ribbon to form a circle.

Press firmly so your hot glue holds tight to both ends!
Then secure the ends with hot glue to form the second link / ring on your ribbon chain.
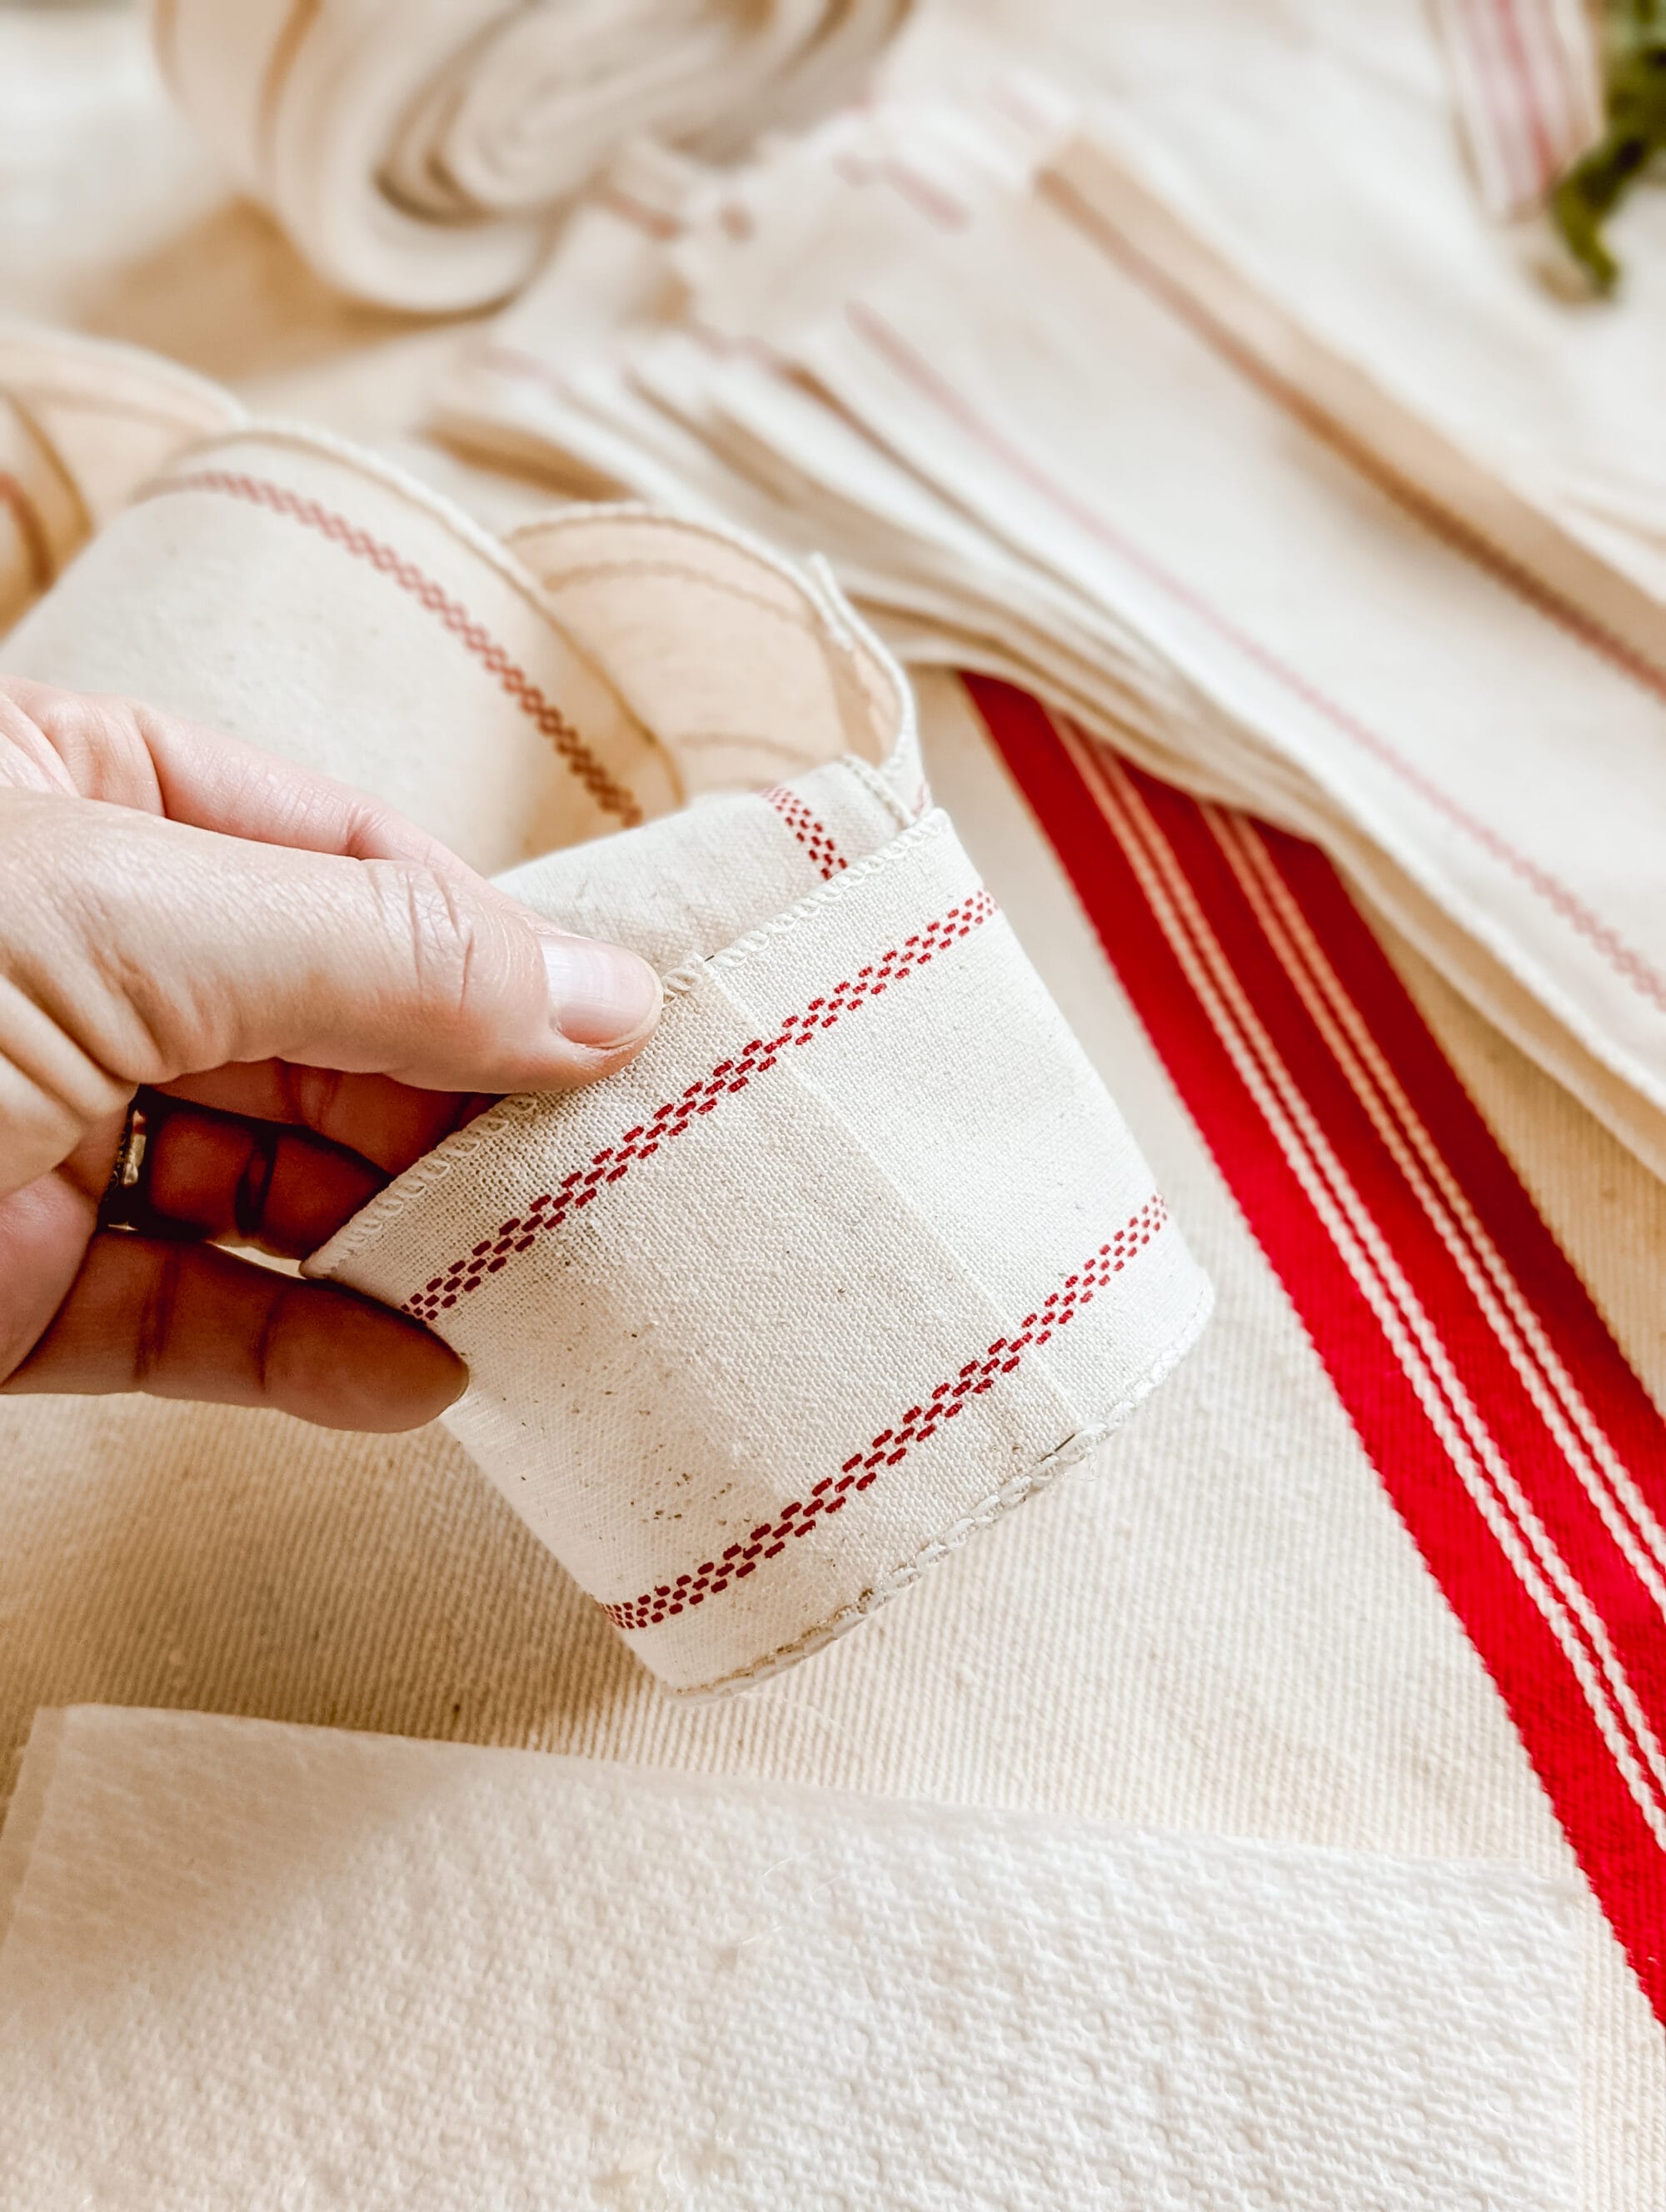
Step 4: Repeat step 3 with all the remaining ribbon strips
Repeat step 3 with all your remaining ribbon strips.

Continue slipping the ribbon strips through the last link of the chain, forming it into a circle, and securing the ends with hot glue, until all the remaining strips of ribbon are connected to form one long ribbon chain garland.
And ta-da… you’ll have the prettiest DIY ribbon chain Christmas Garland to decorate yout mantle with this holiday season!

I had so much fun getting crafty for this project. And I actually have a couple more rolls of ribbon that would make the perfect DIY ribbon chain to hang up over by the hot cocoa bar.
So I’ll likely be making more of these pretty garlands this season!
Don’t forget to pin this for later!
When you make your DIY ribbon chain Christmas garland, I’d love to see it. Please share, send a pic or tag me on Instagram @whiteandwoodgrain so I can see!
Also, if you’re not already, I’d like to invite you to join my email list!
My email list is where I share behind the scenes content, projects I’m working on, and links to new blog posts like this one as soon as they go live.
I hope you enjoyed today’s post, and I hope it brought a little Christmas joy to your scroll today!
Now I’ve had a couple people ask me this, so if you’re curious too, this is how I hang garland on our antique mantle without damaging it!

And if you want more info on the Christmas greenery I decorate with each year, head to this post for a full review of my favorite Norfolk pine garlands.
Thanks so much for stopping by the blog today! Until next time…